Migrate Oracle to PostgreSQL Without Downtime
PostgreSQL has become a common target for Oracle migration projects. NineData helps reduce downtime, keep data consistent, and give teams a clear path for cutover and rollback.
Migration challenges
- Business continuity: The migration must happen without interrupting production traffic.
- Schema changes: Large table sets and ongoing DDL changes make migration harder to control.
- Data quality: You need a reliable way to confirm that the target stays consistent with the source.
- Failure recovery: If cutover fails, you still need a quick rollback path.
Why use NineData?
- Zero-downtime migration: NineData supports schema migration, full data migration, and CDC-based incremental replication from redo logs.
- High replication performance: NineData is designed to move large volumes of data quickly during both full and incremental phases.
- Rollback support: Set up reverse replication before cutover to keep a recovery path ready.
- Data quality checks: NineData provides comparison and repair features to help you verify the migration results.
Before you begin
- Add the Oracle source and PostgreSQL target to NineData.
- Confirm network access between NineData and both databases.
- Make sure you have permission to create replication, comparison, and alert tasks.
Migration steps
Step 1: Add source and target data sources
Sign in to the NineData console, go to Datasource > Datasource, and then click Create Datasource.
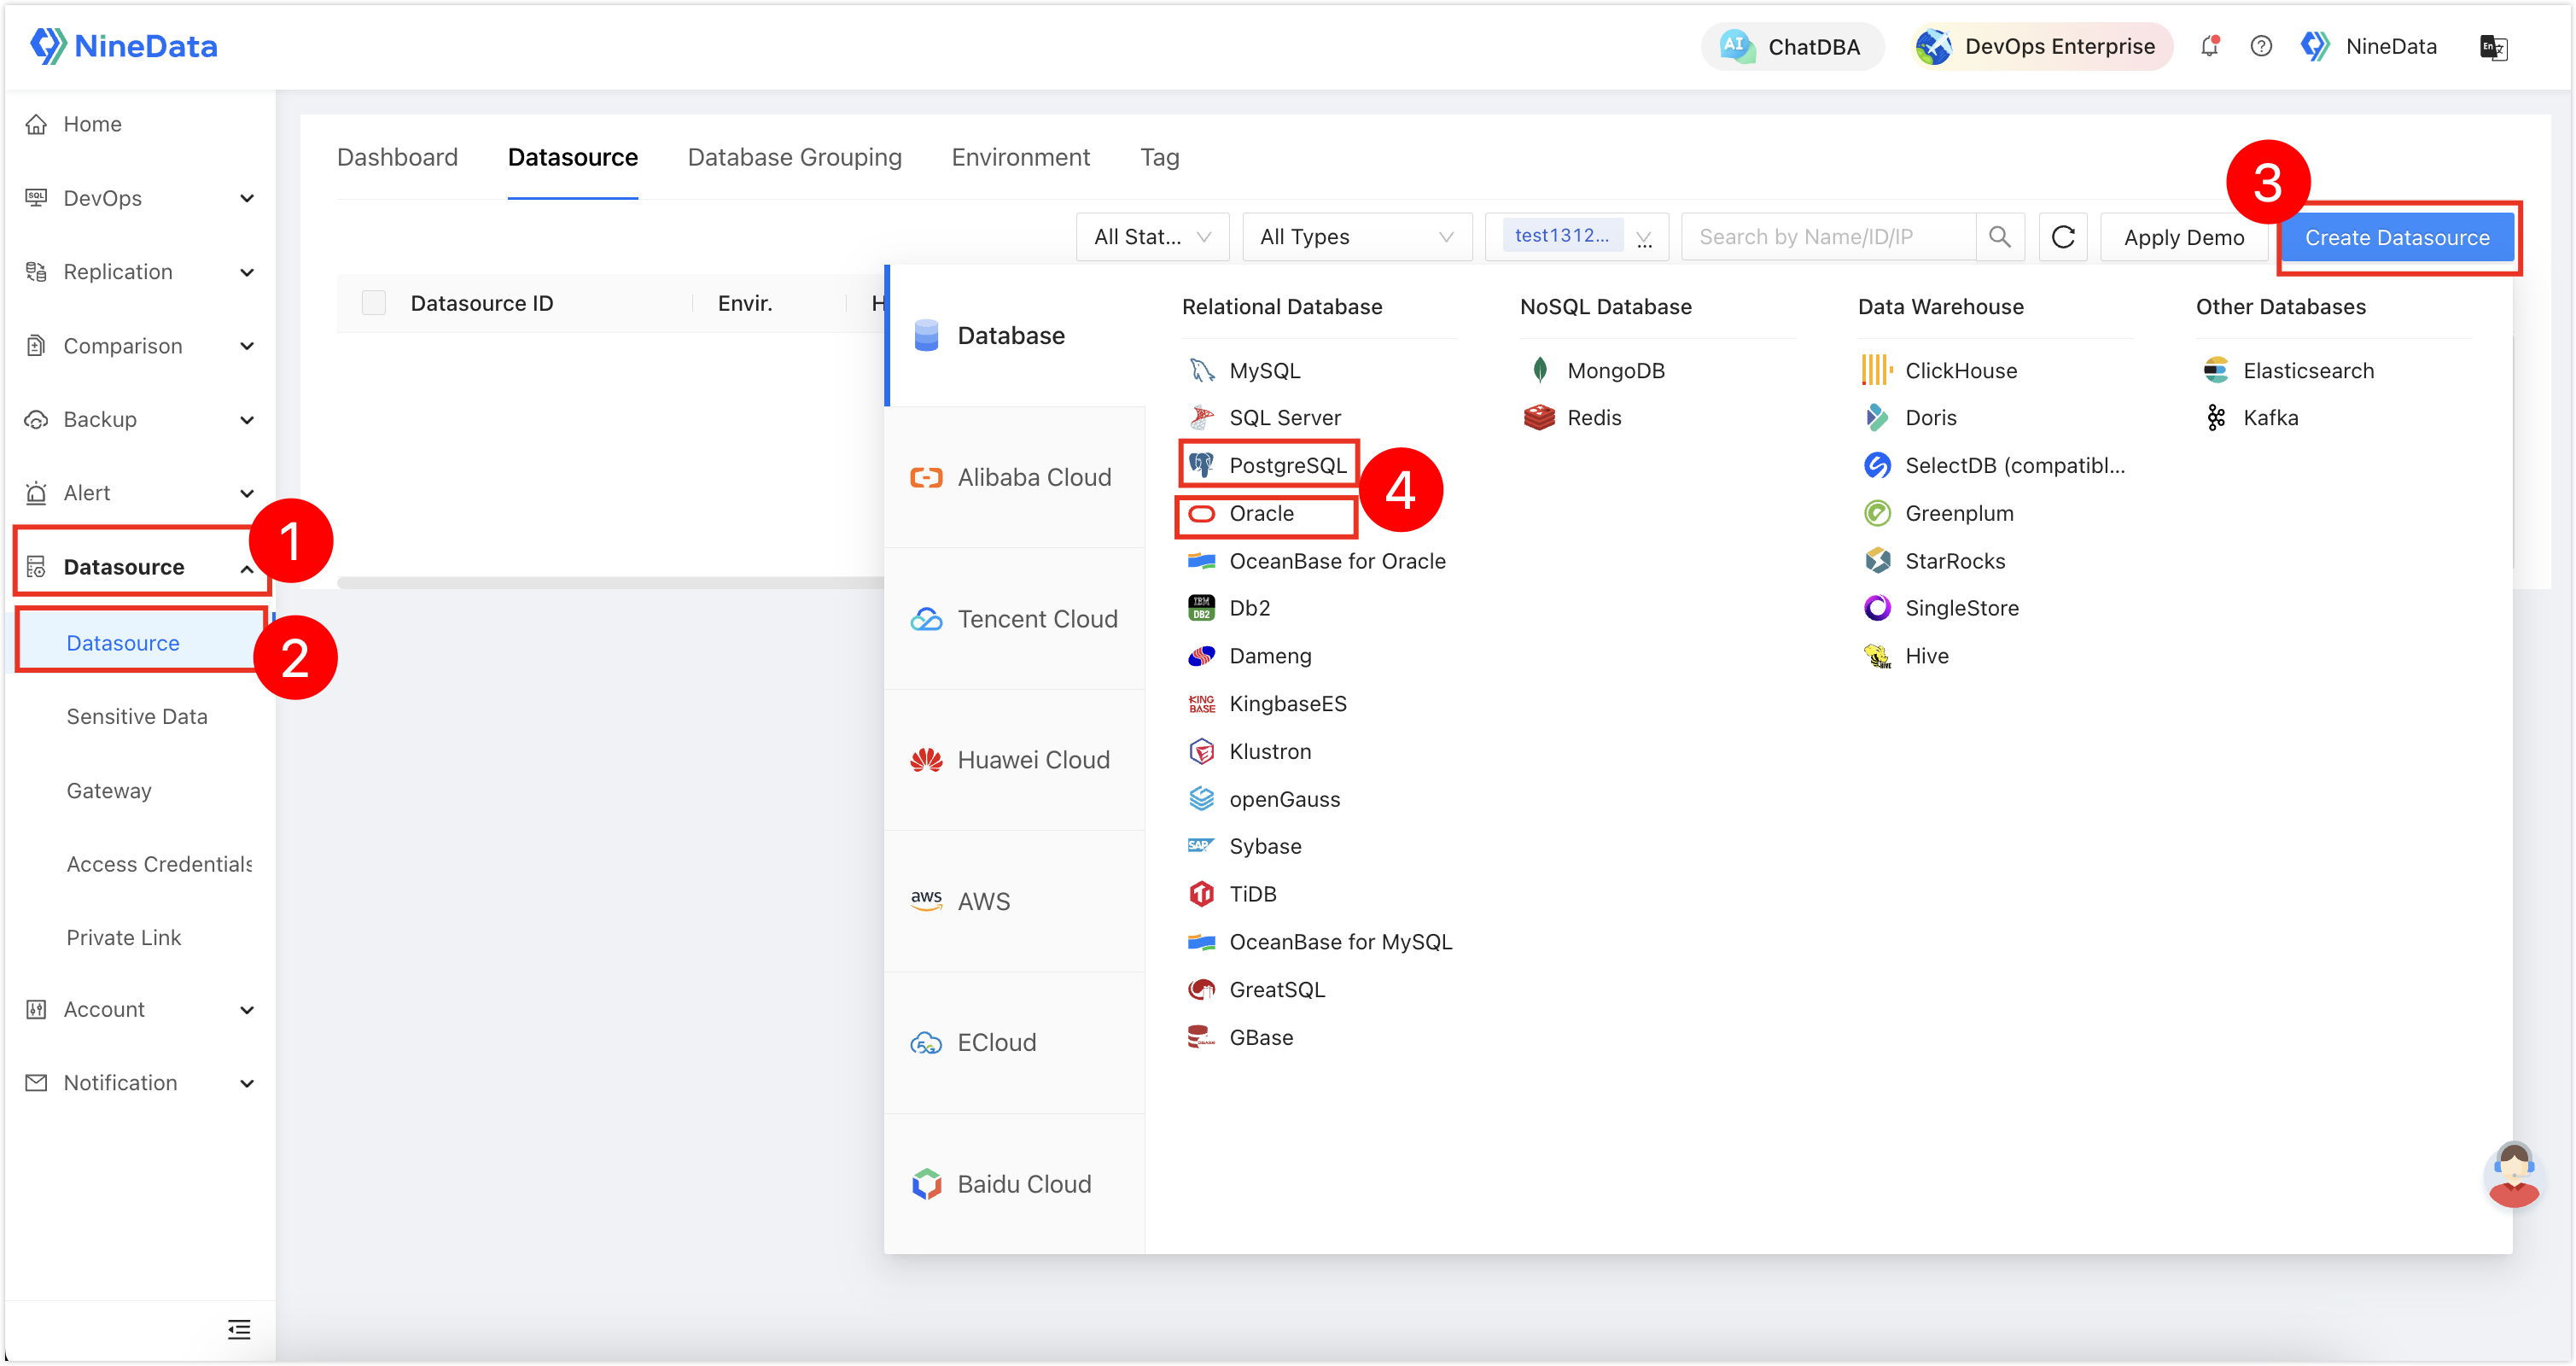
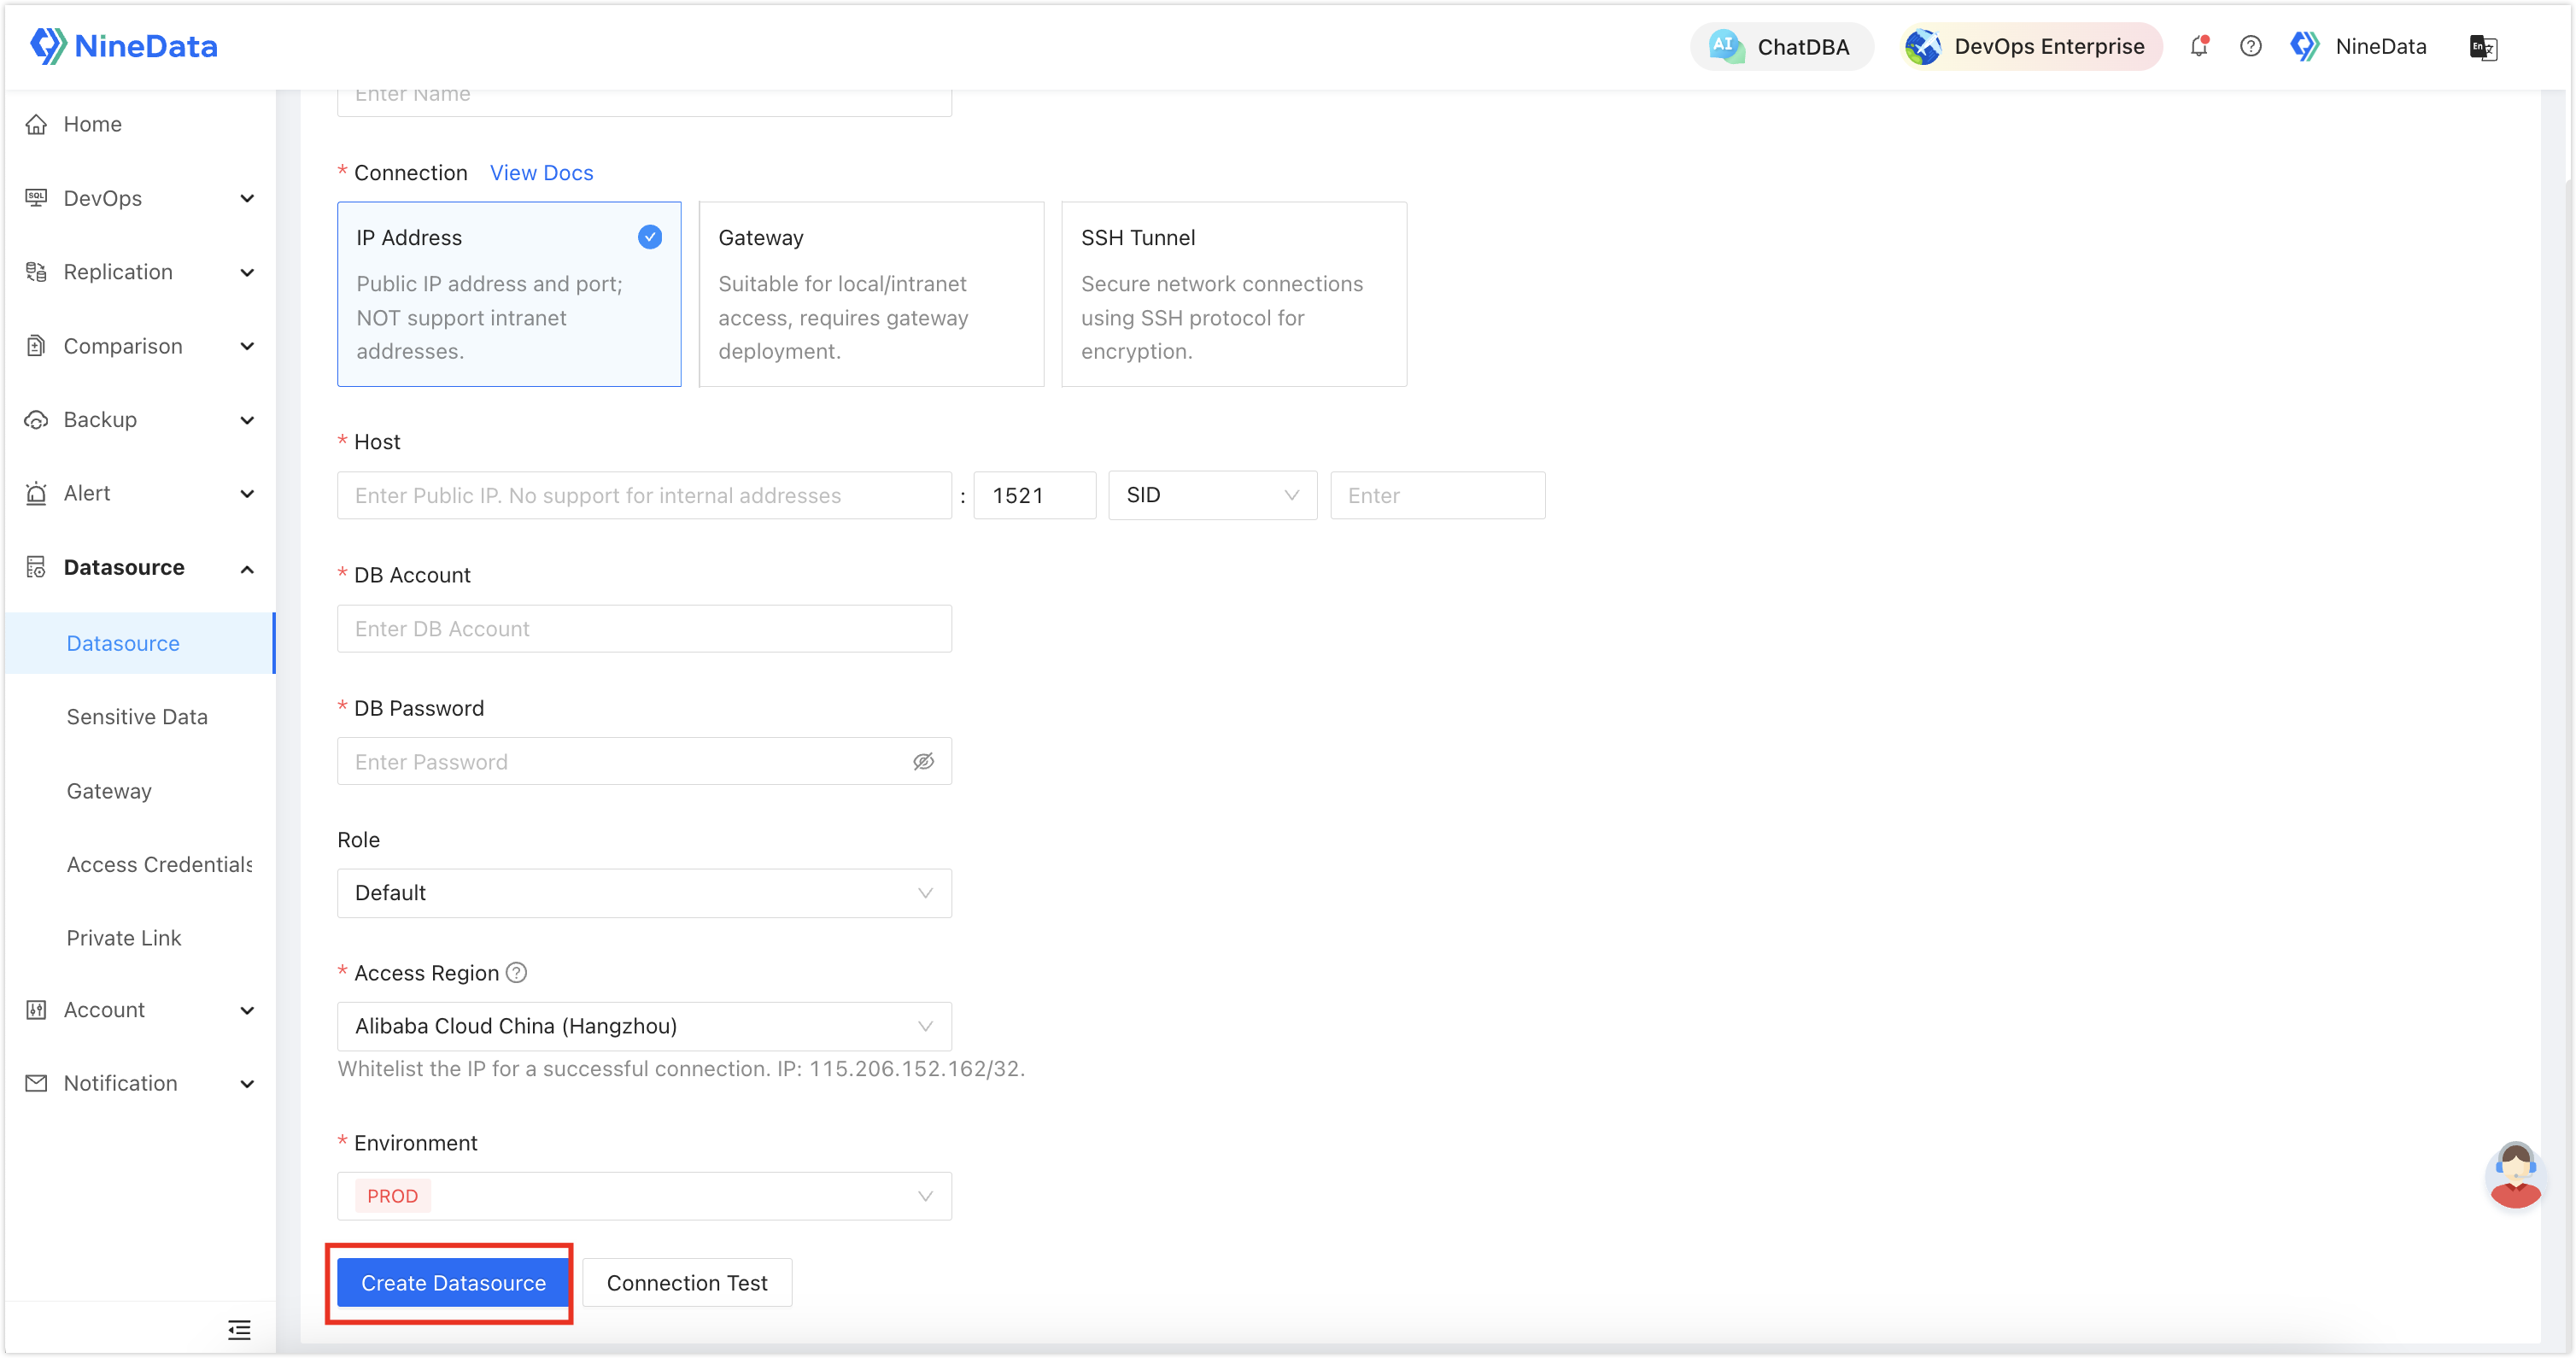
Follow the prompts to finish adding the source and target databases.
Step 2: Configure the sync pipeline
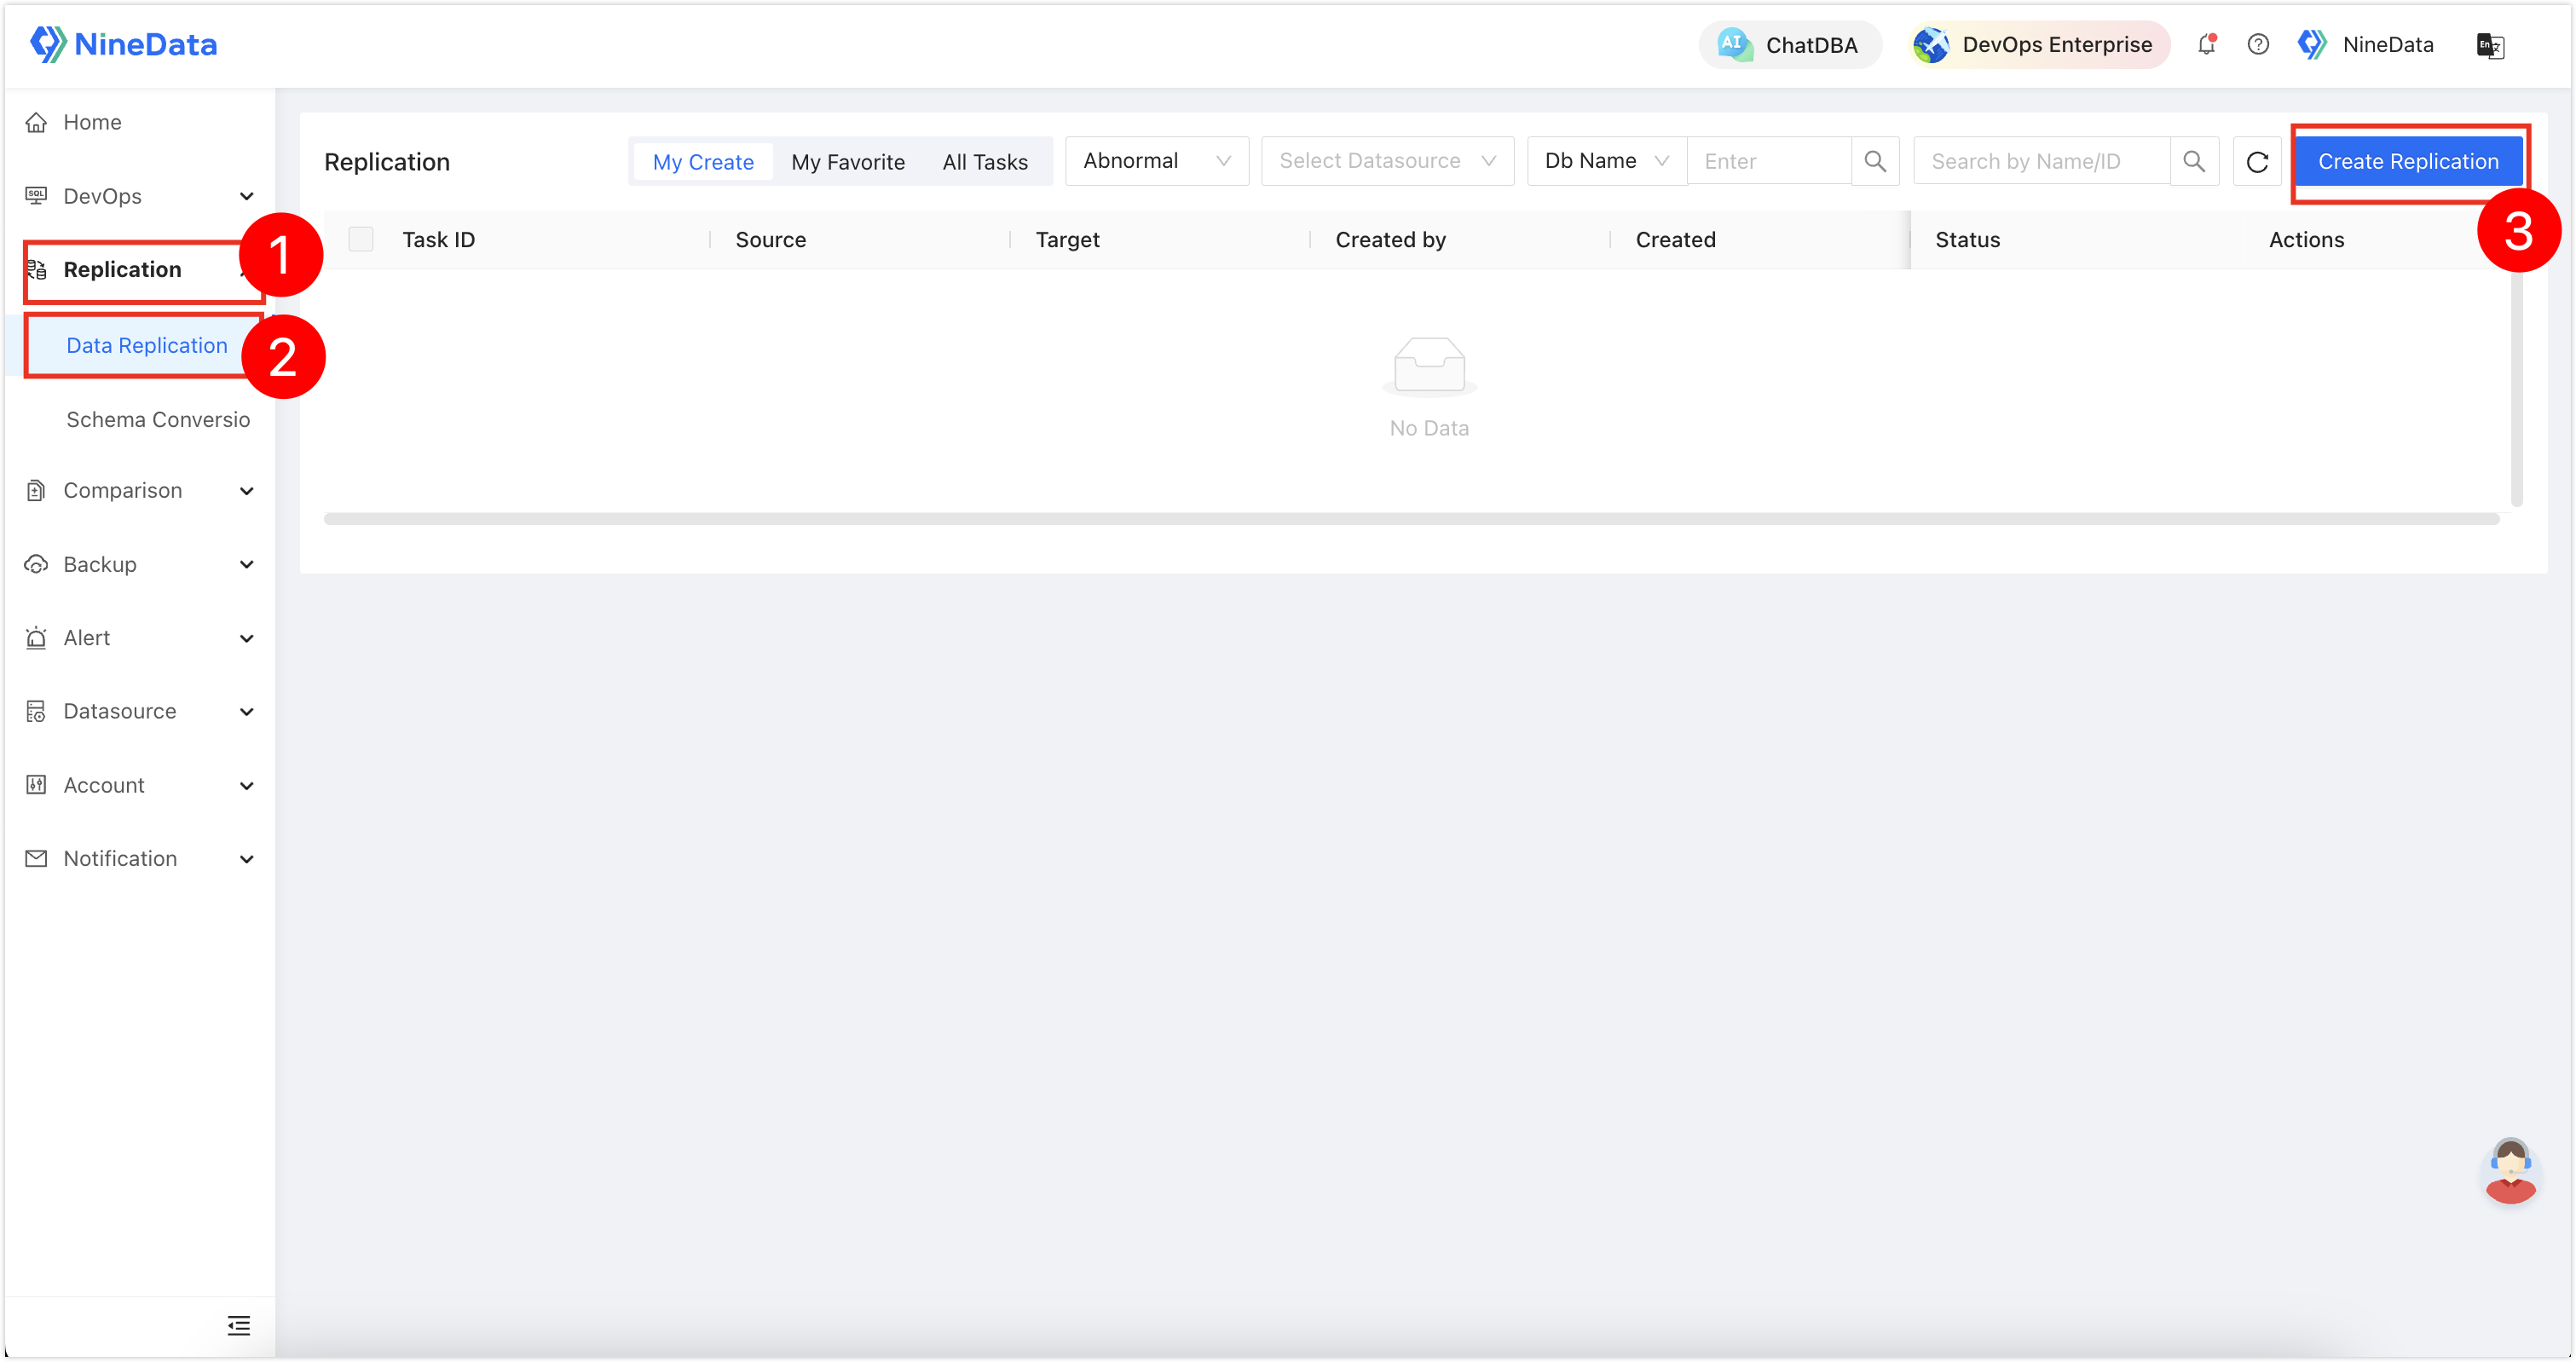
Sign in to the NineData console, go to Replication > Data Replication, and then click Create Replication.
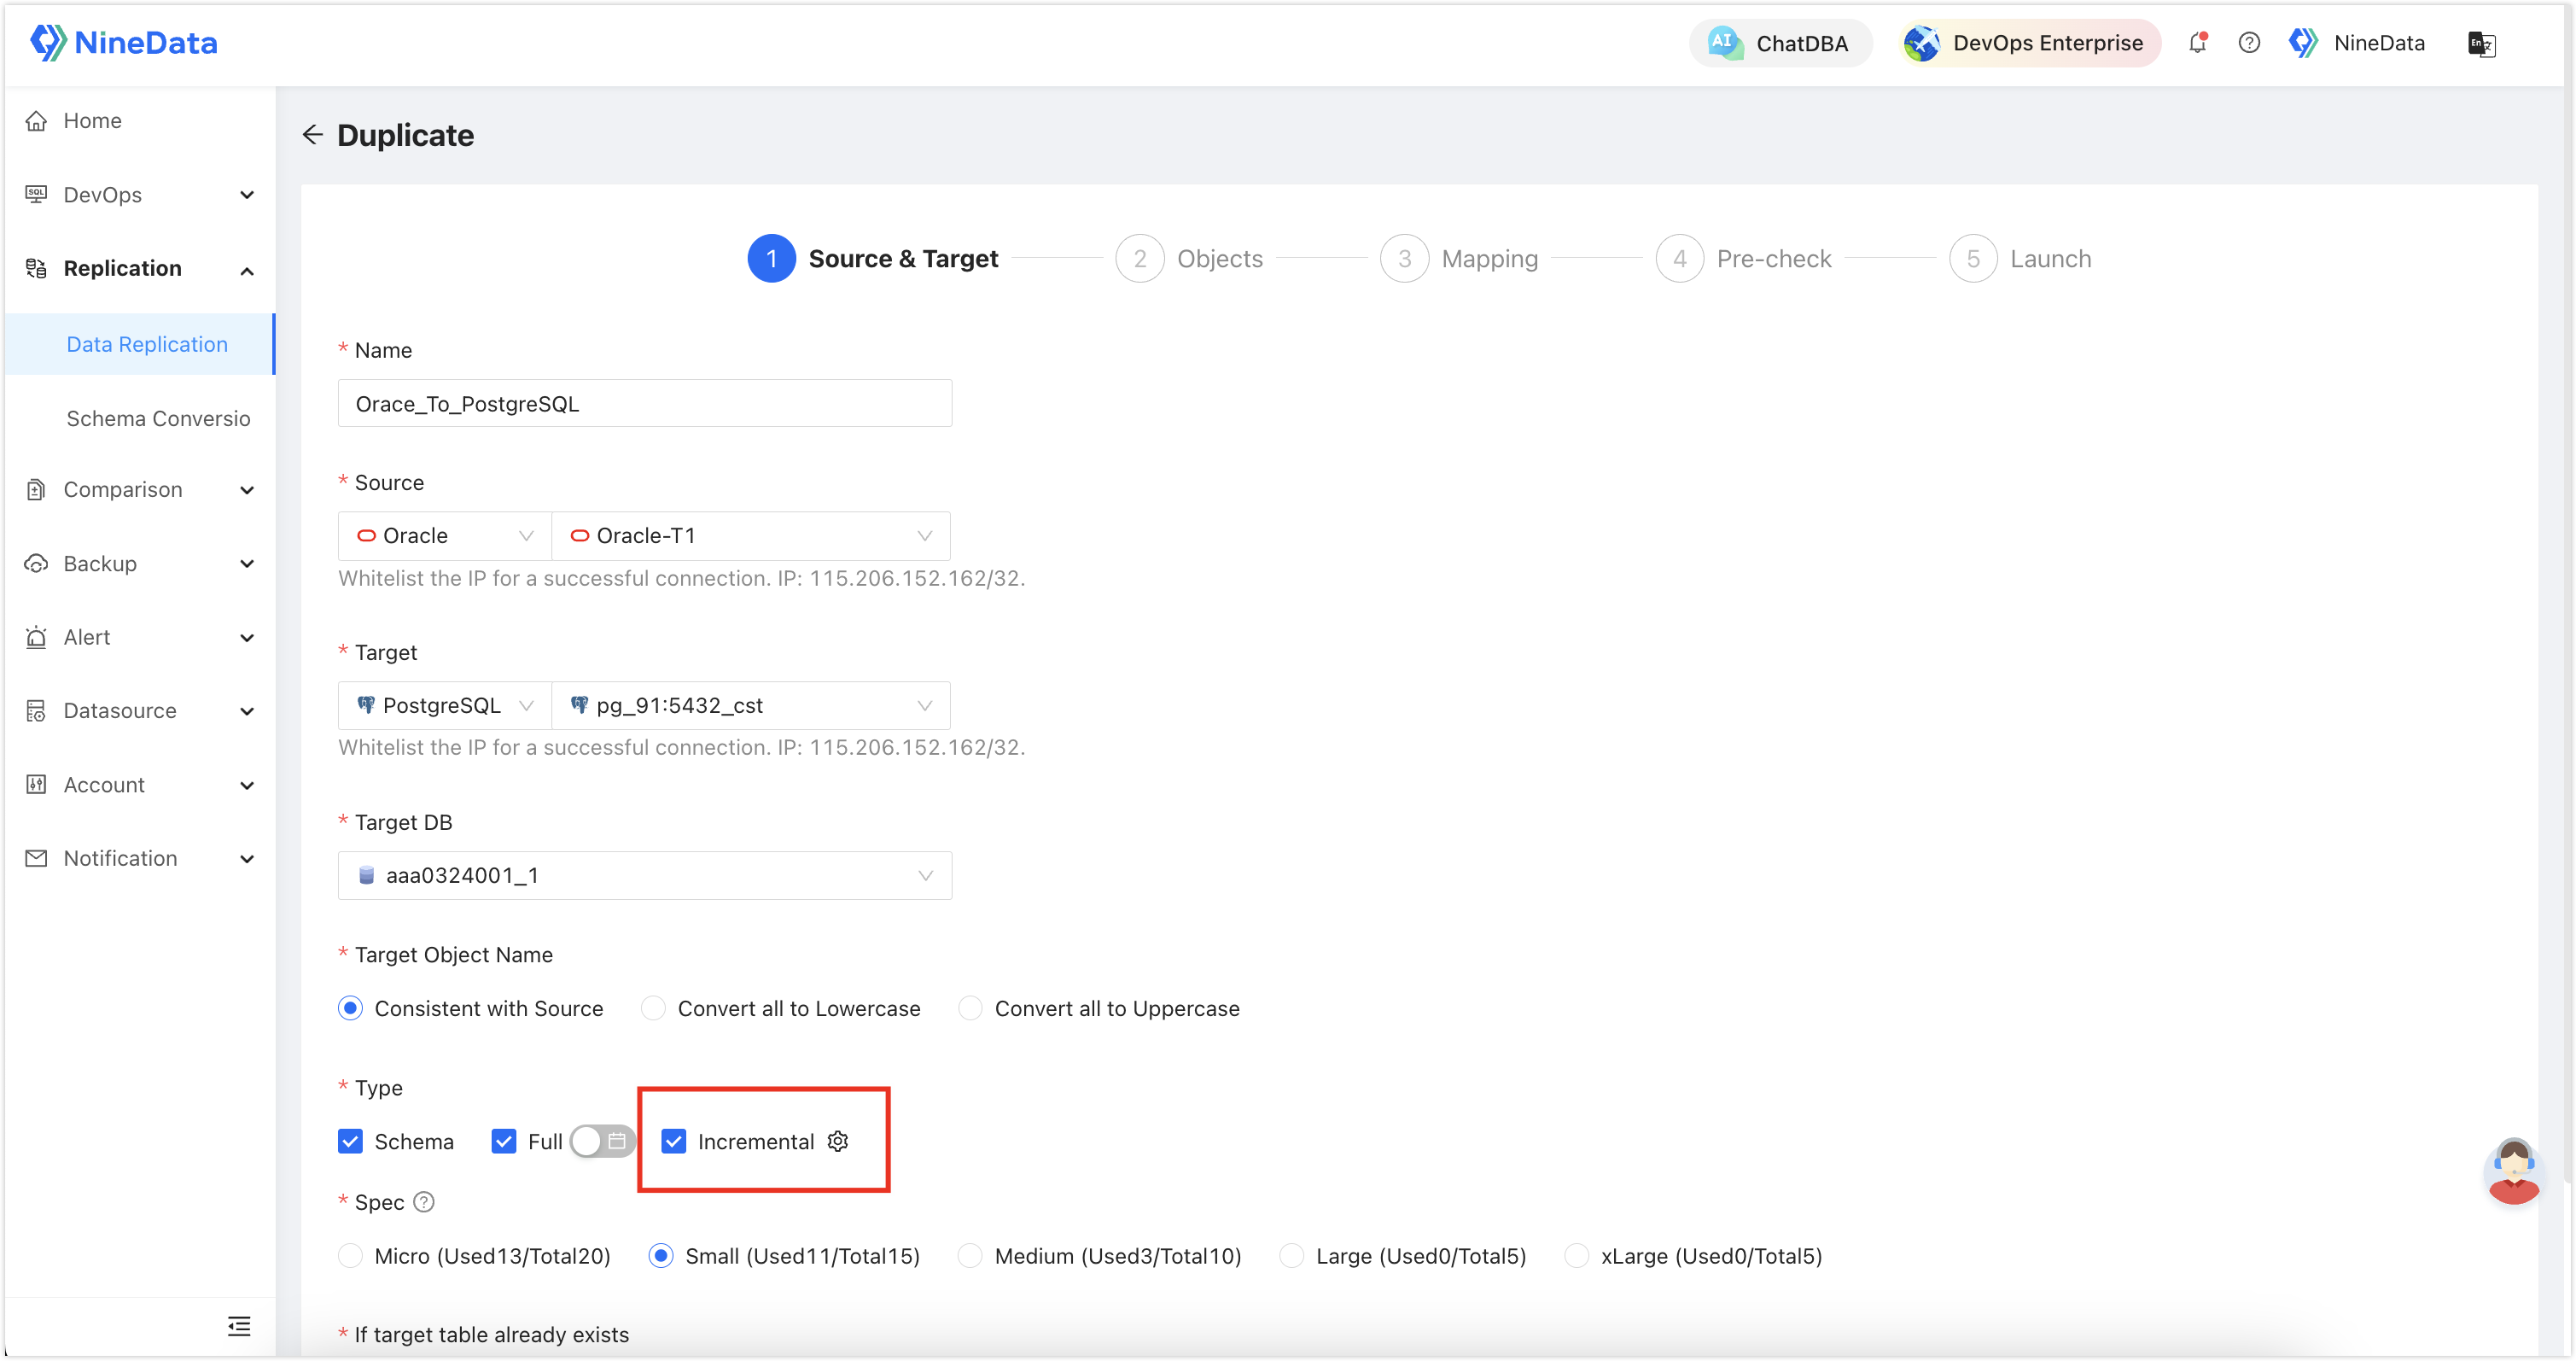
Configure the replication task as prompted. Since this migration needs zero downtime, select Incremental under Type.
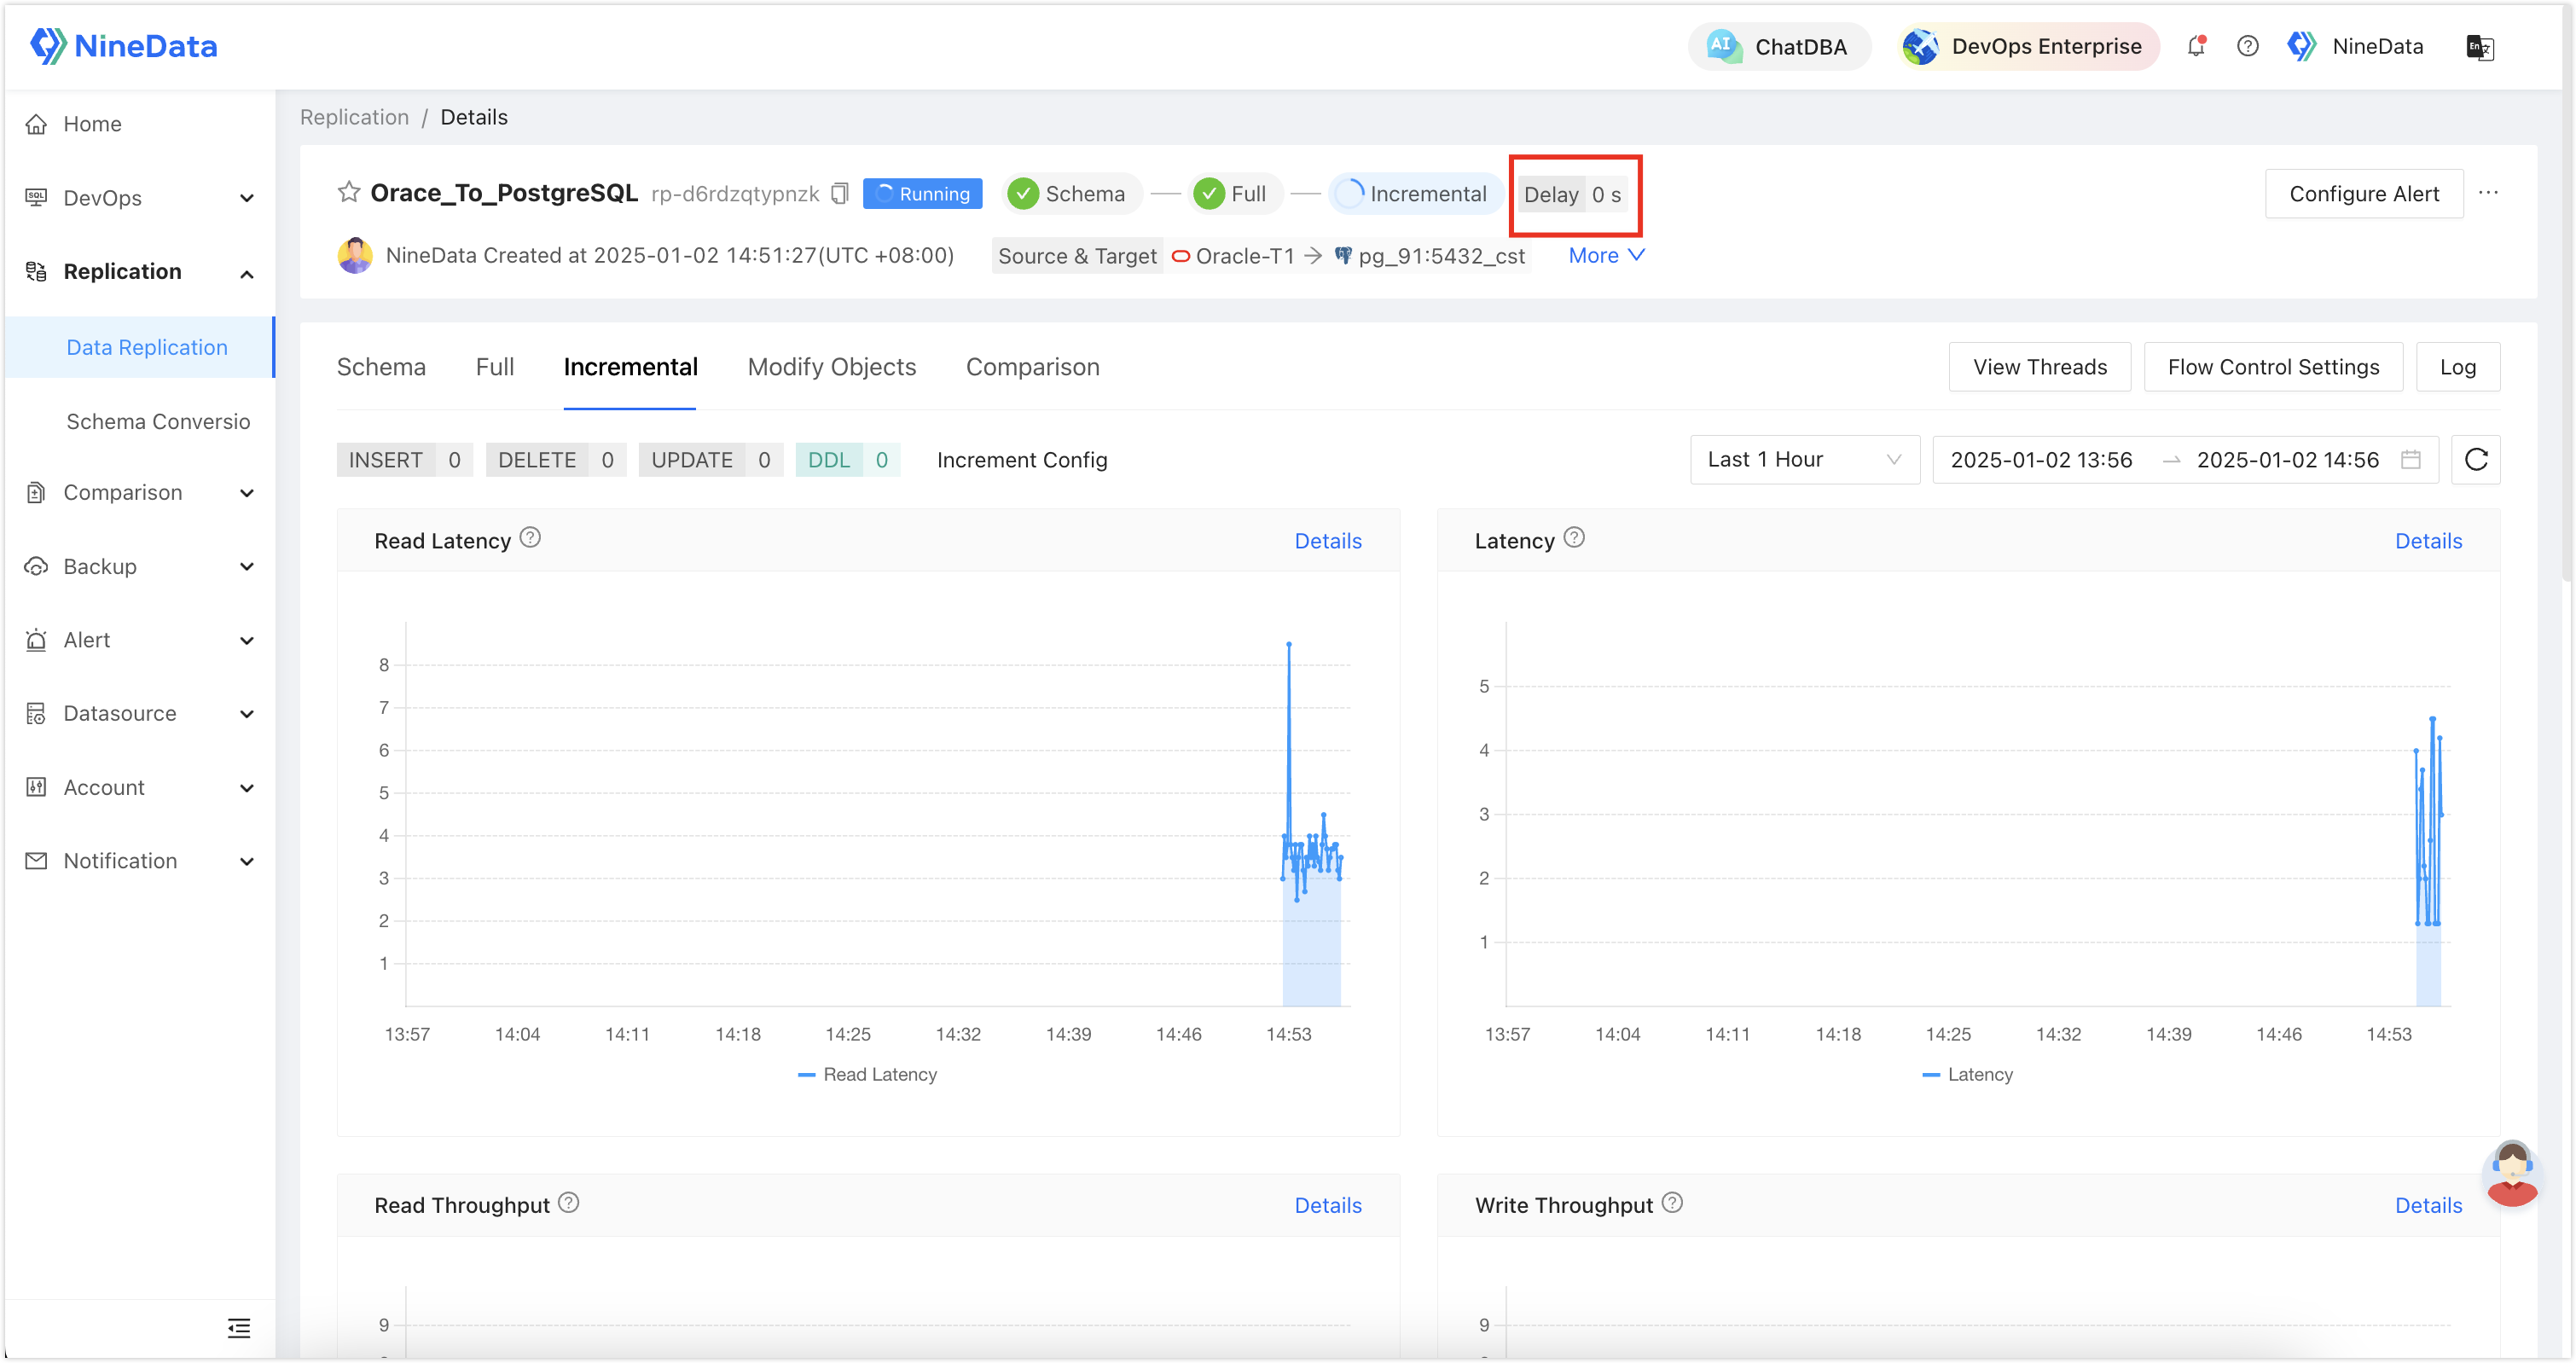
After you finish the configuration, start the task. NineData will first migrate the existing data and then replicate incremental data from Oracle in real time. When the task panel shows Latency: 0 seconds, the target is up to date.
Step 3: Verify data integrity on the target
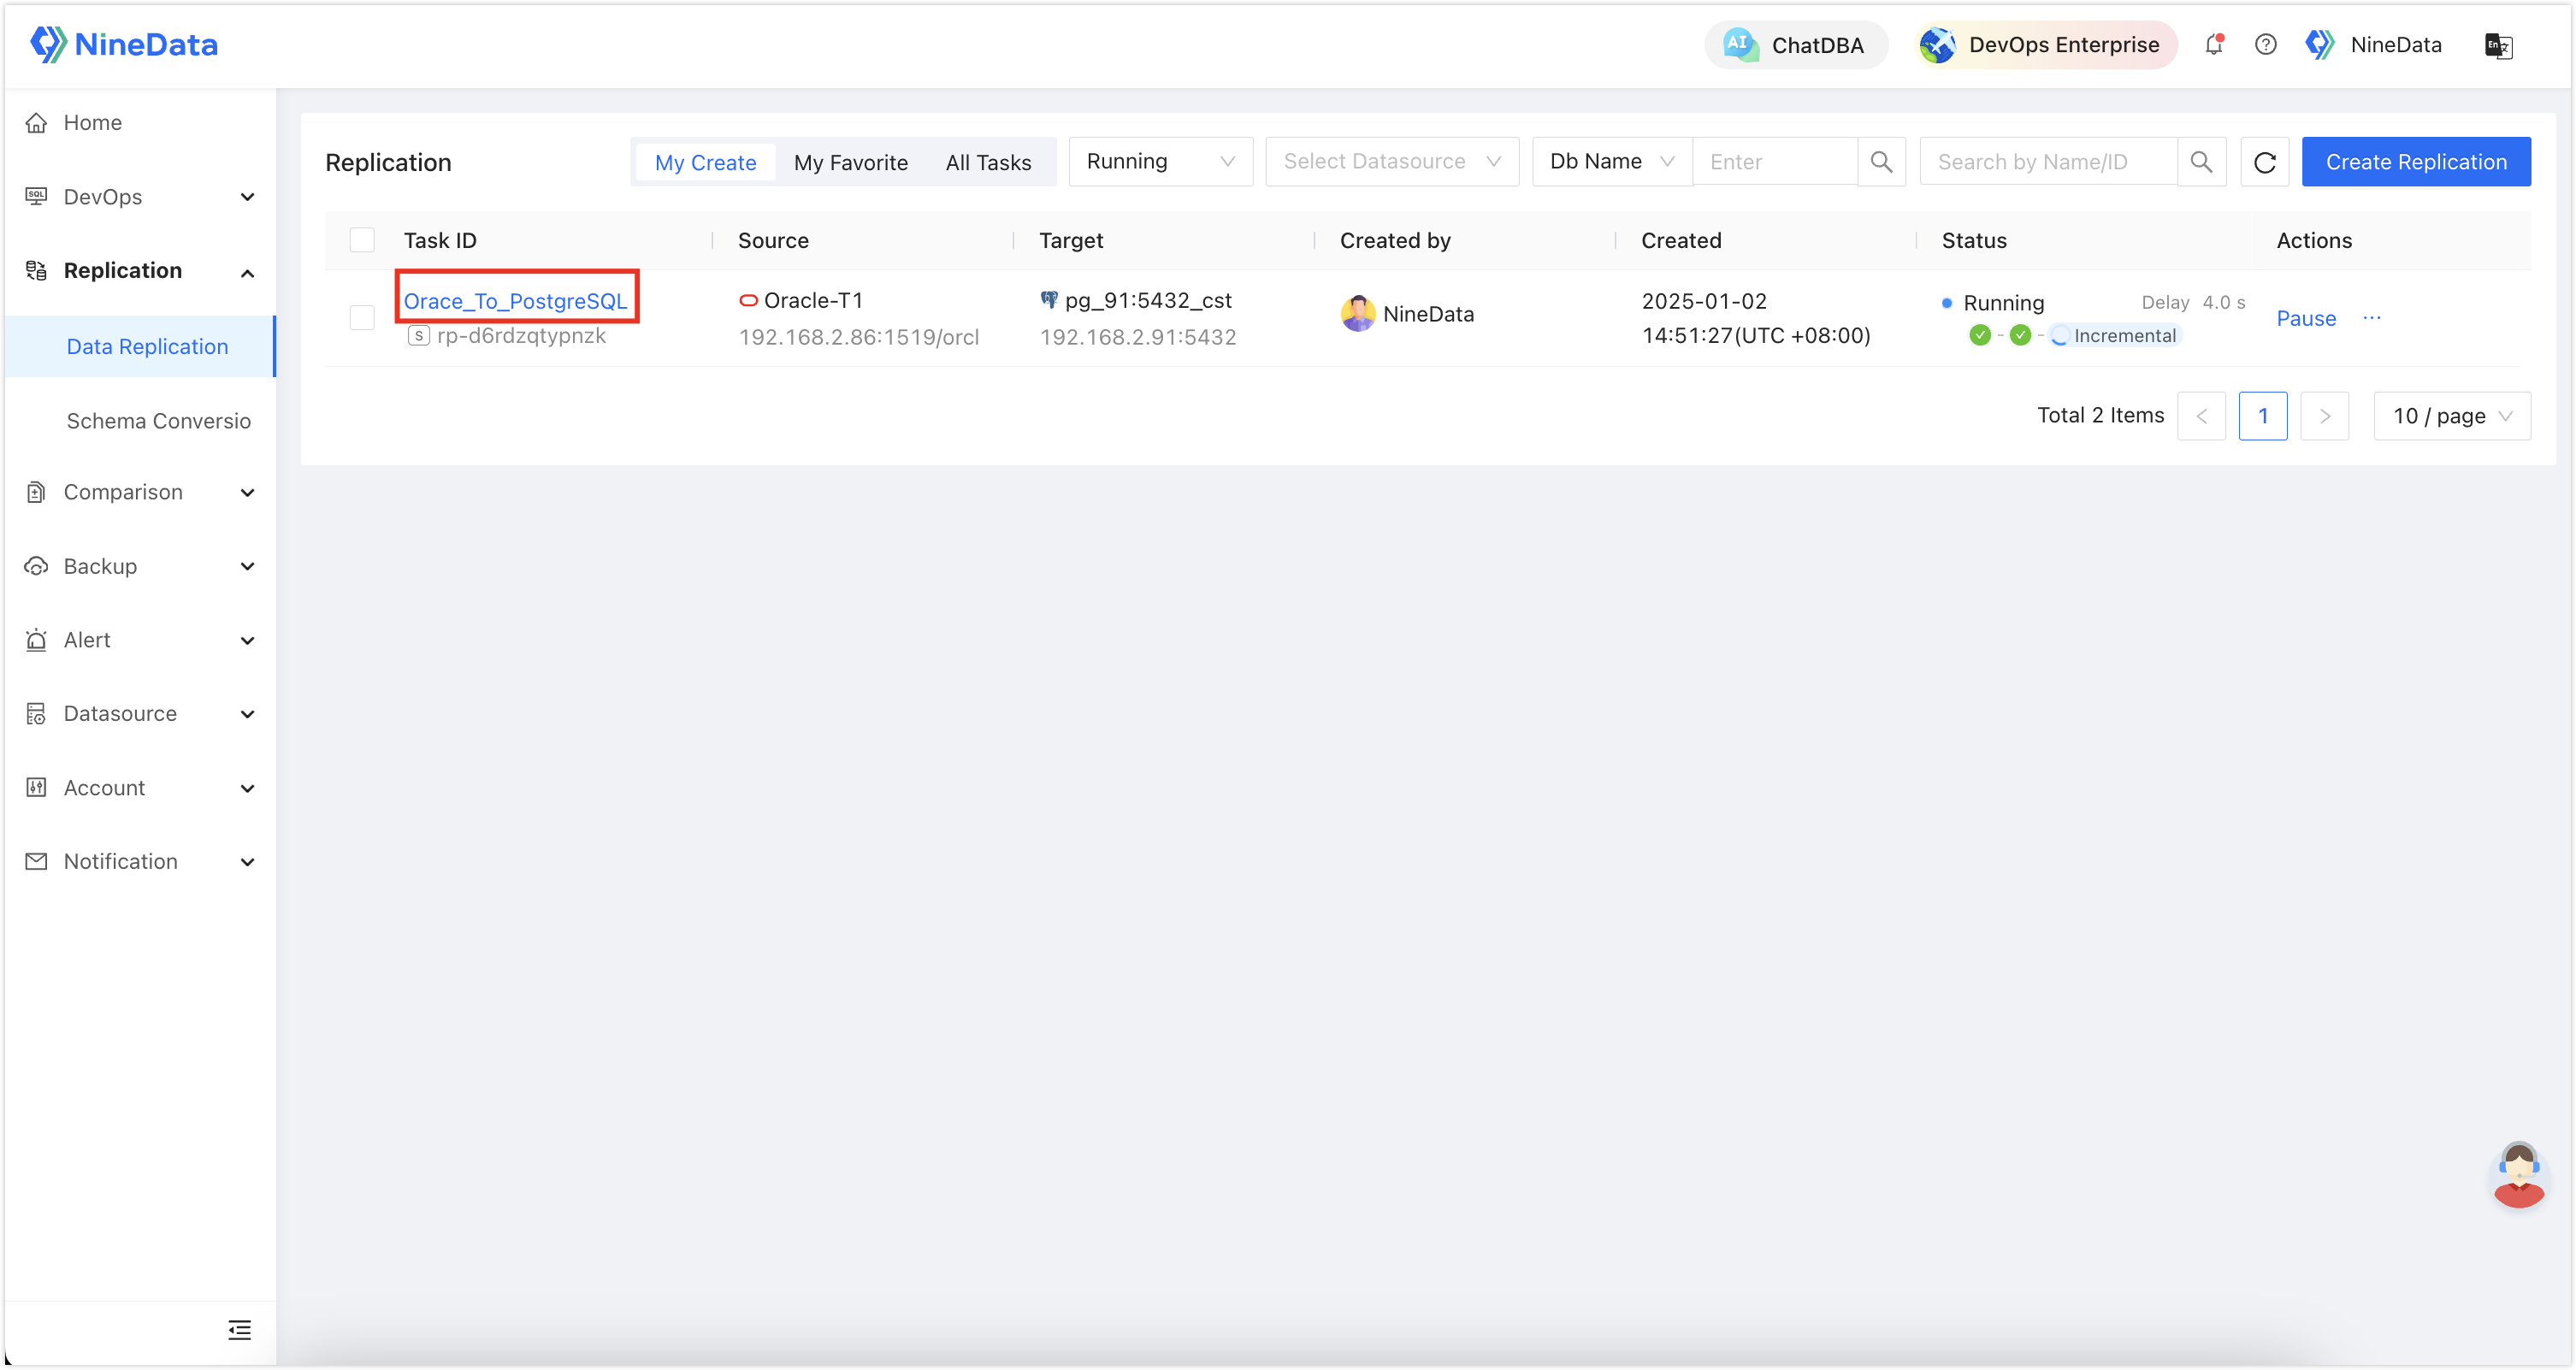
Sign in to the NineData console, go to Replication > Data Replication, and then click the replication task ID created in Step 2.
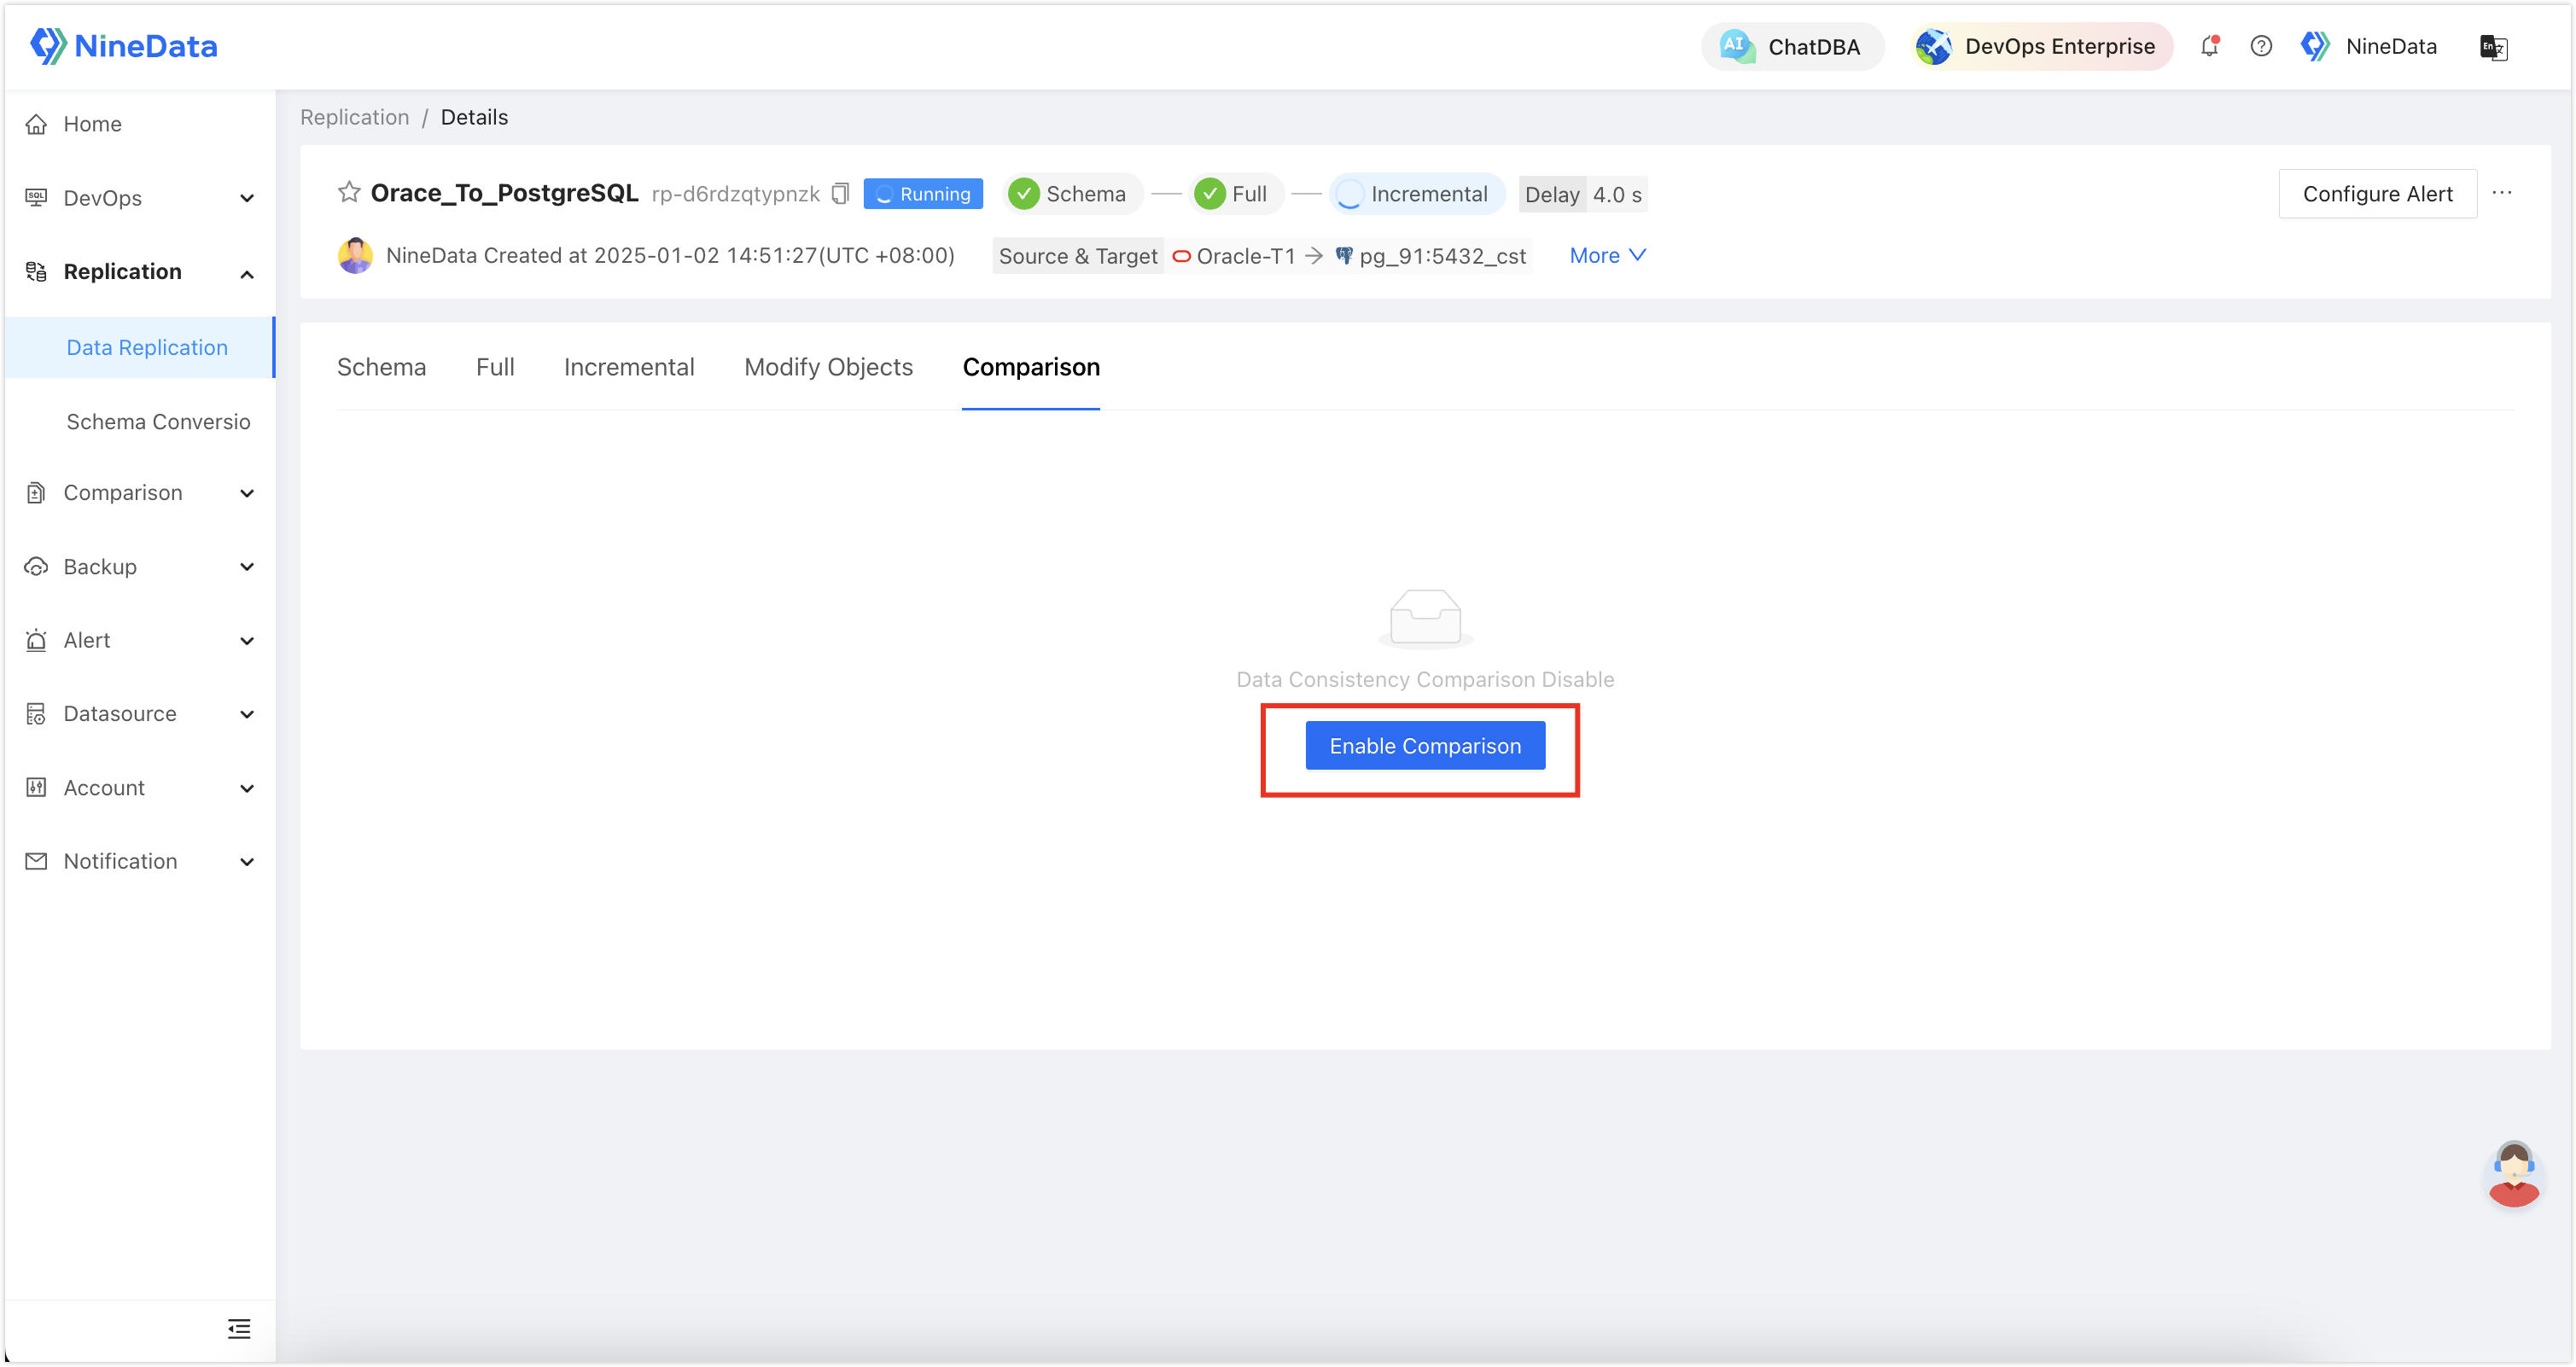
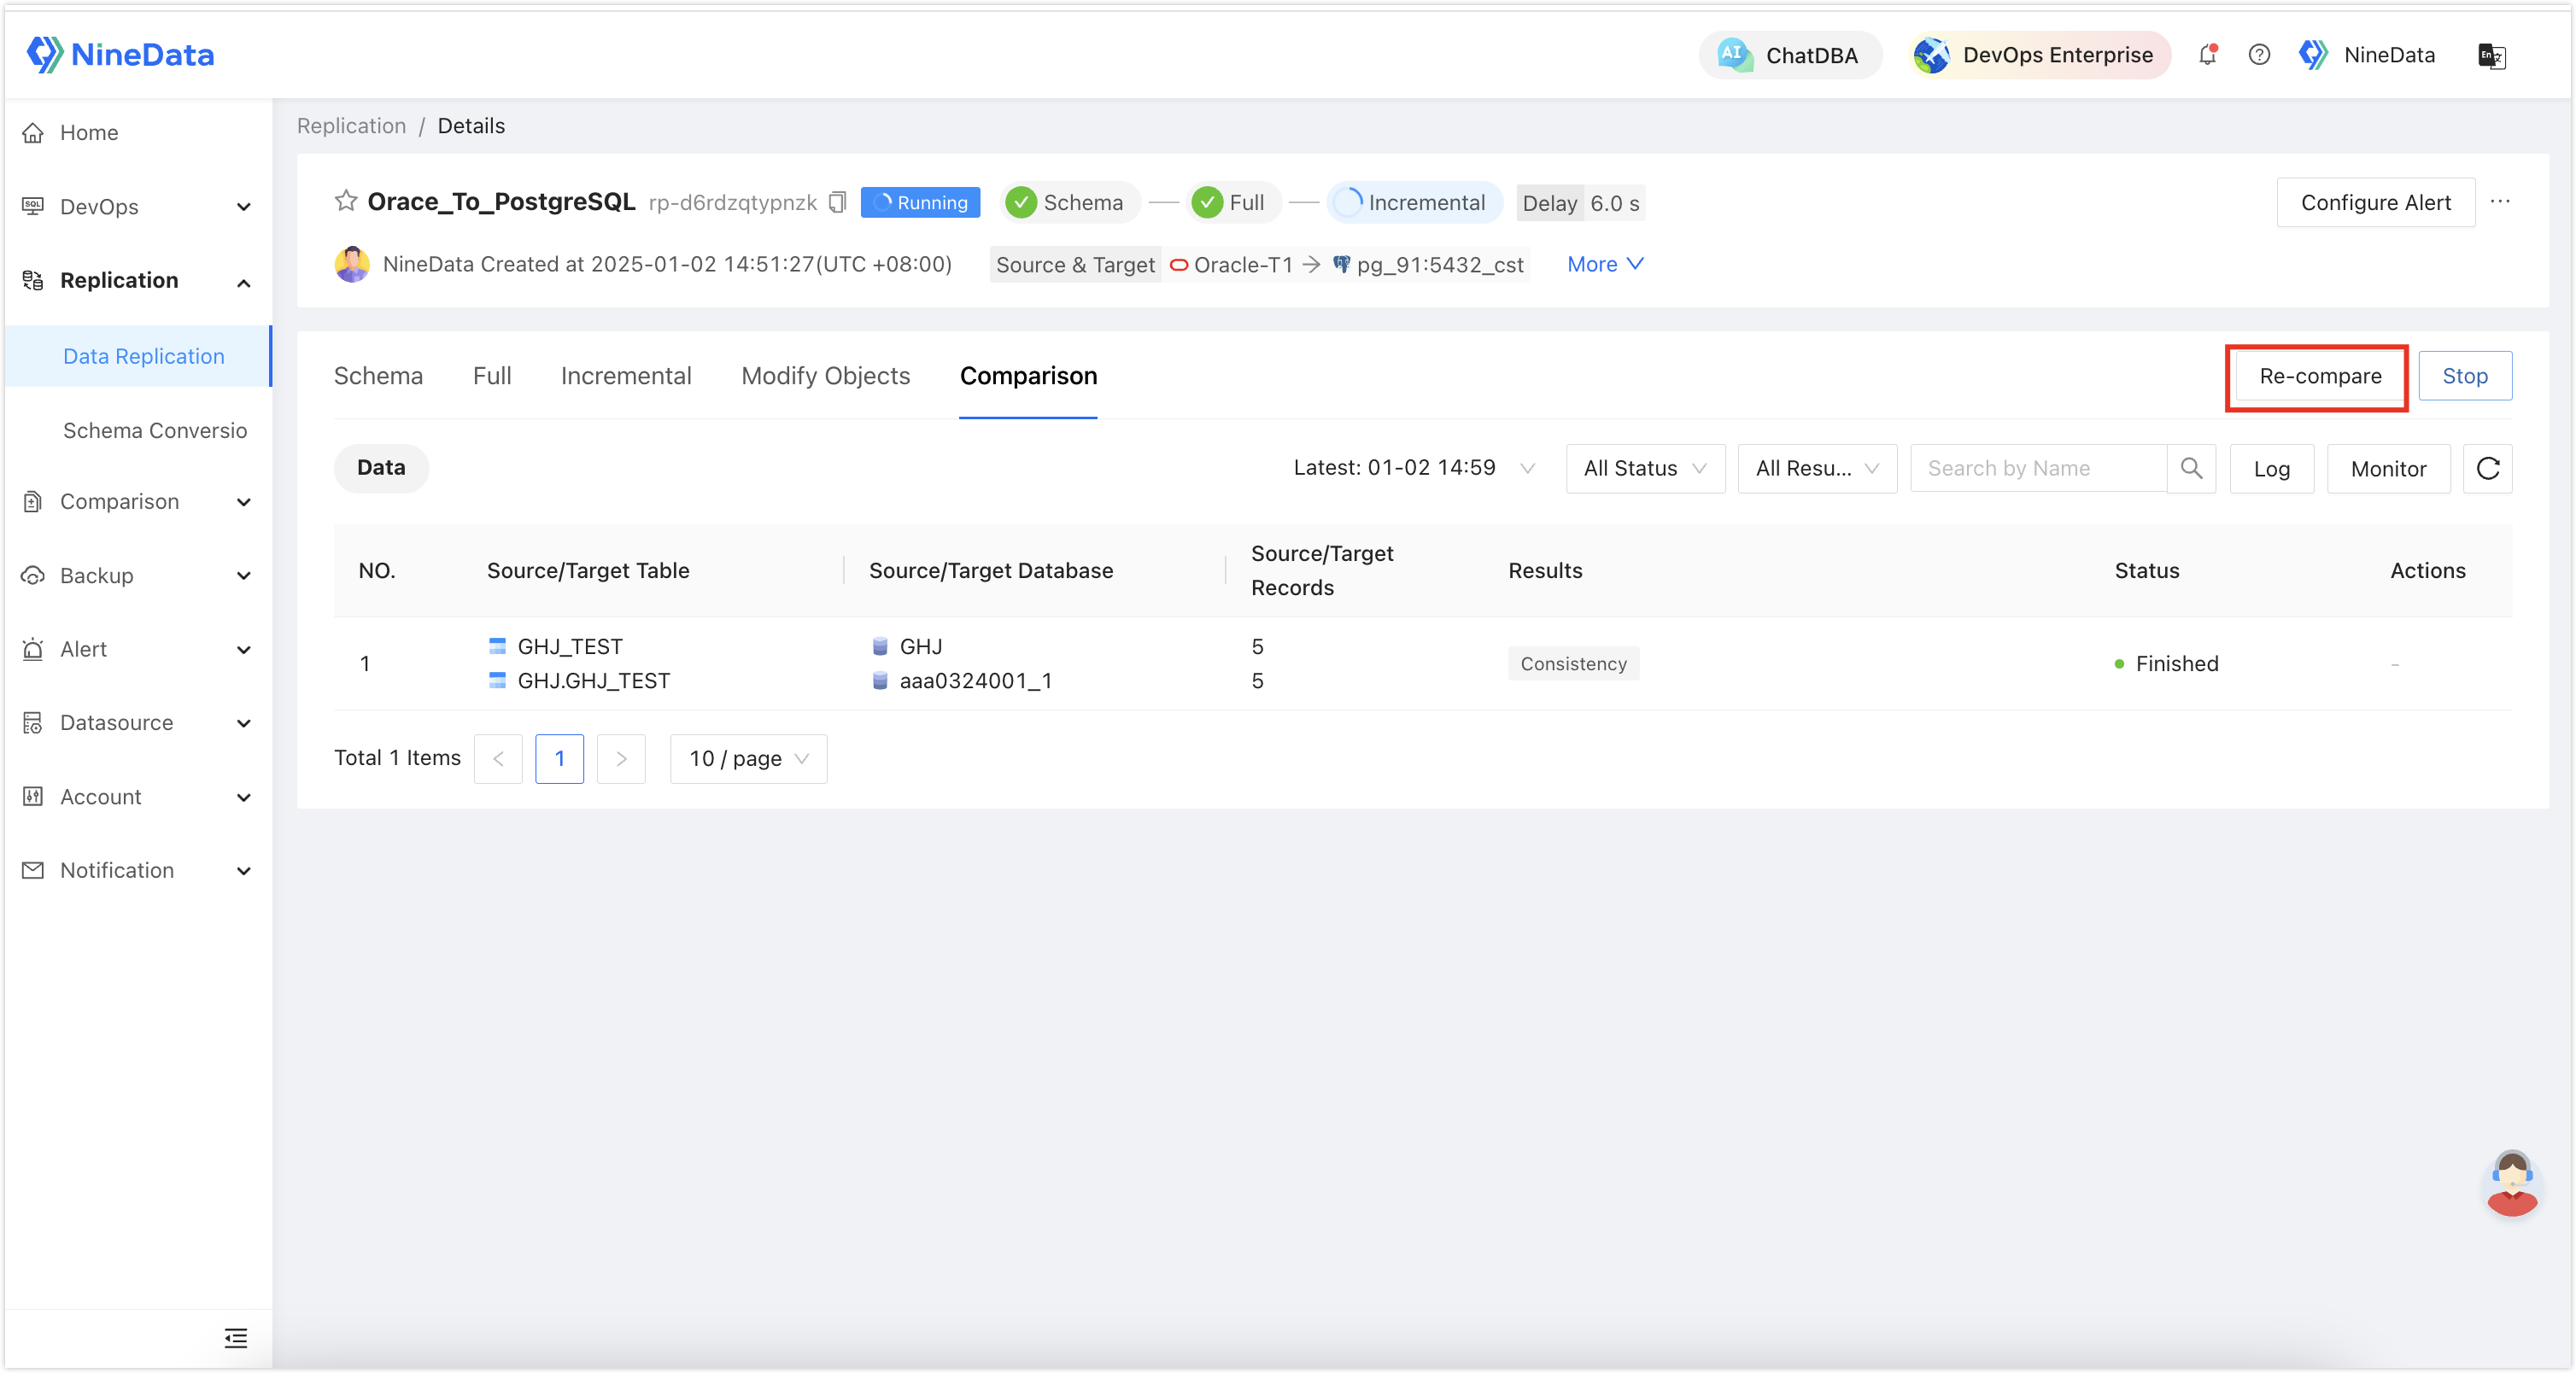
Open the Comparison tab and click Enable Comparison. If Enable Data Consistency Comparison was already selected in Step 2, the comparison results appear directly.
 tip
tipOnce enabled, NineData compares the synchronized objects between the source and target and displays the results.
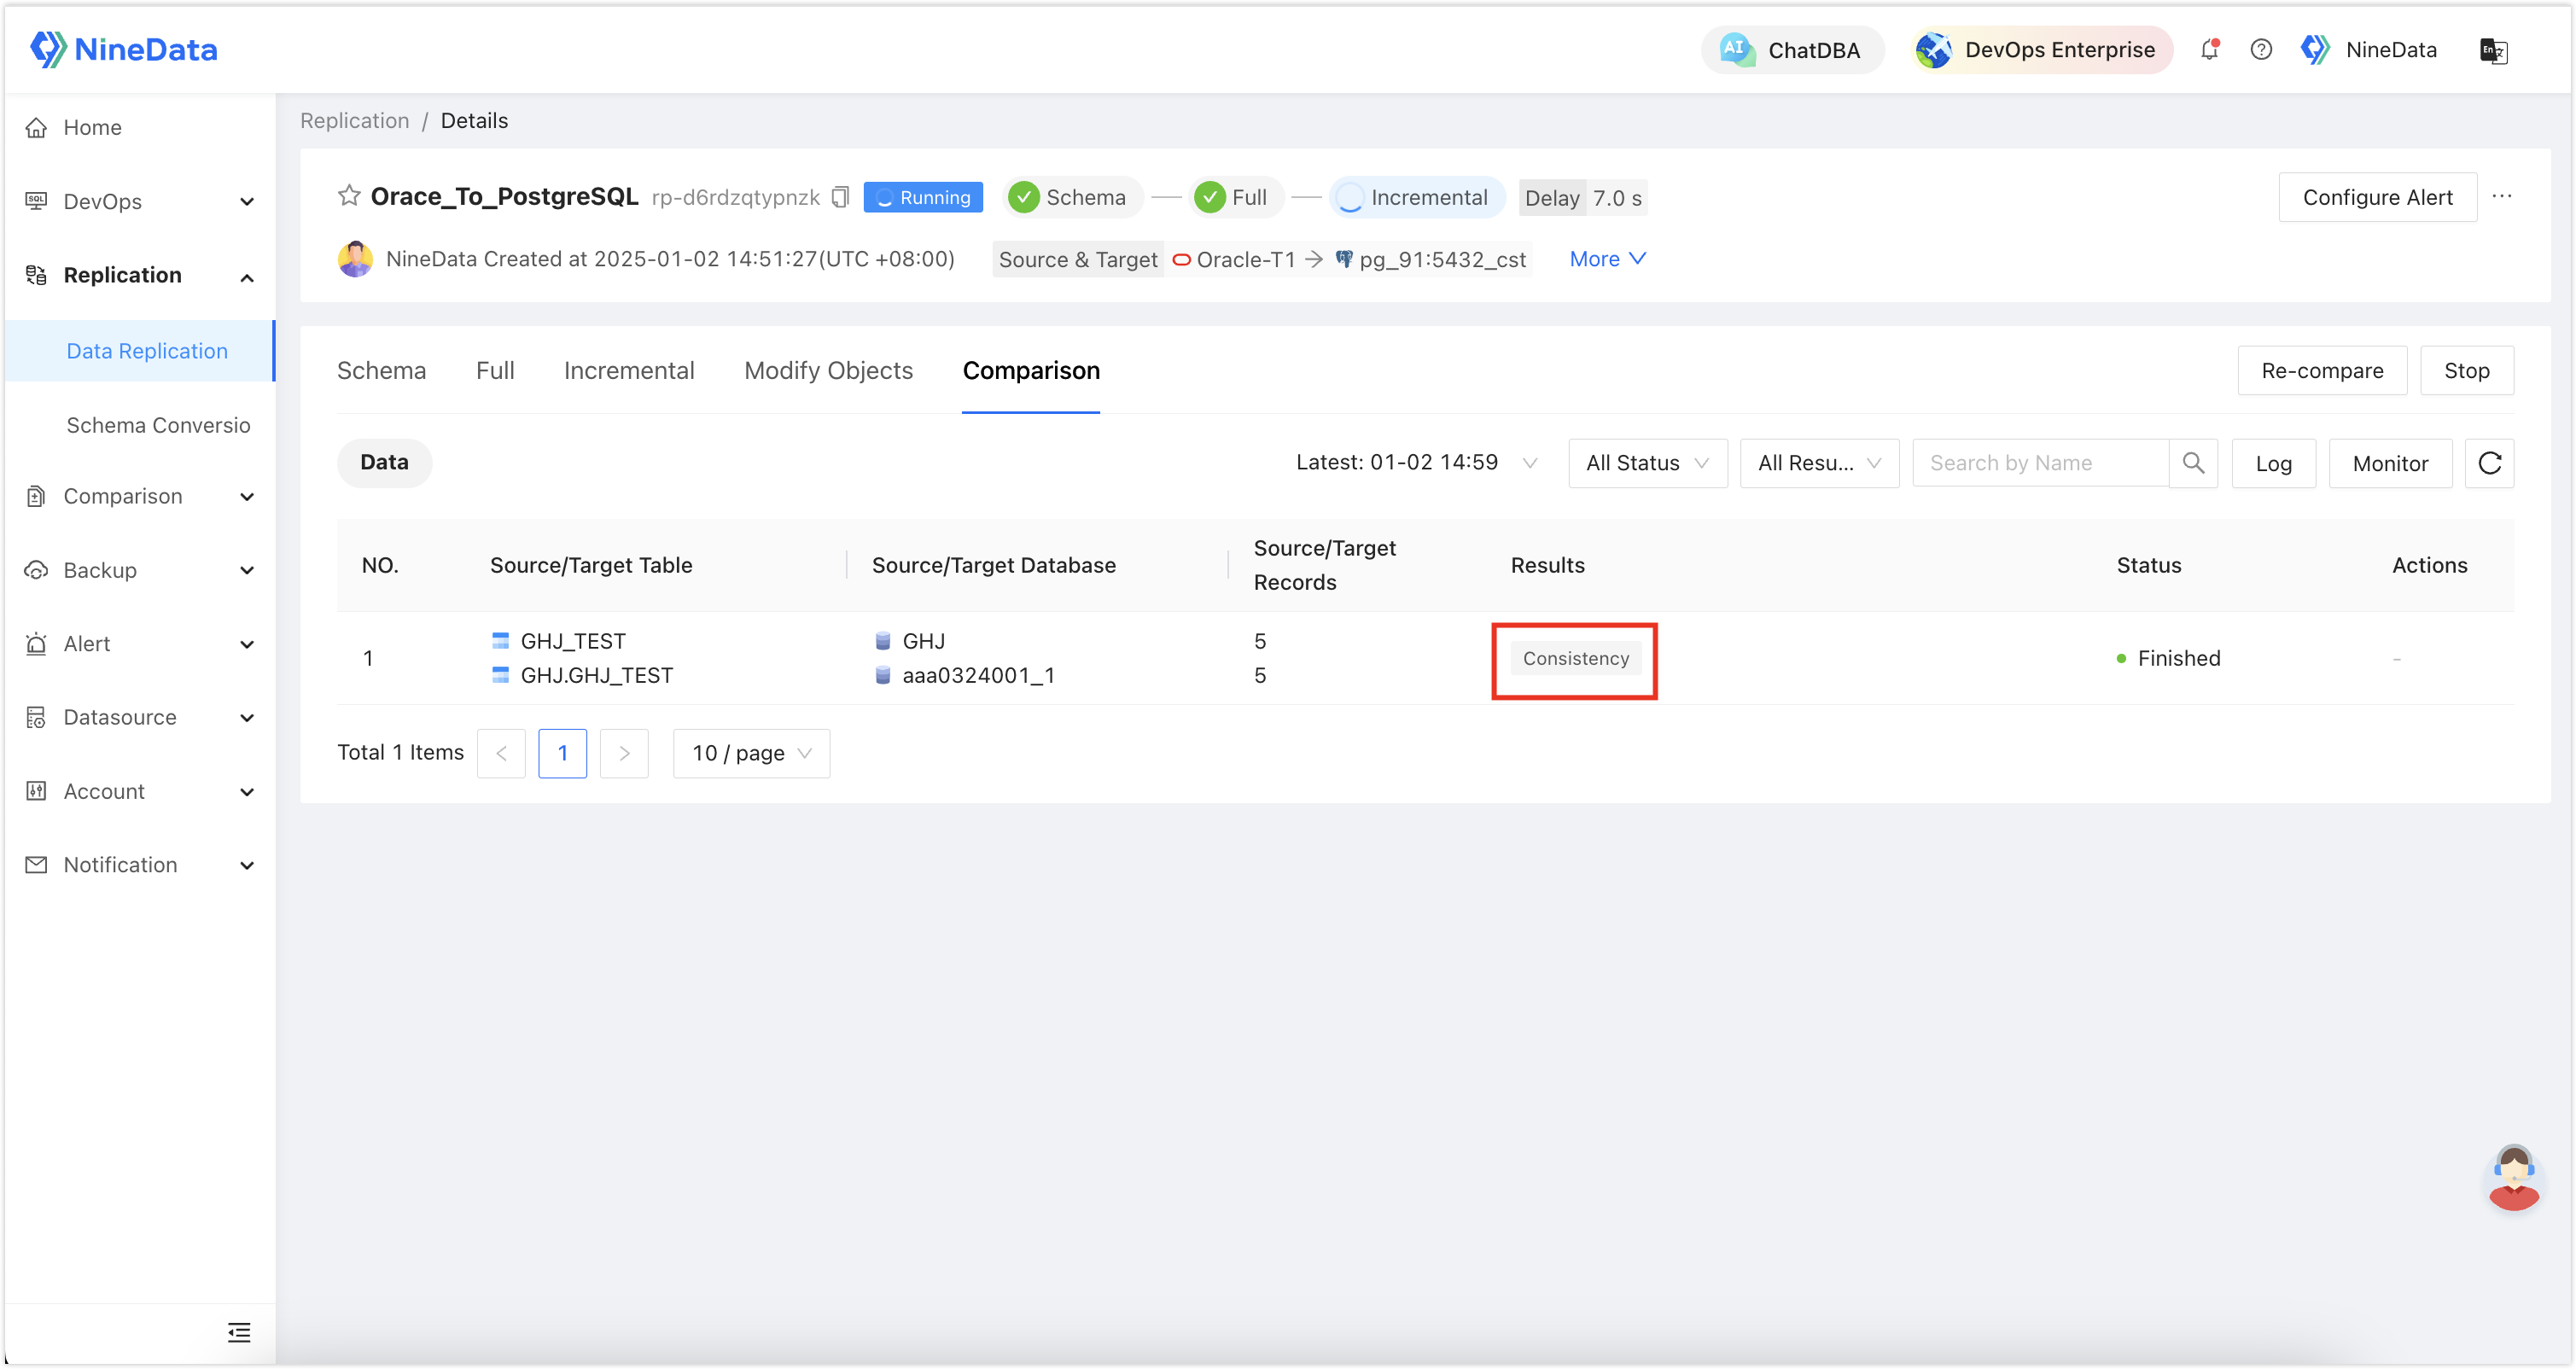
After some time, click Re-compare to verify the latest incremental data.
Step 4: Configure task alerts
Because this is a long-running migration task, you may want real-time alerts for failures or delays.
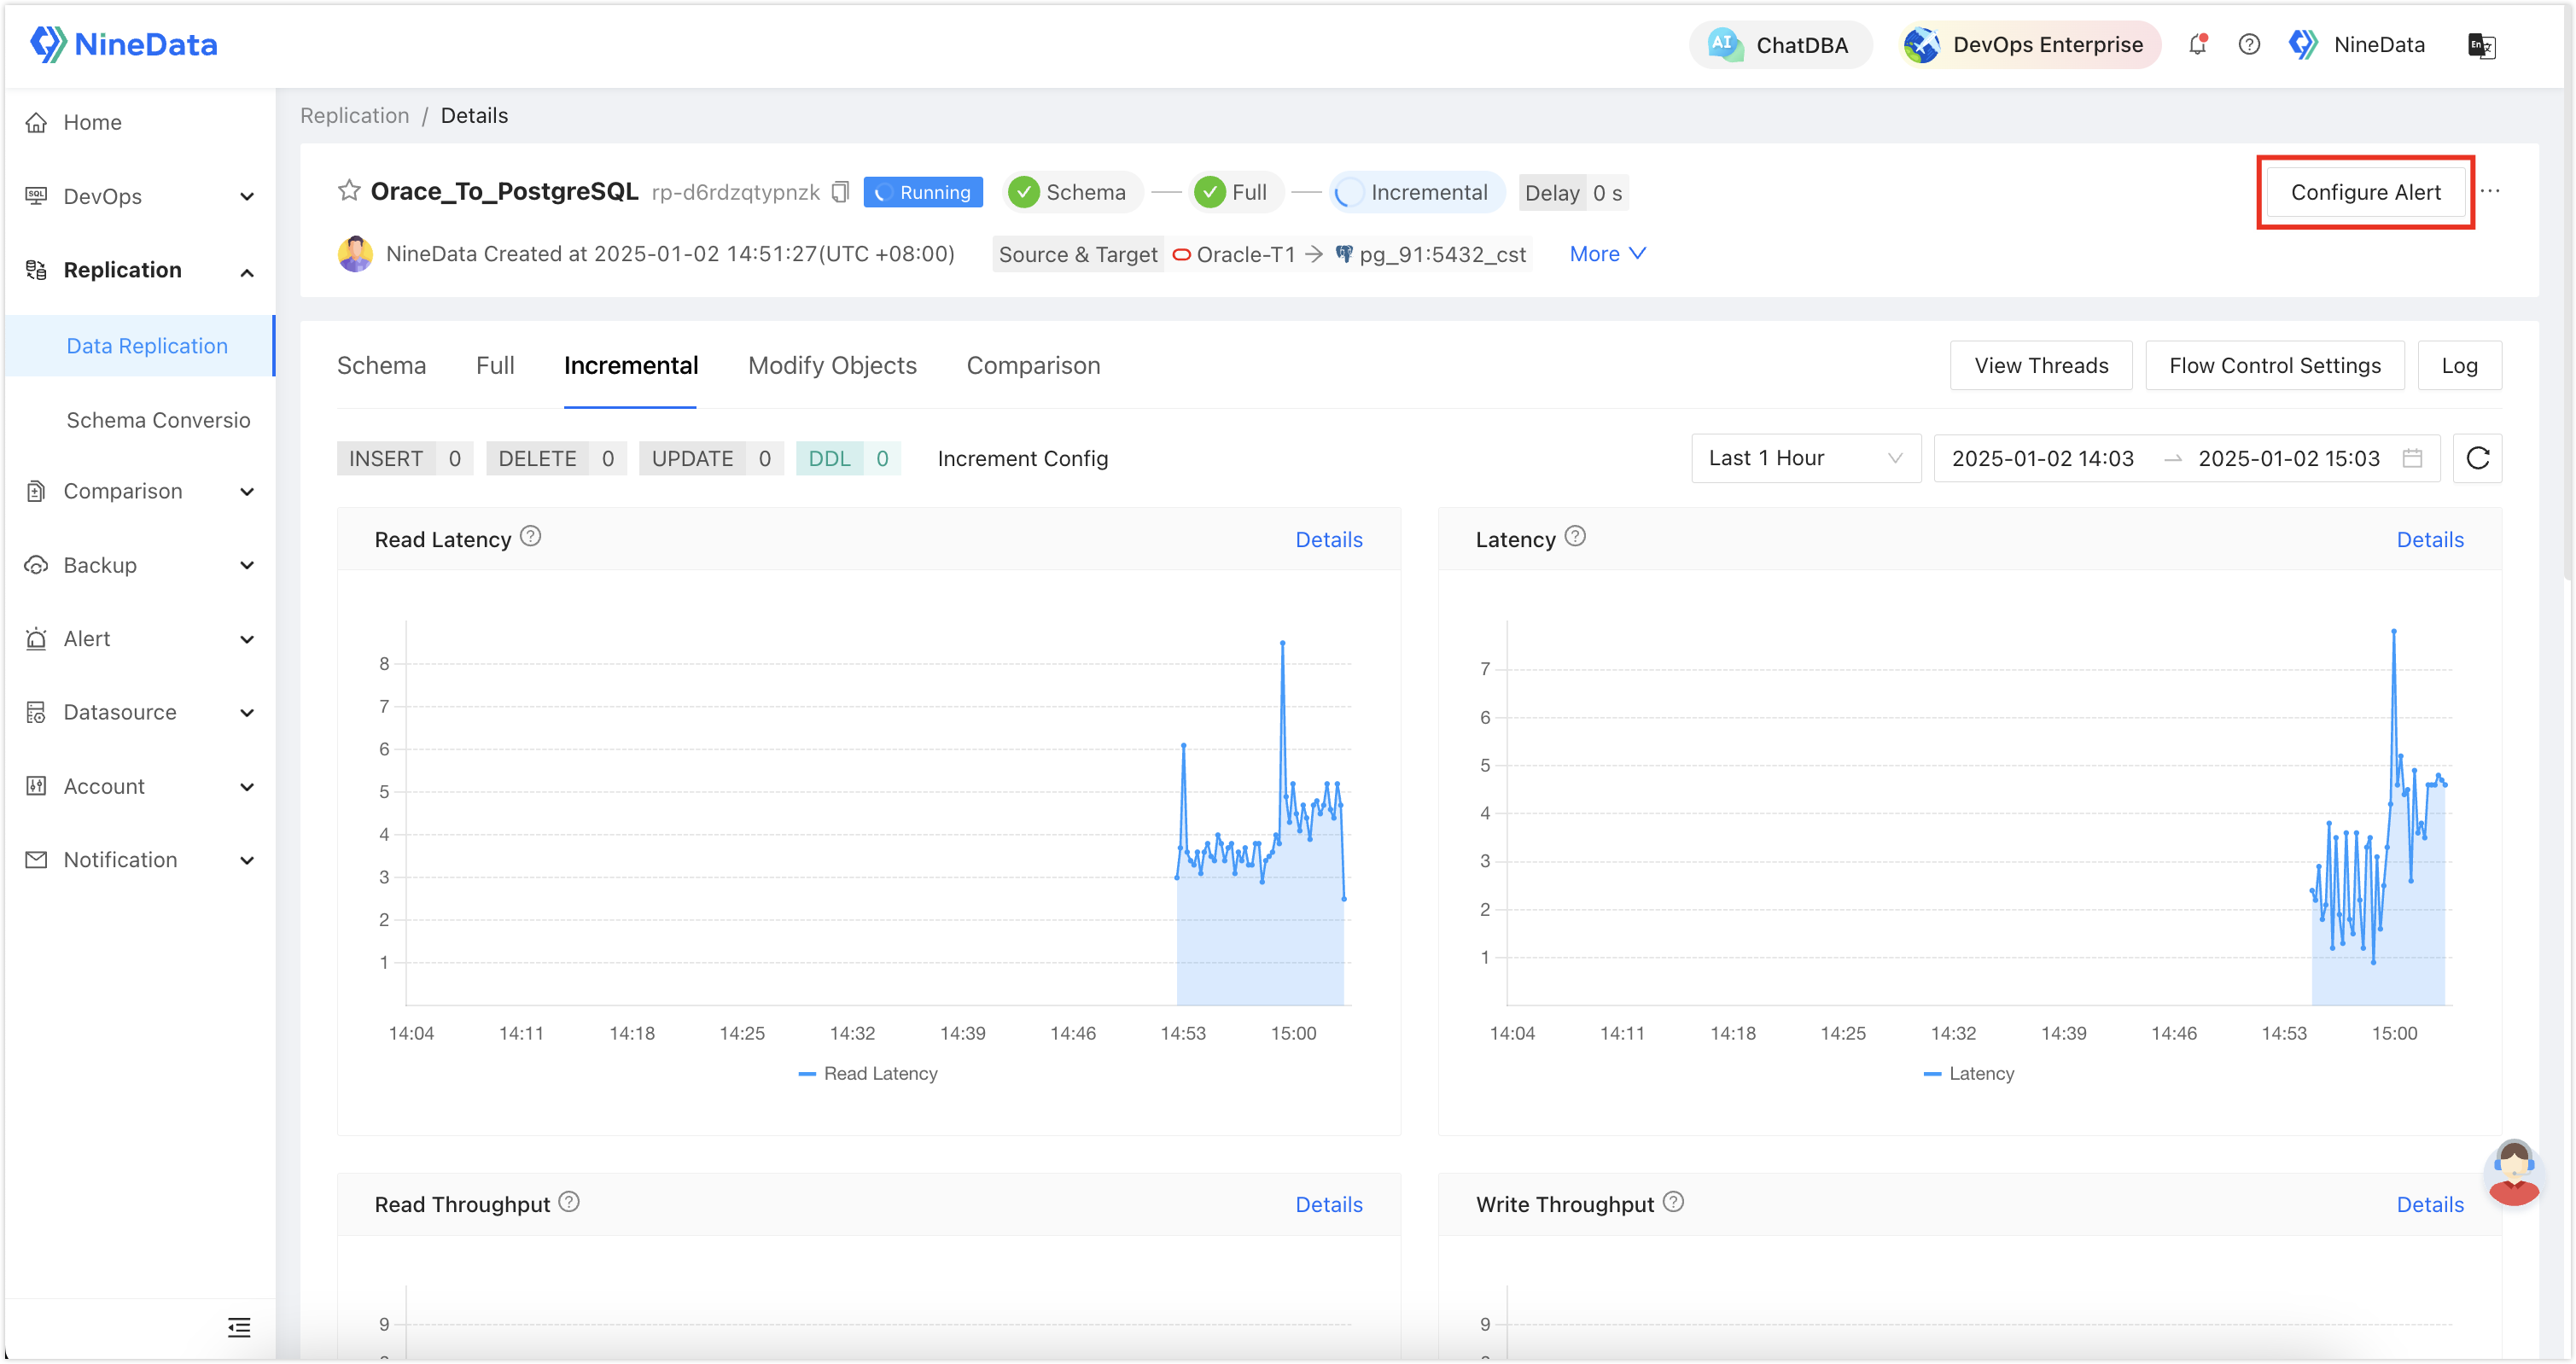
Sign in to the NineData console, go to Replication > Data Replication, and then click the replication task ID created in Step 2.
Click Configure Alert in the page header.
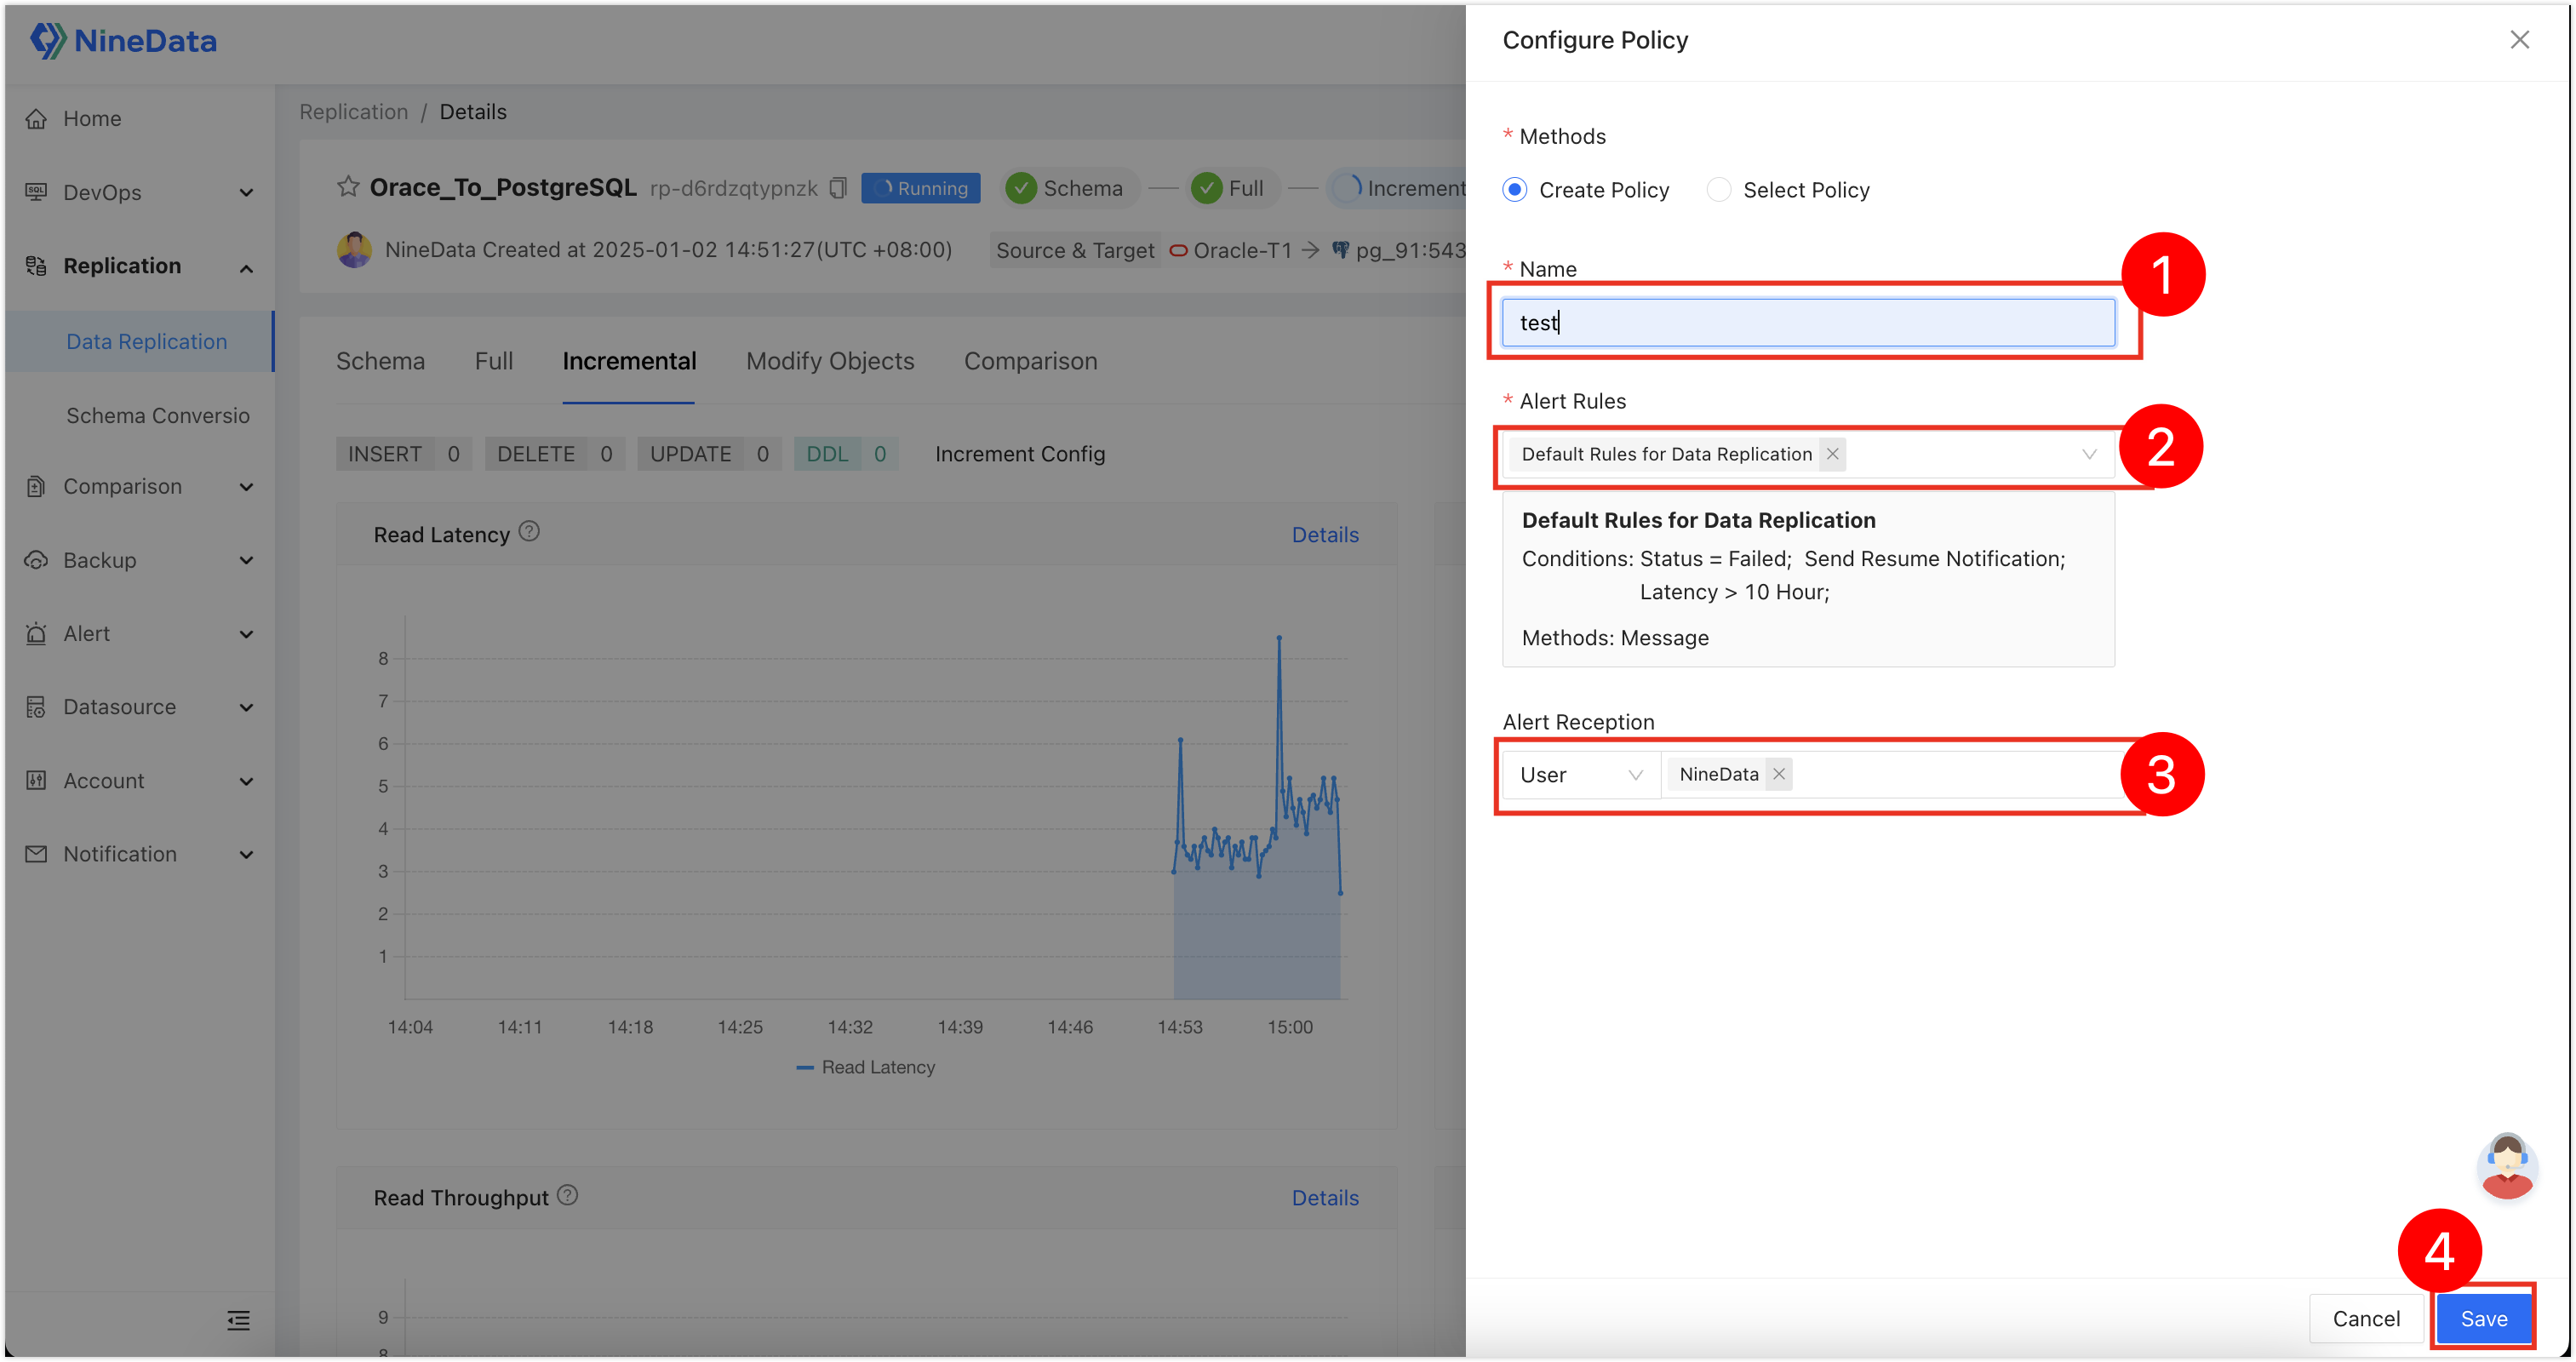
Enter the policy name, select the alert rules and recipient, and click Save. Use the built-in rules to send SMS notifications when a task fails or the replication delay reaches 10 minutes. Create custom rules if required.
Result
When the task delay reaches 0, Oracle and PostgreSQL are synchronized and ready for a planned cutover.
Next steps
- Switch application traffic to PostgreSQL during a planned maintenance window.
- Keep comparison and alert rules enabled until cutover finishes.
- If you need rollback protection, prepare the reverse replication path before the switch.