Migrate MySQL to AWS RDS MySQL Without Downtime
Cross-cloud migration is often difficult when avoiding downtime and keeping databases private. NineData helps move MySQL data between an on-premises data center, other clouds, and AWS RDS MySQL with secure replication and rollback support.
Why cross-cloud migration is hard
- Business continuity: The migration must finish without interrupting production traffic.
- Schema changes: Large tables and ongoing DDL changes make migration harder to control.
- Data quality: You need a reliable way to verify that the source and target stay consistent.
- Failure recovery: If cutover fails, you still need a quick way to roll back.
Why use NineData?
- Private network access: NineData connects to cloud databases without requiring public exposure.
- Zero-downtime migration: NineData supports schema migration, full data migration, and incremental replication based on redo logs.
- High replication performance: NineData is designed for fast full and incremental replication.
- Rollback support: Build reverse replication before cutover to keep a recovery path open.
Before you begin
- Add the source database and the AWS RDS MySQL target to NineData.
- Confirm network access between NineData and both databases.
- Make sure you have permission to create replication, comparison, and alert tasks.
Migration steps
Step 1: Register source and target data sources
Sign in to the NineData console, go to Datasource > Datasource, and then click Create Datasource.
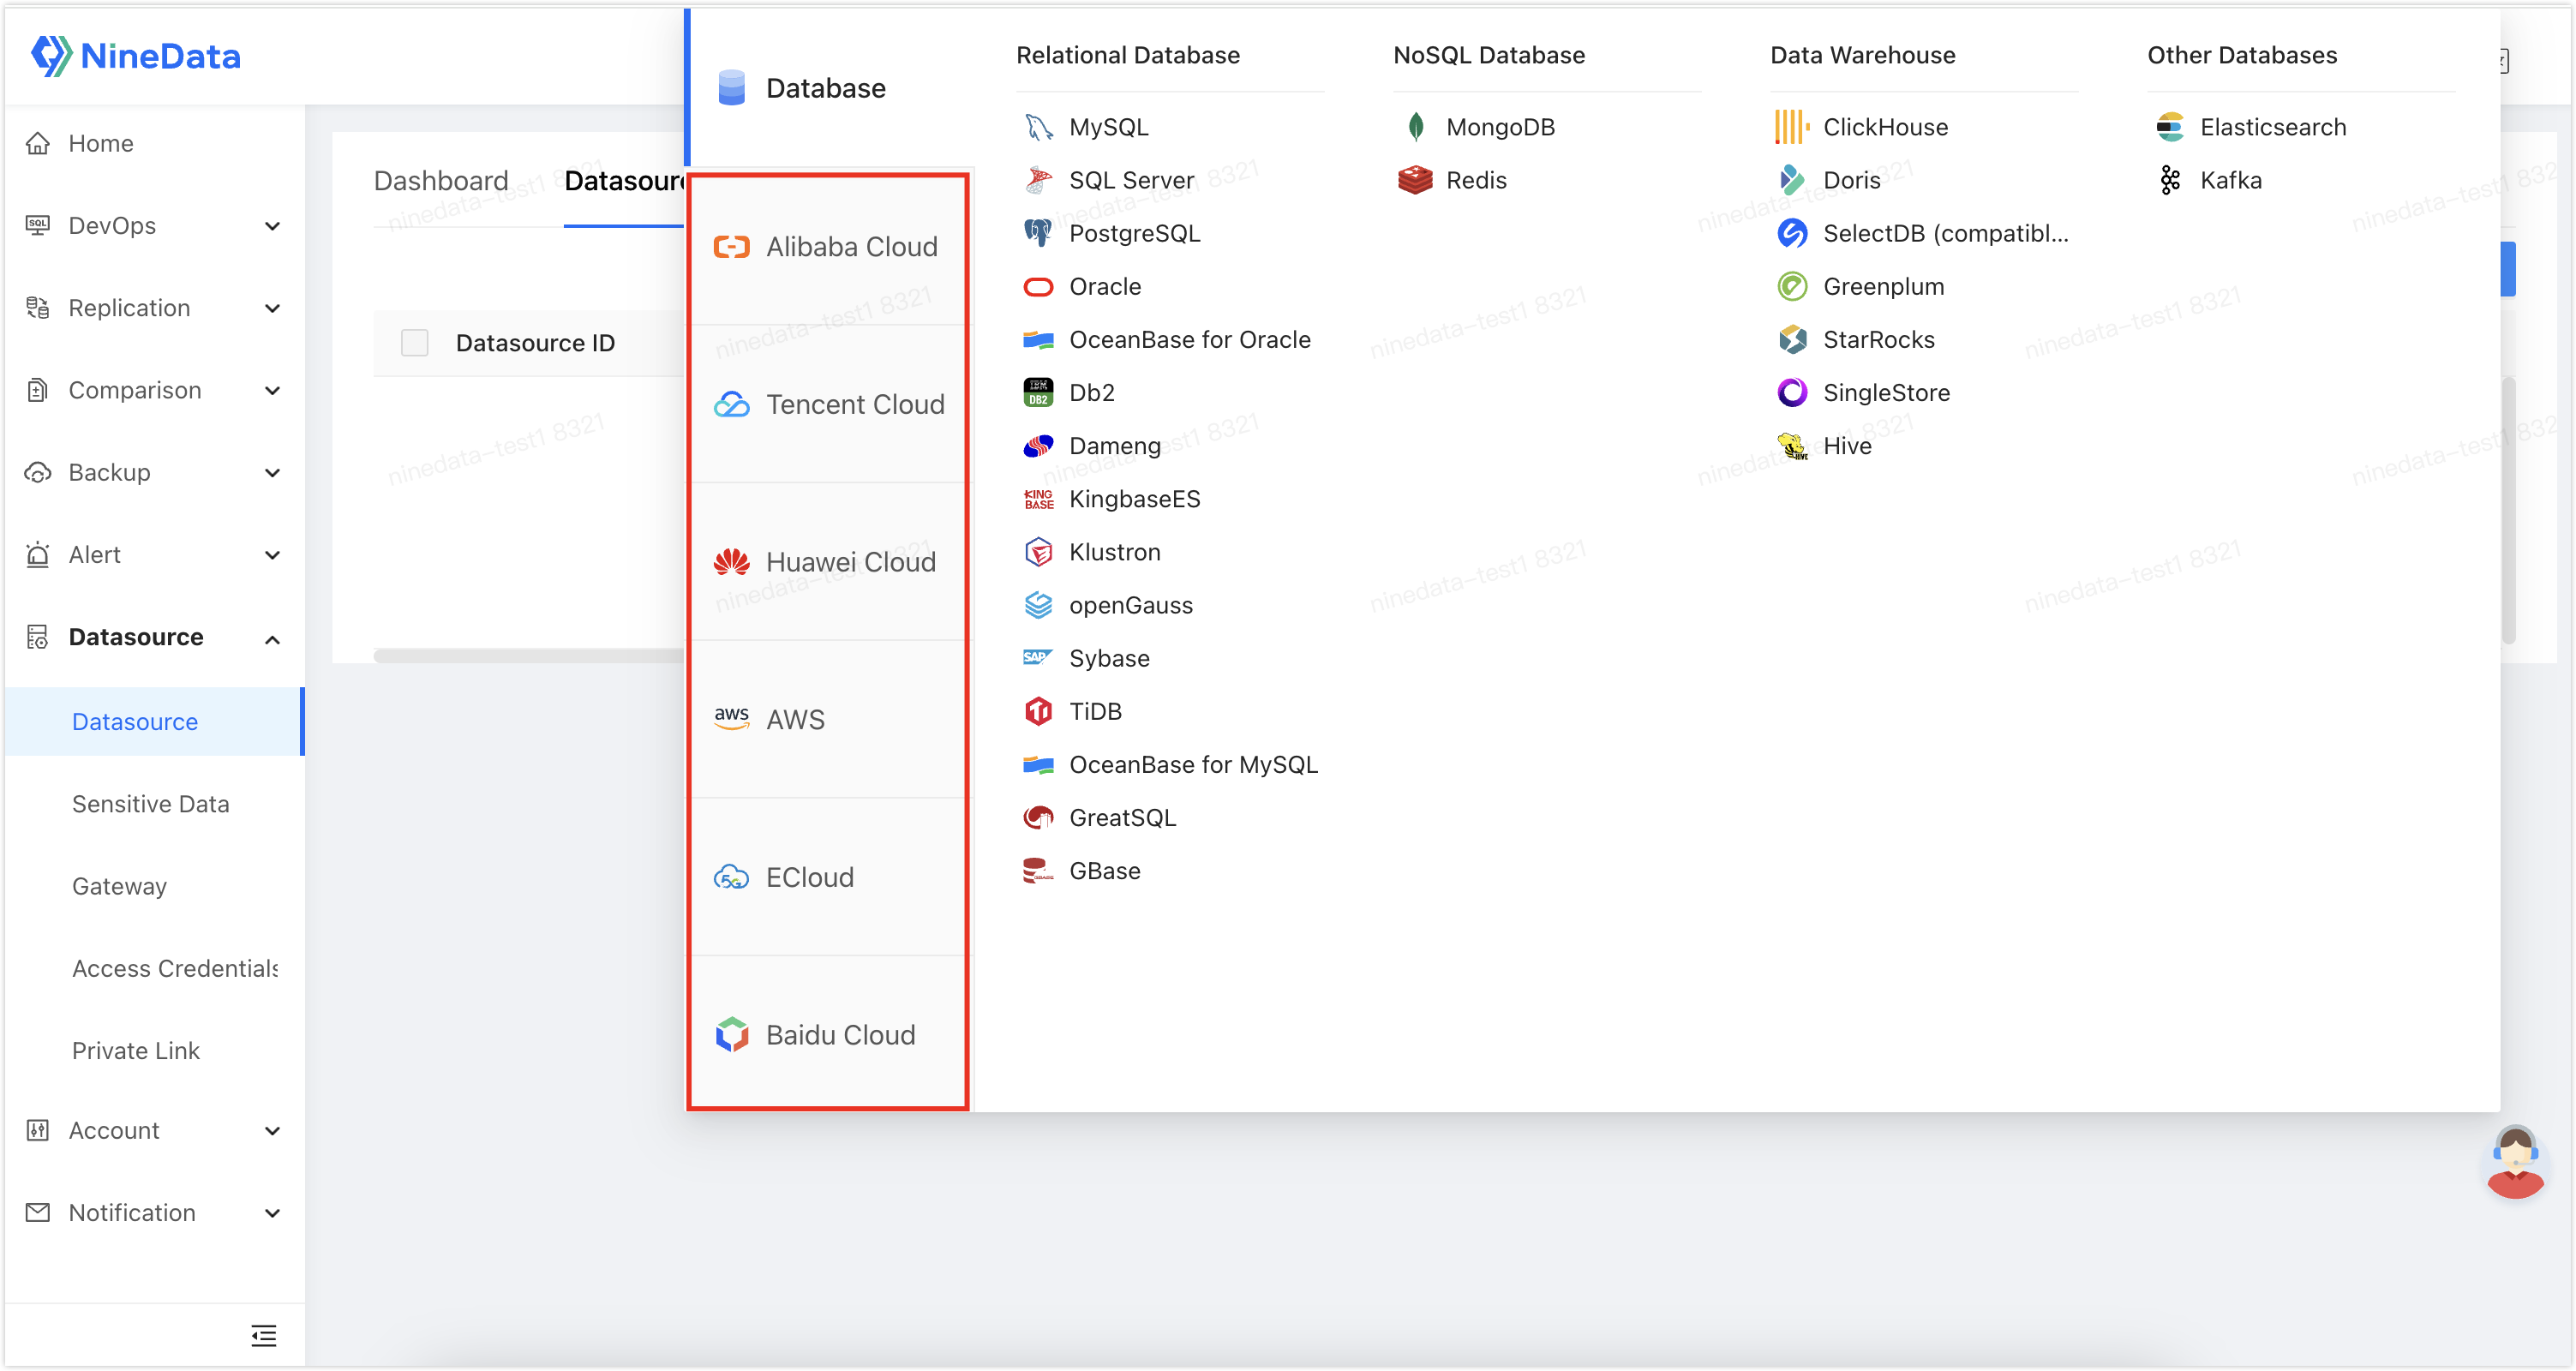
Follow the prompts to add the source and target databases through the private network method.
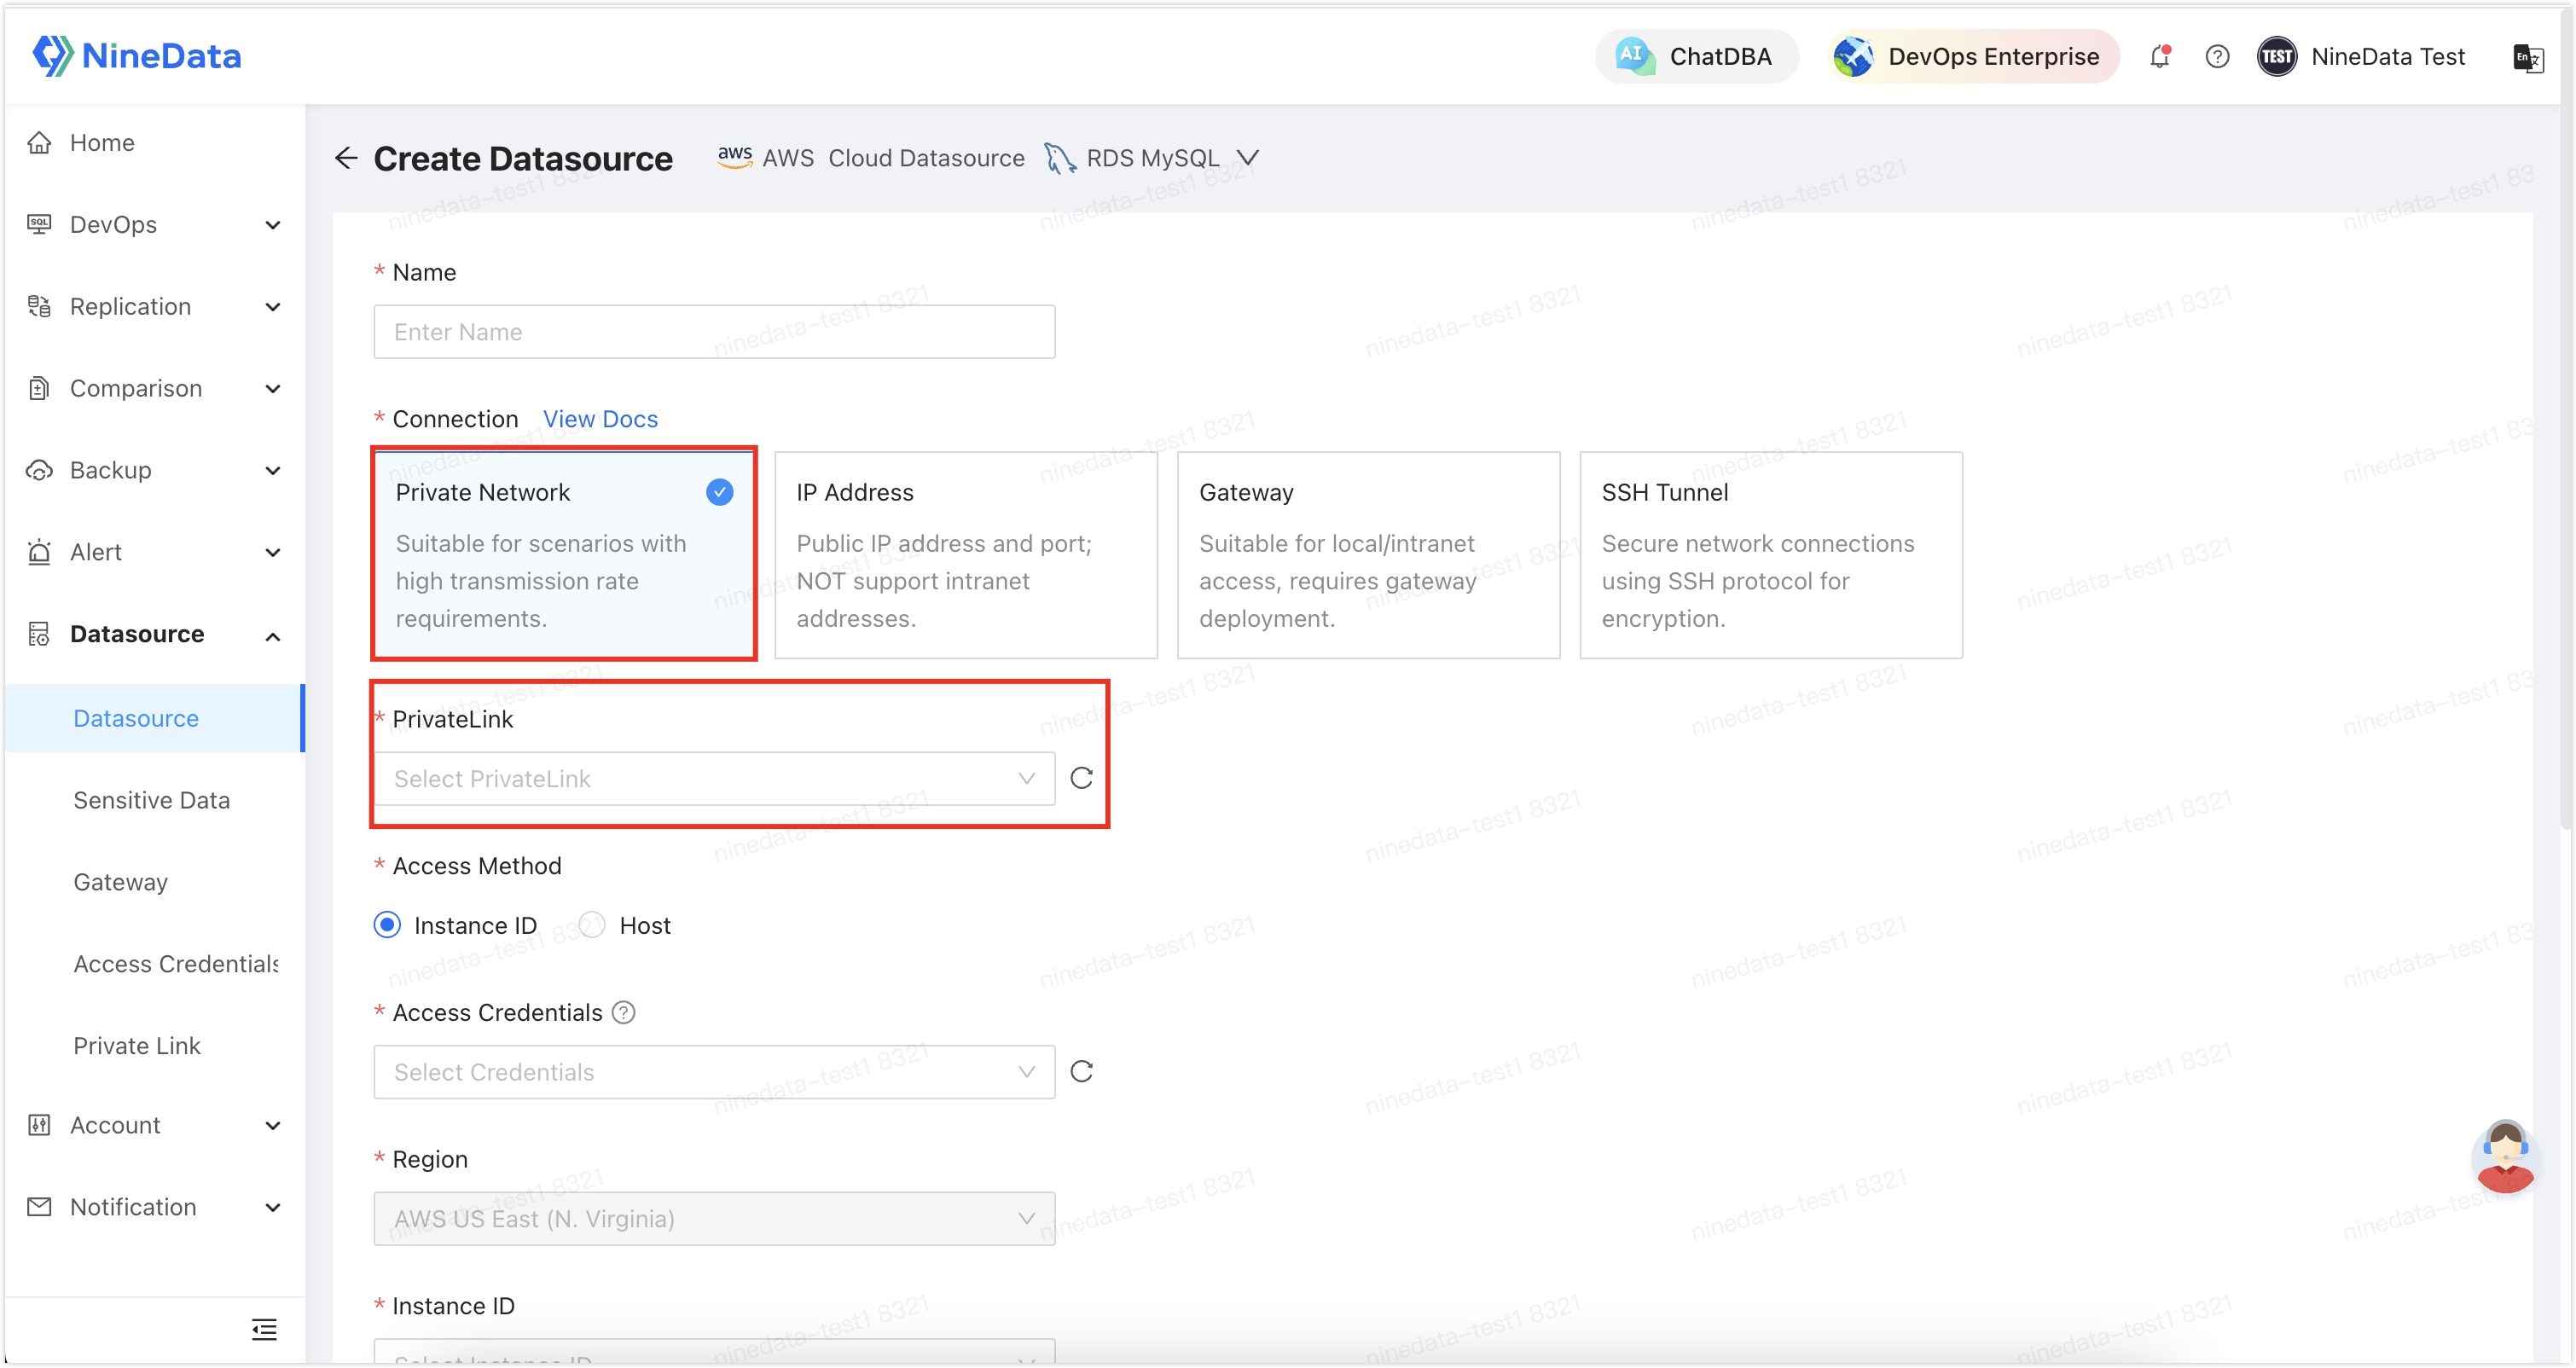
Step 2: Configure the replication task
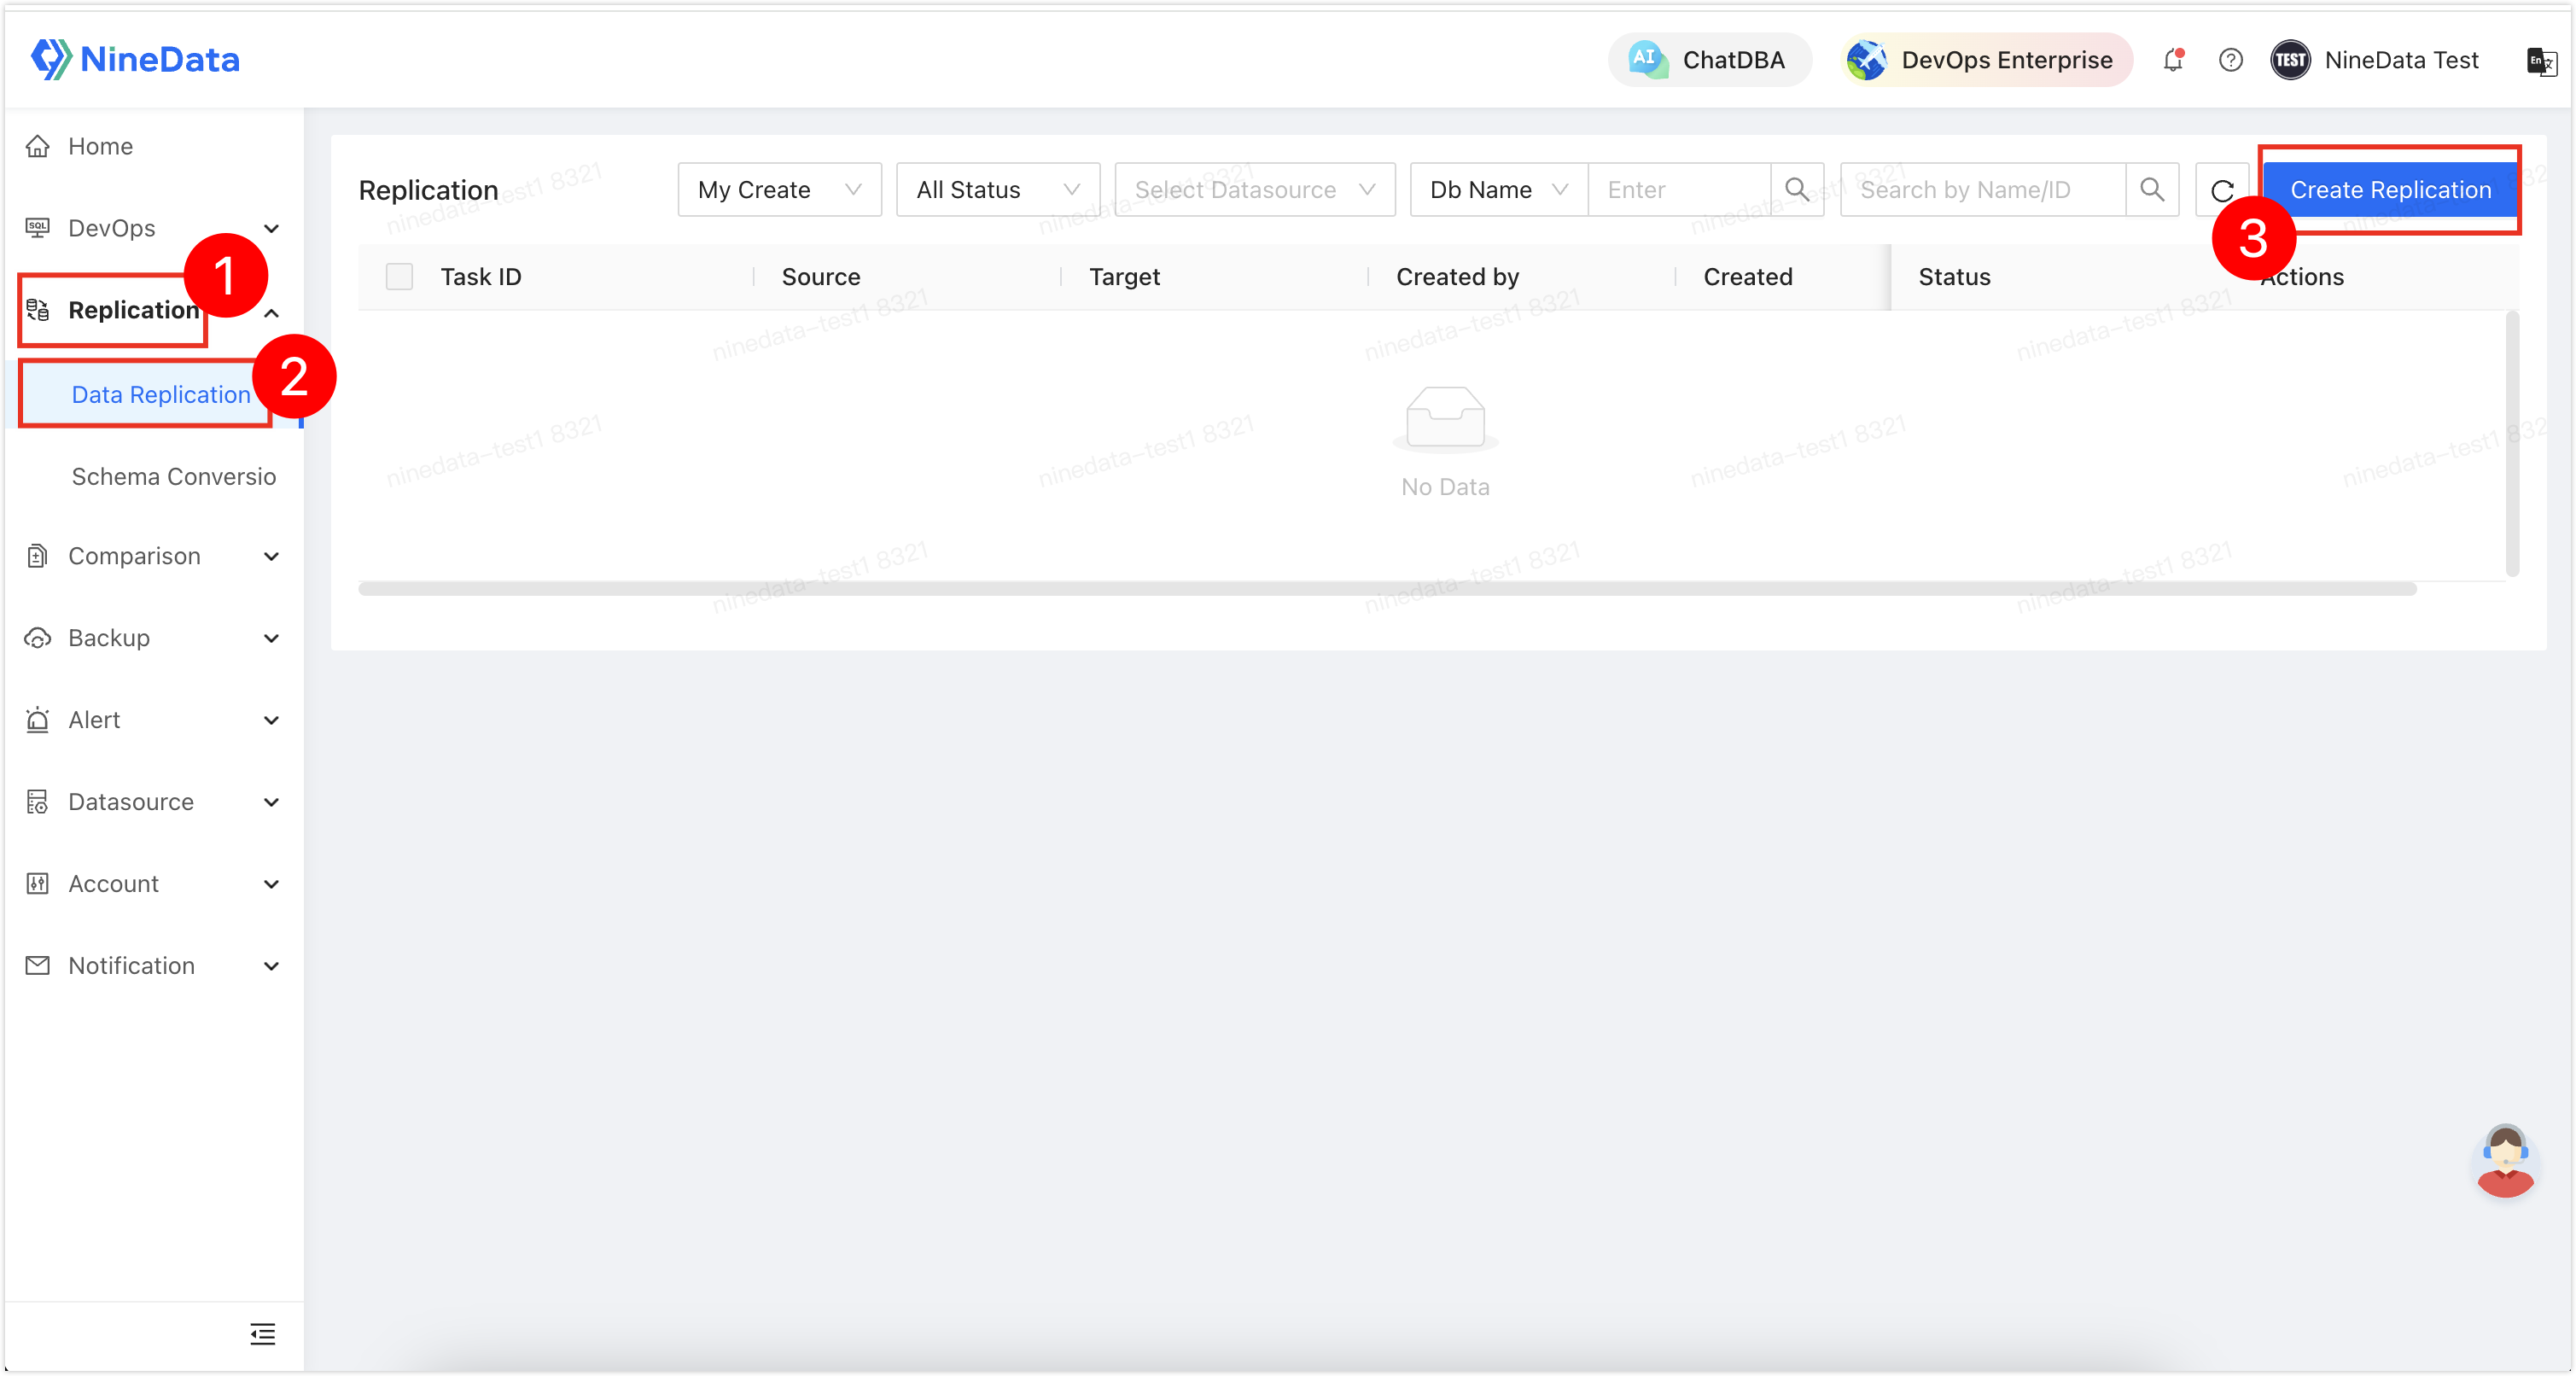
Sign in to the NineData console, go to Replication > Data Replication, and then click Create Replication.
Follow the prompts to configure the replication task. To migrate the structure and all data, select Schema, Full, and Incremental in Type.
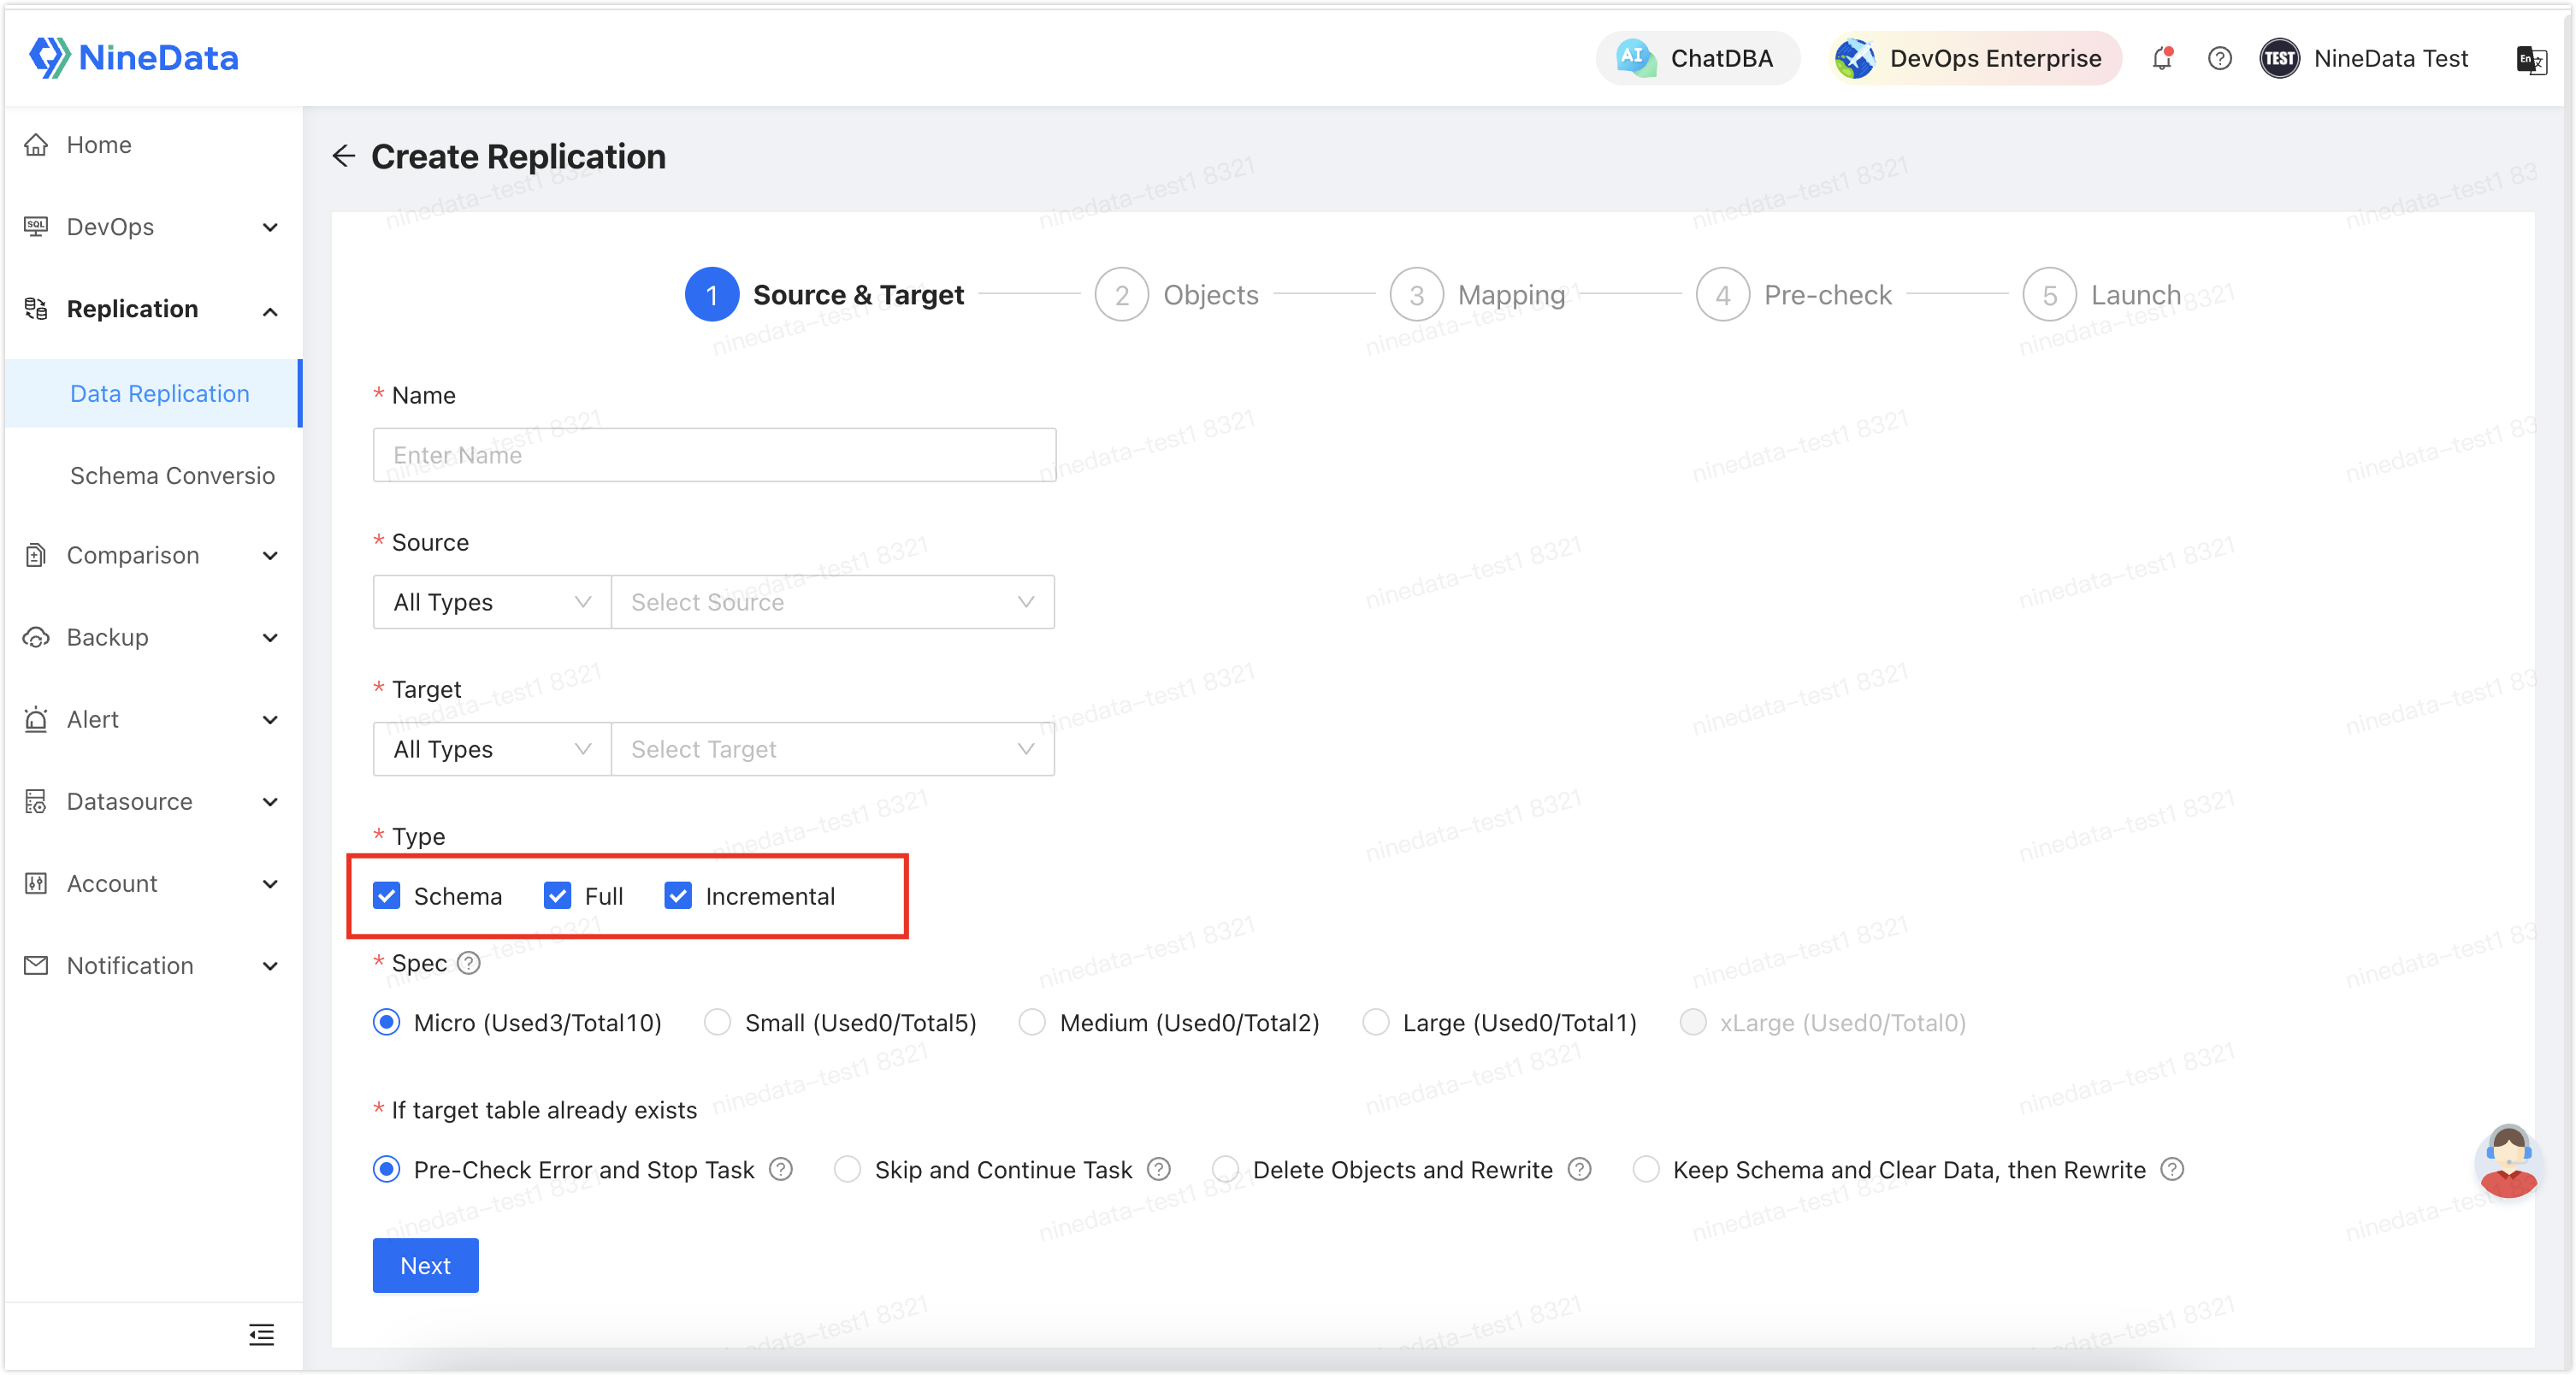
After the configuration is finished, start the task. NineData first migrates existing data and then replicates incremental changes in real time. When the incremental delay reaches 0 s, the target is up to date.
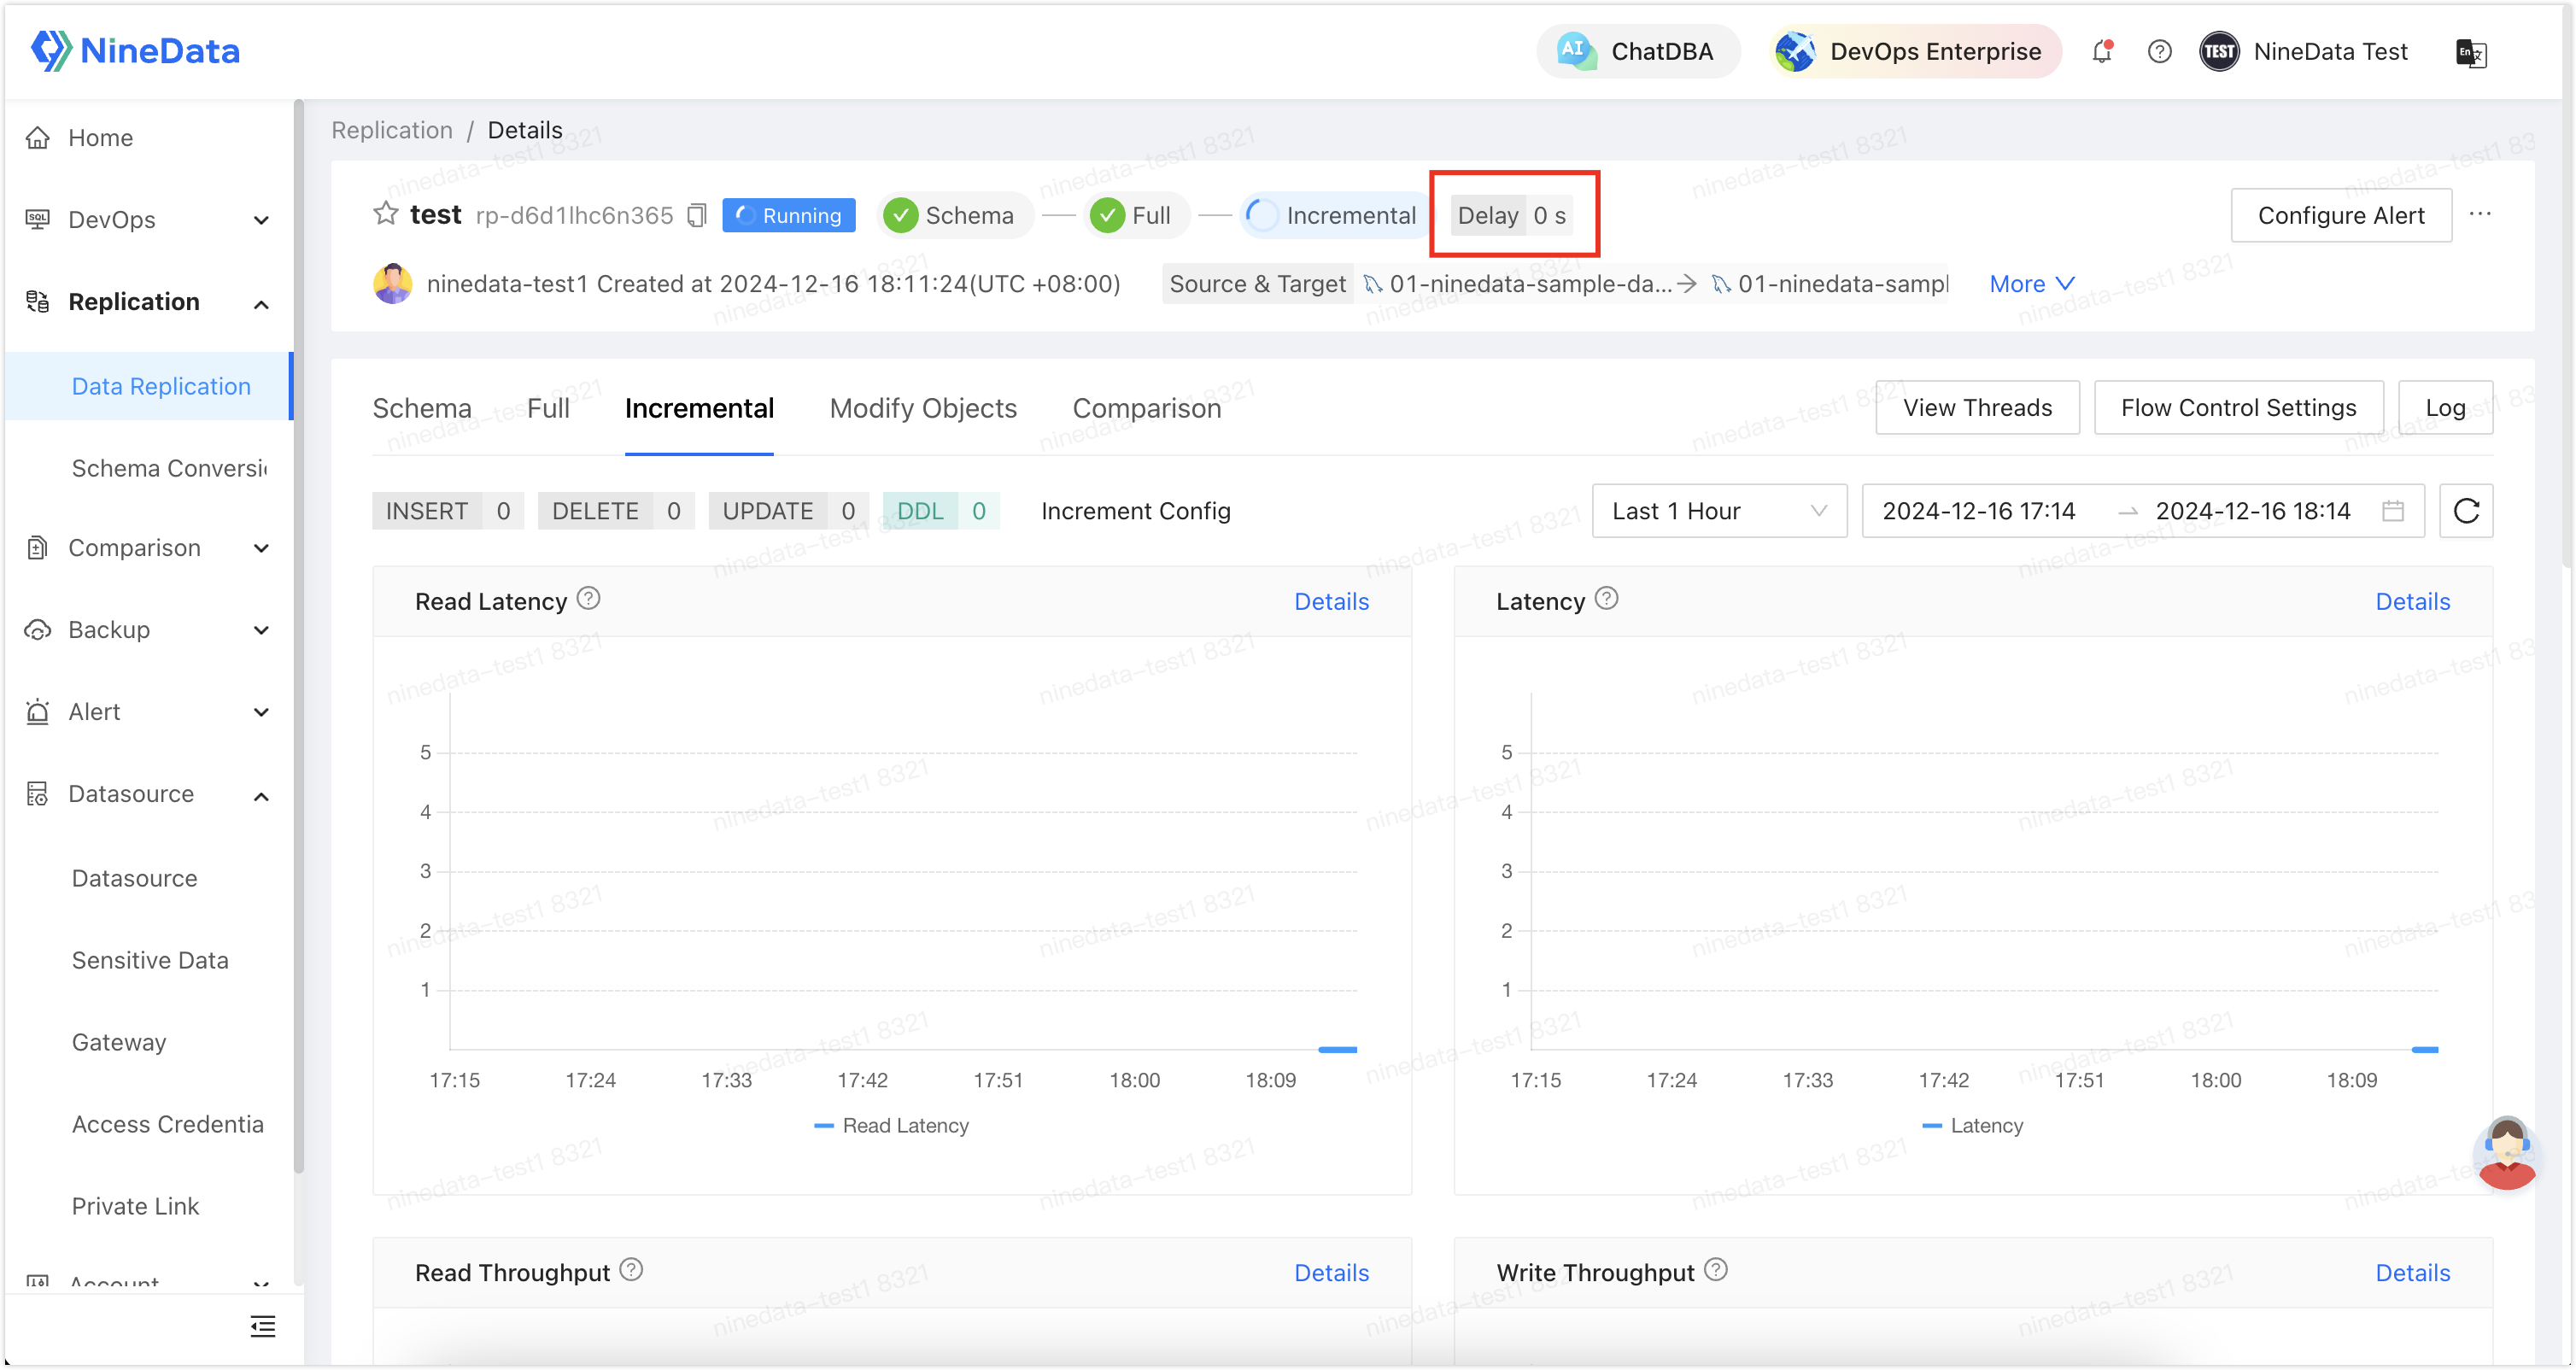
Step 3: Verify data integrity on the target
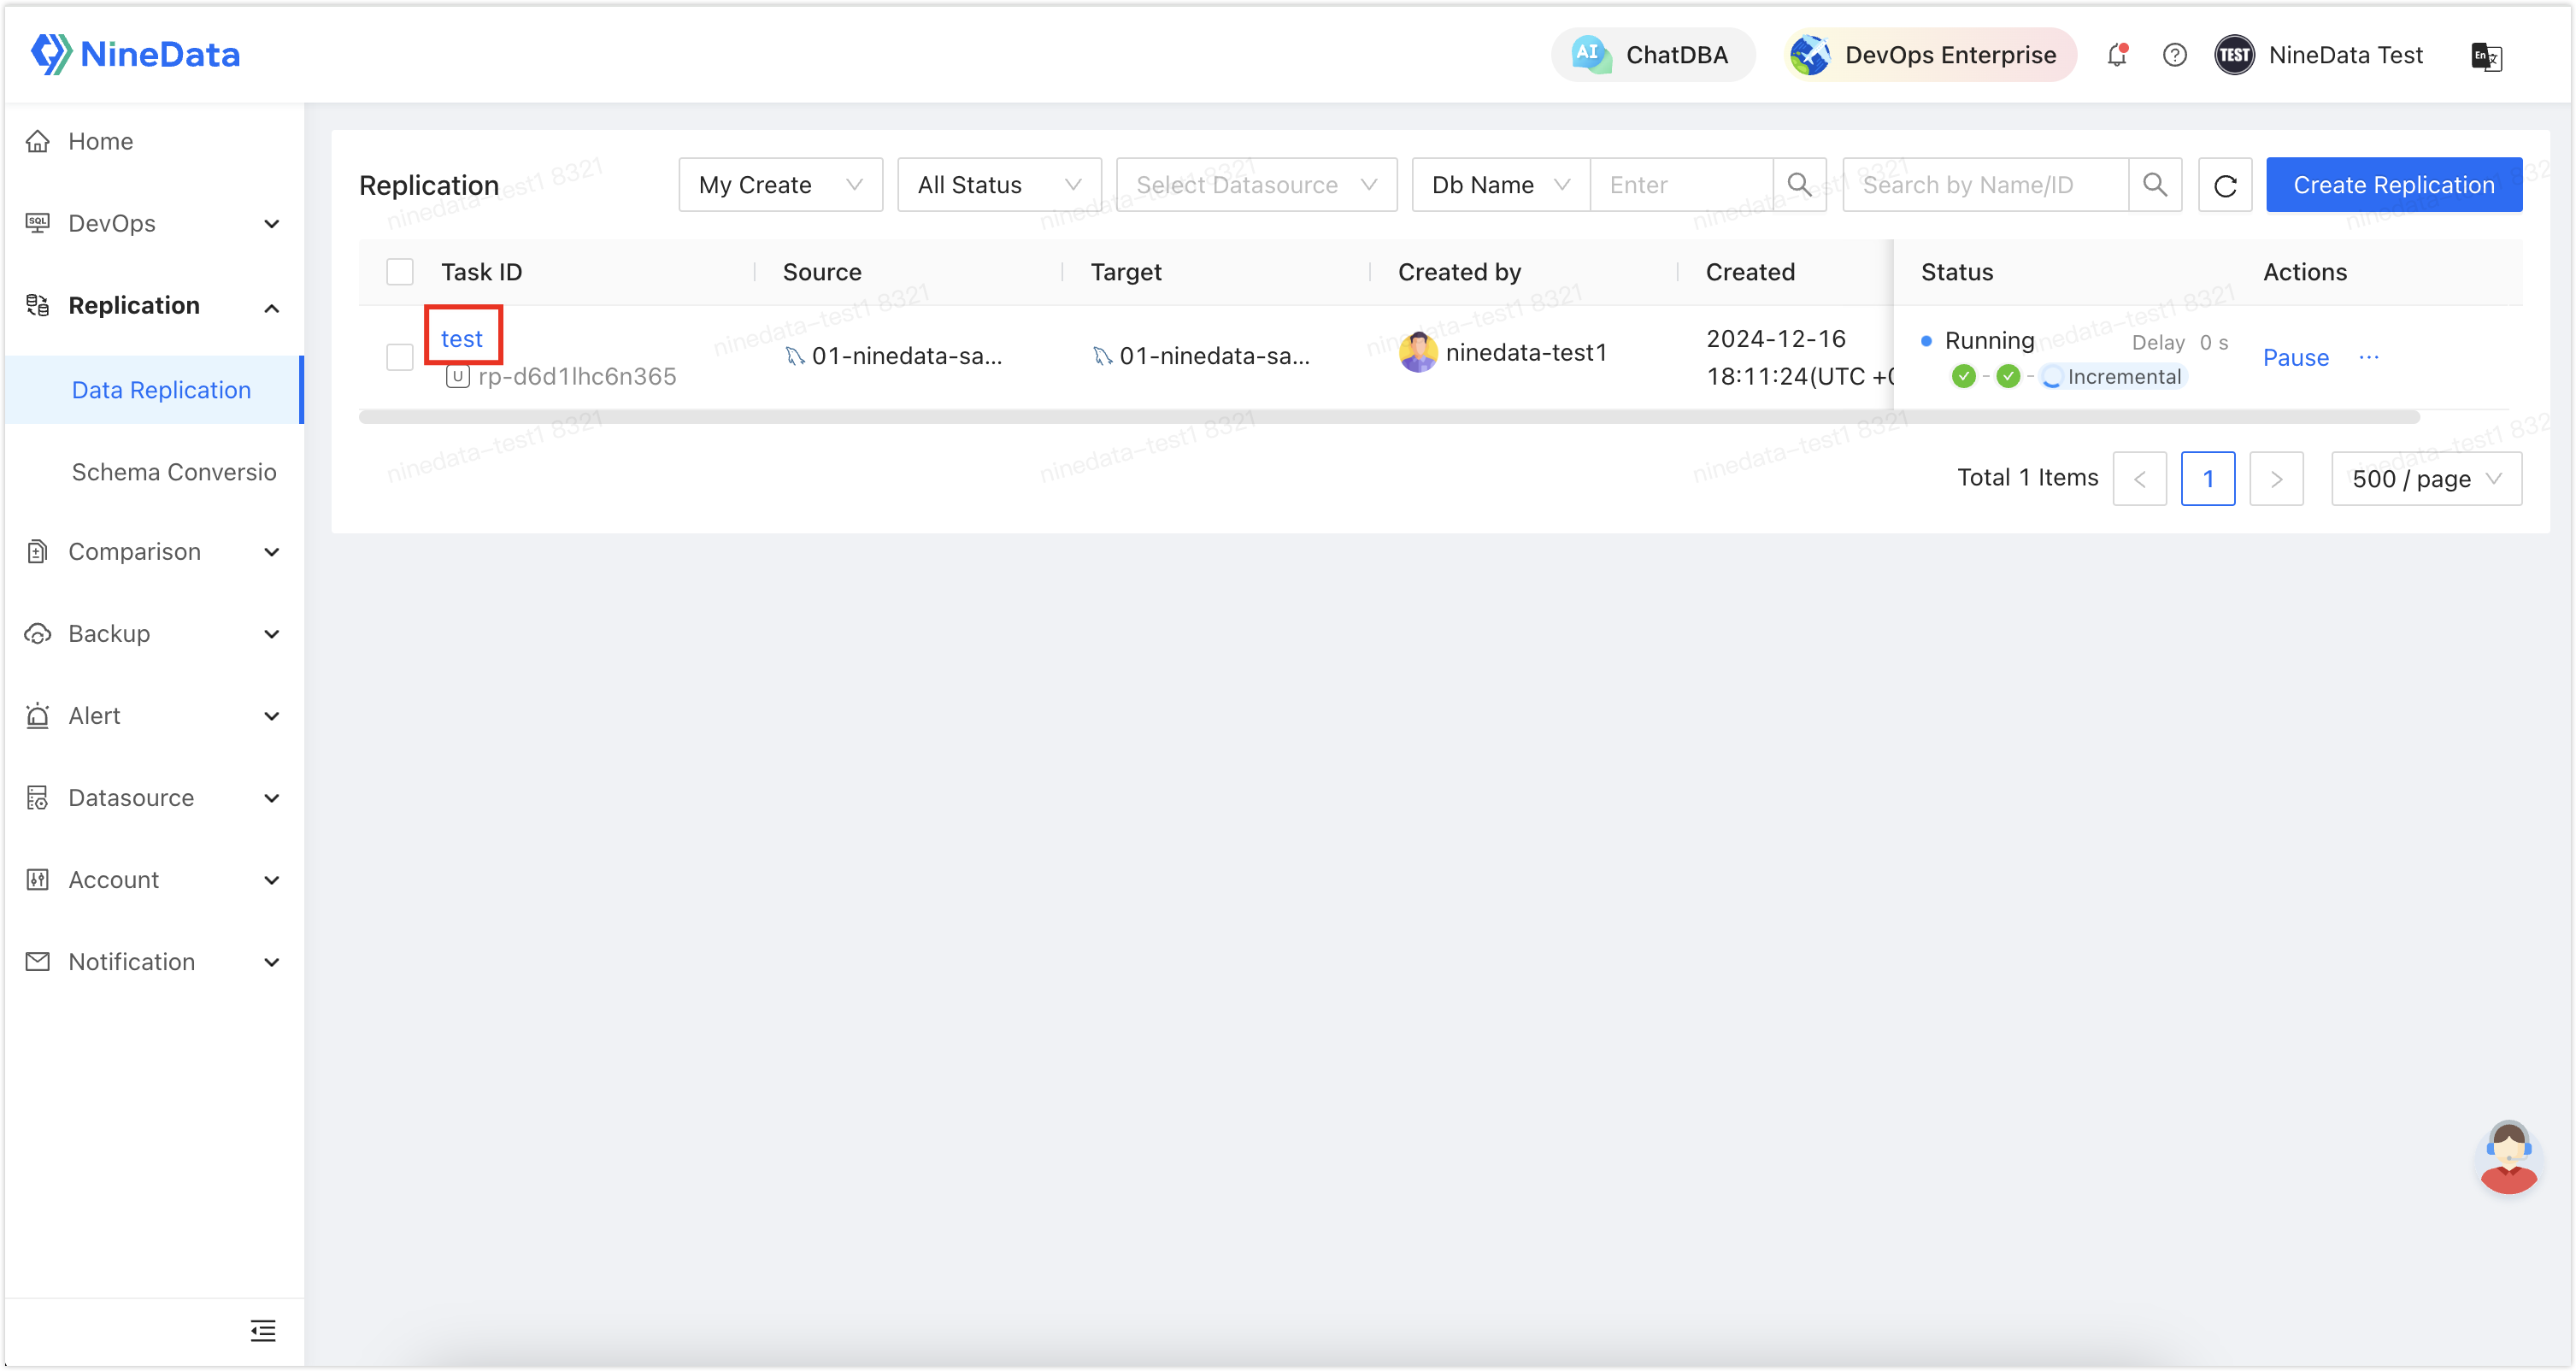
Sign in to the NineData console, go to Replication > Data Replication, and then click the replication task ID created in Step 2.
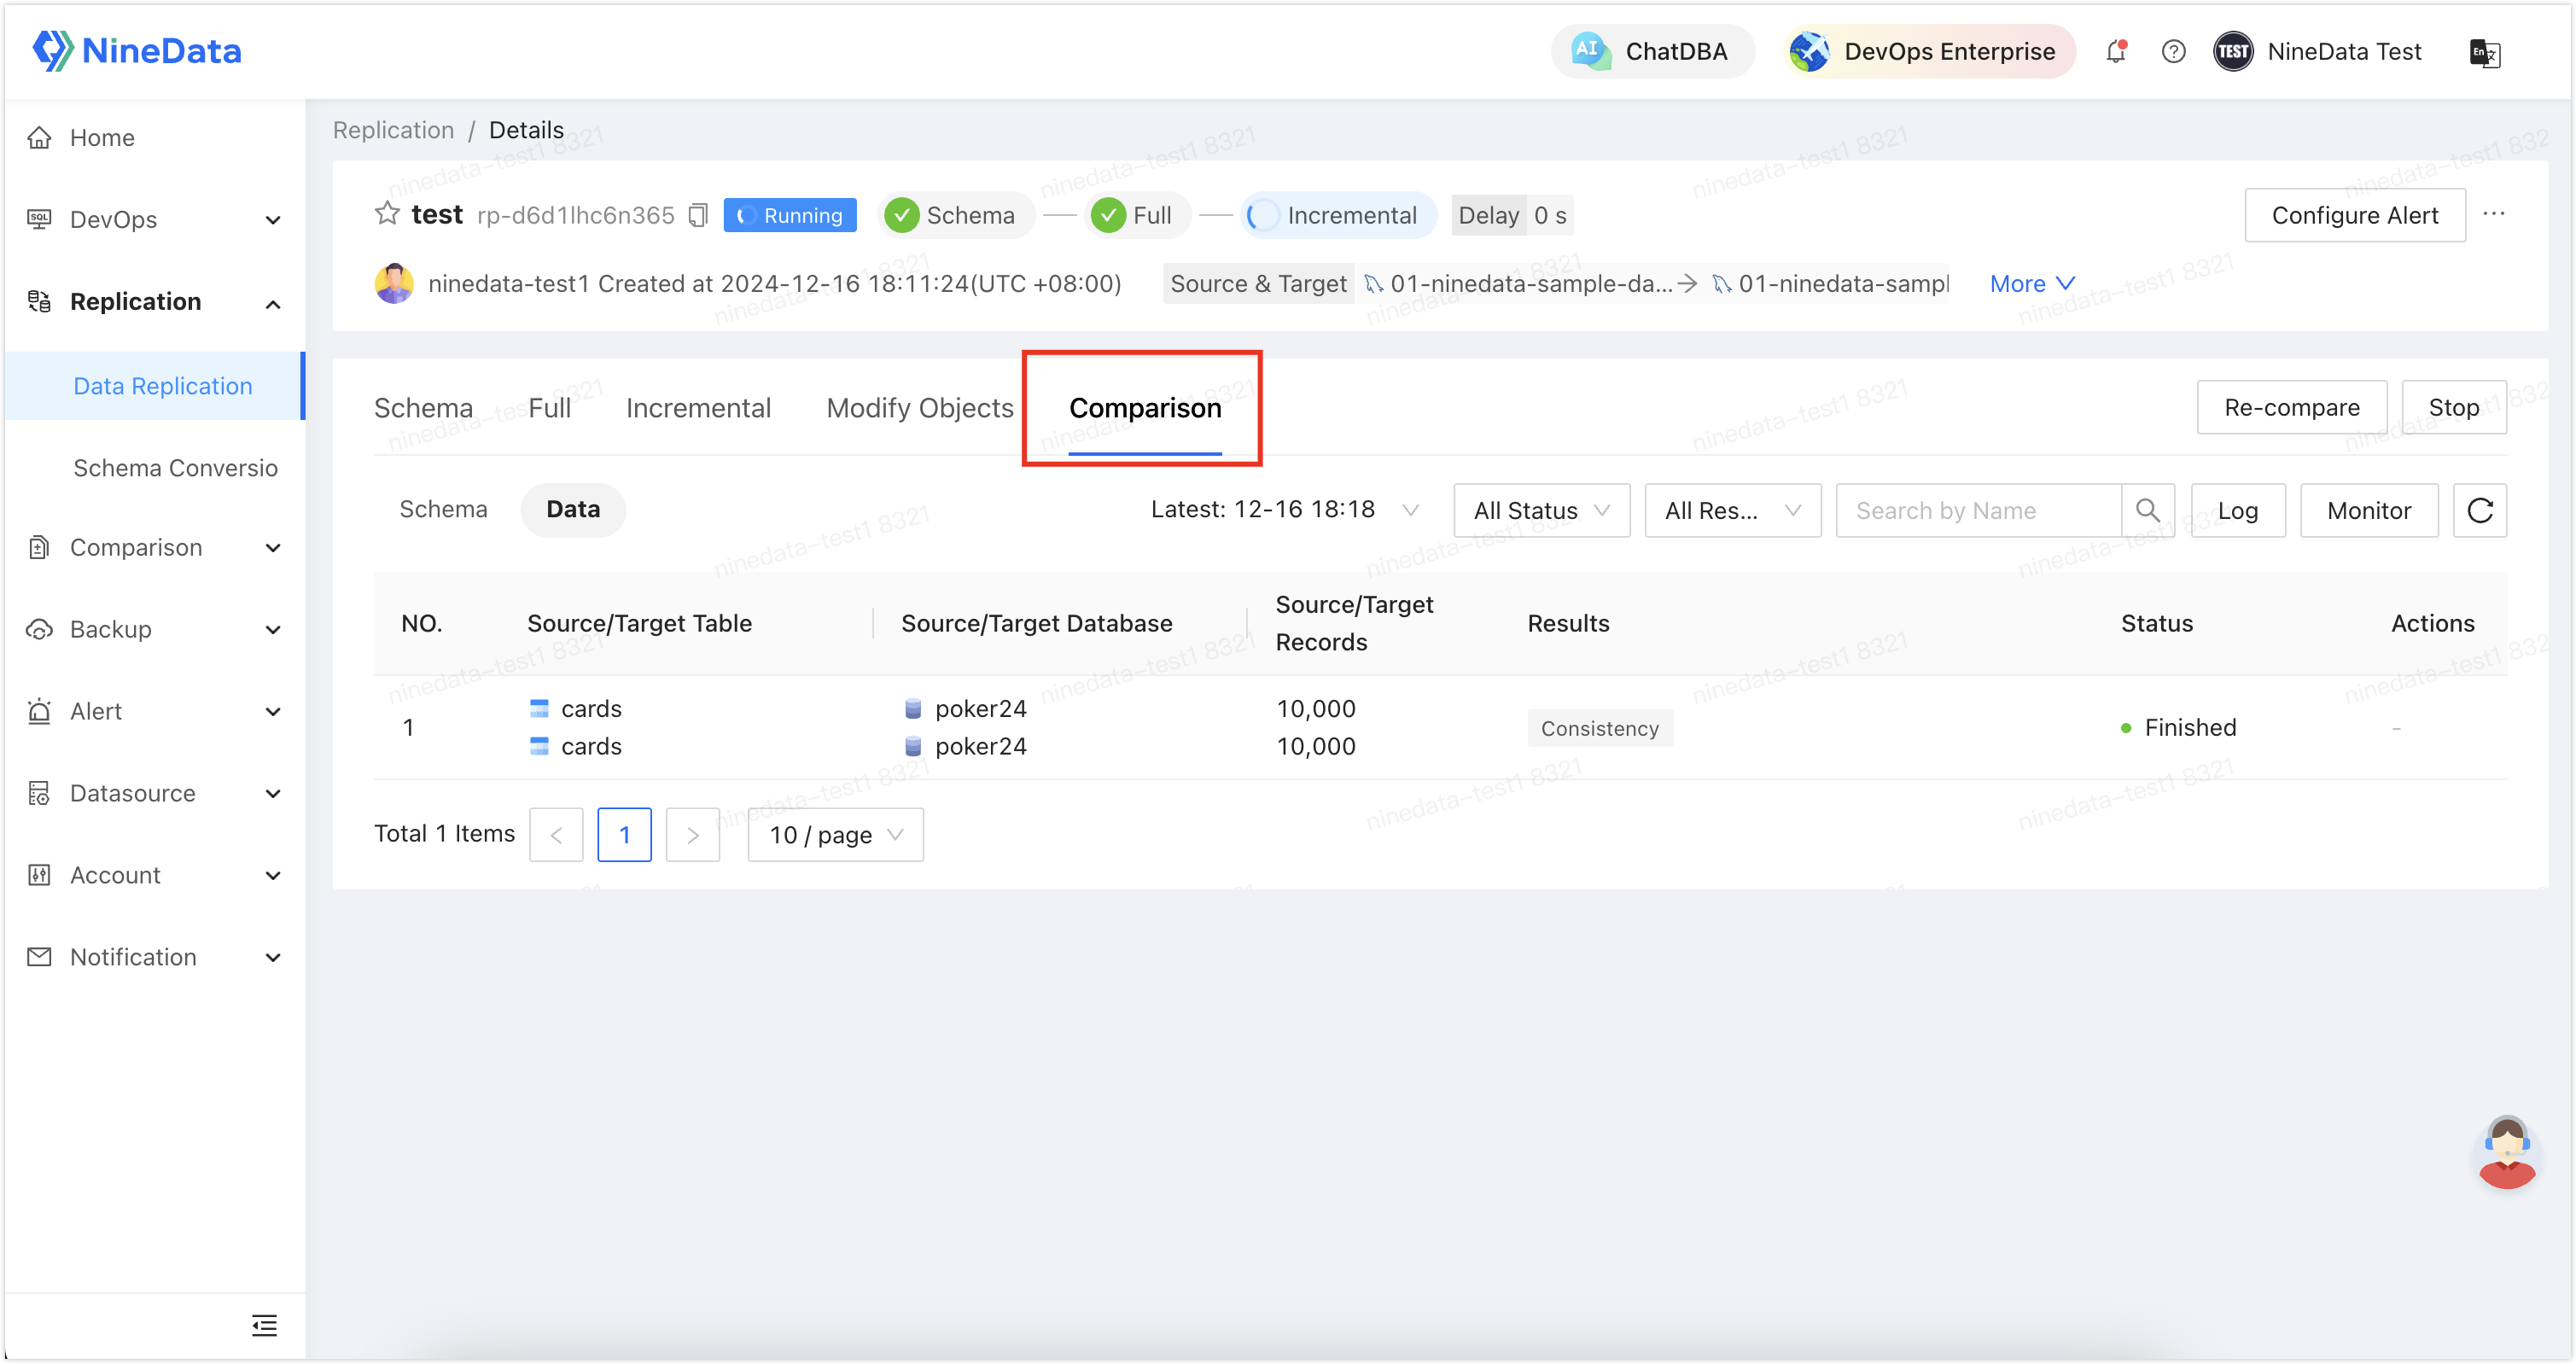
Open the Comparison tab to view the comparison results. If you did not enable comparison in Step 2, click Enable Comparison here.
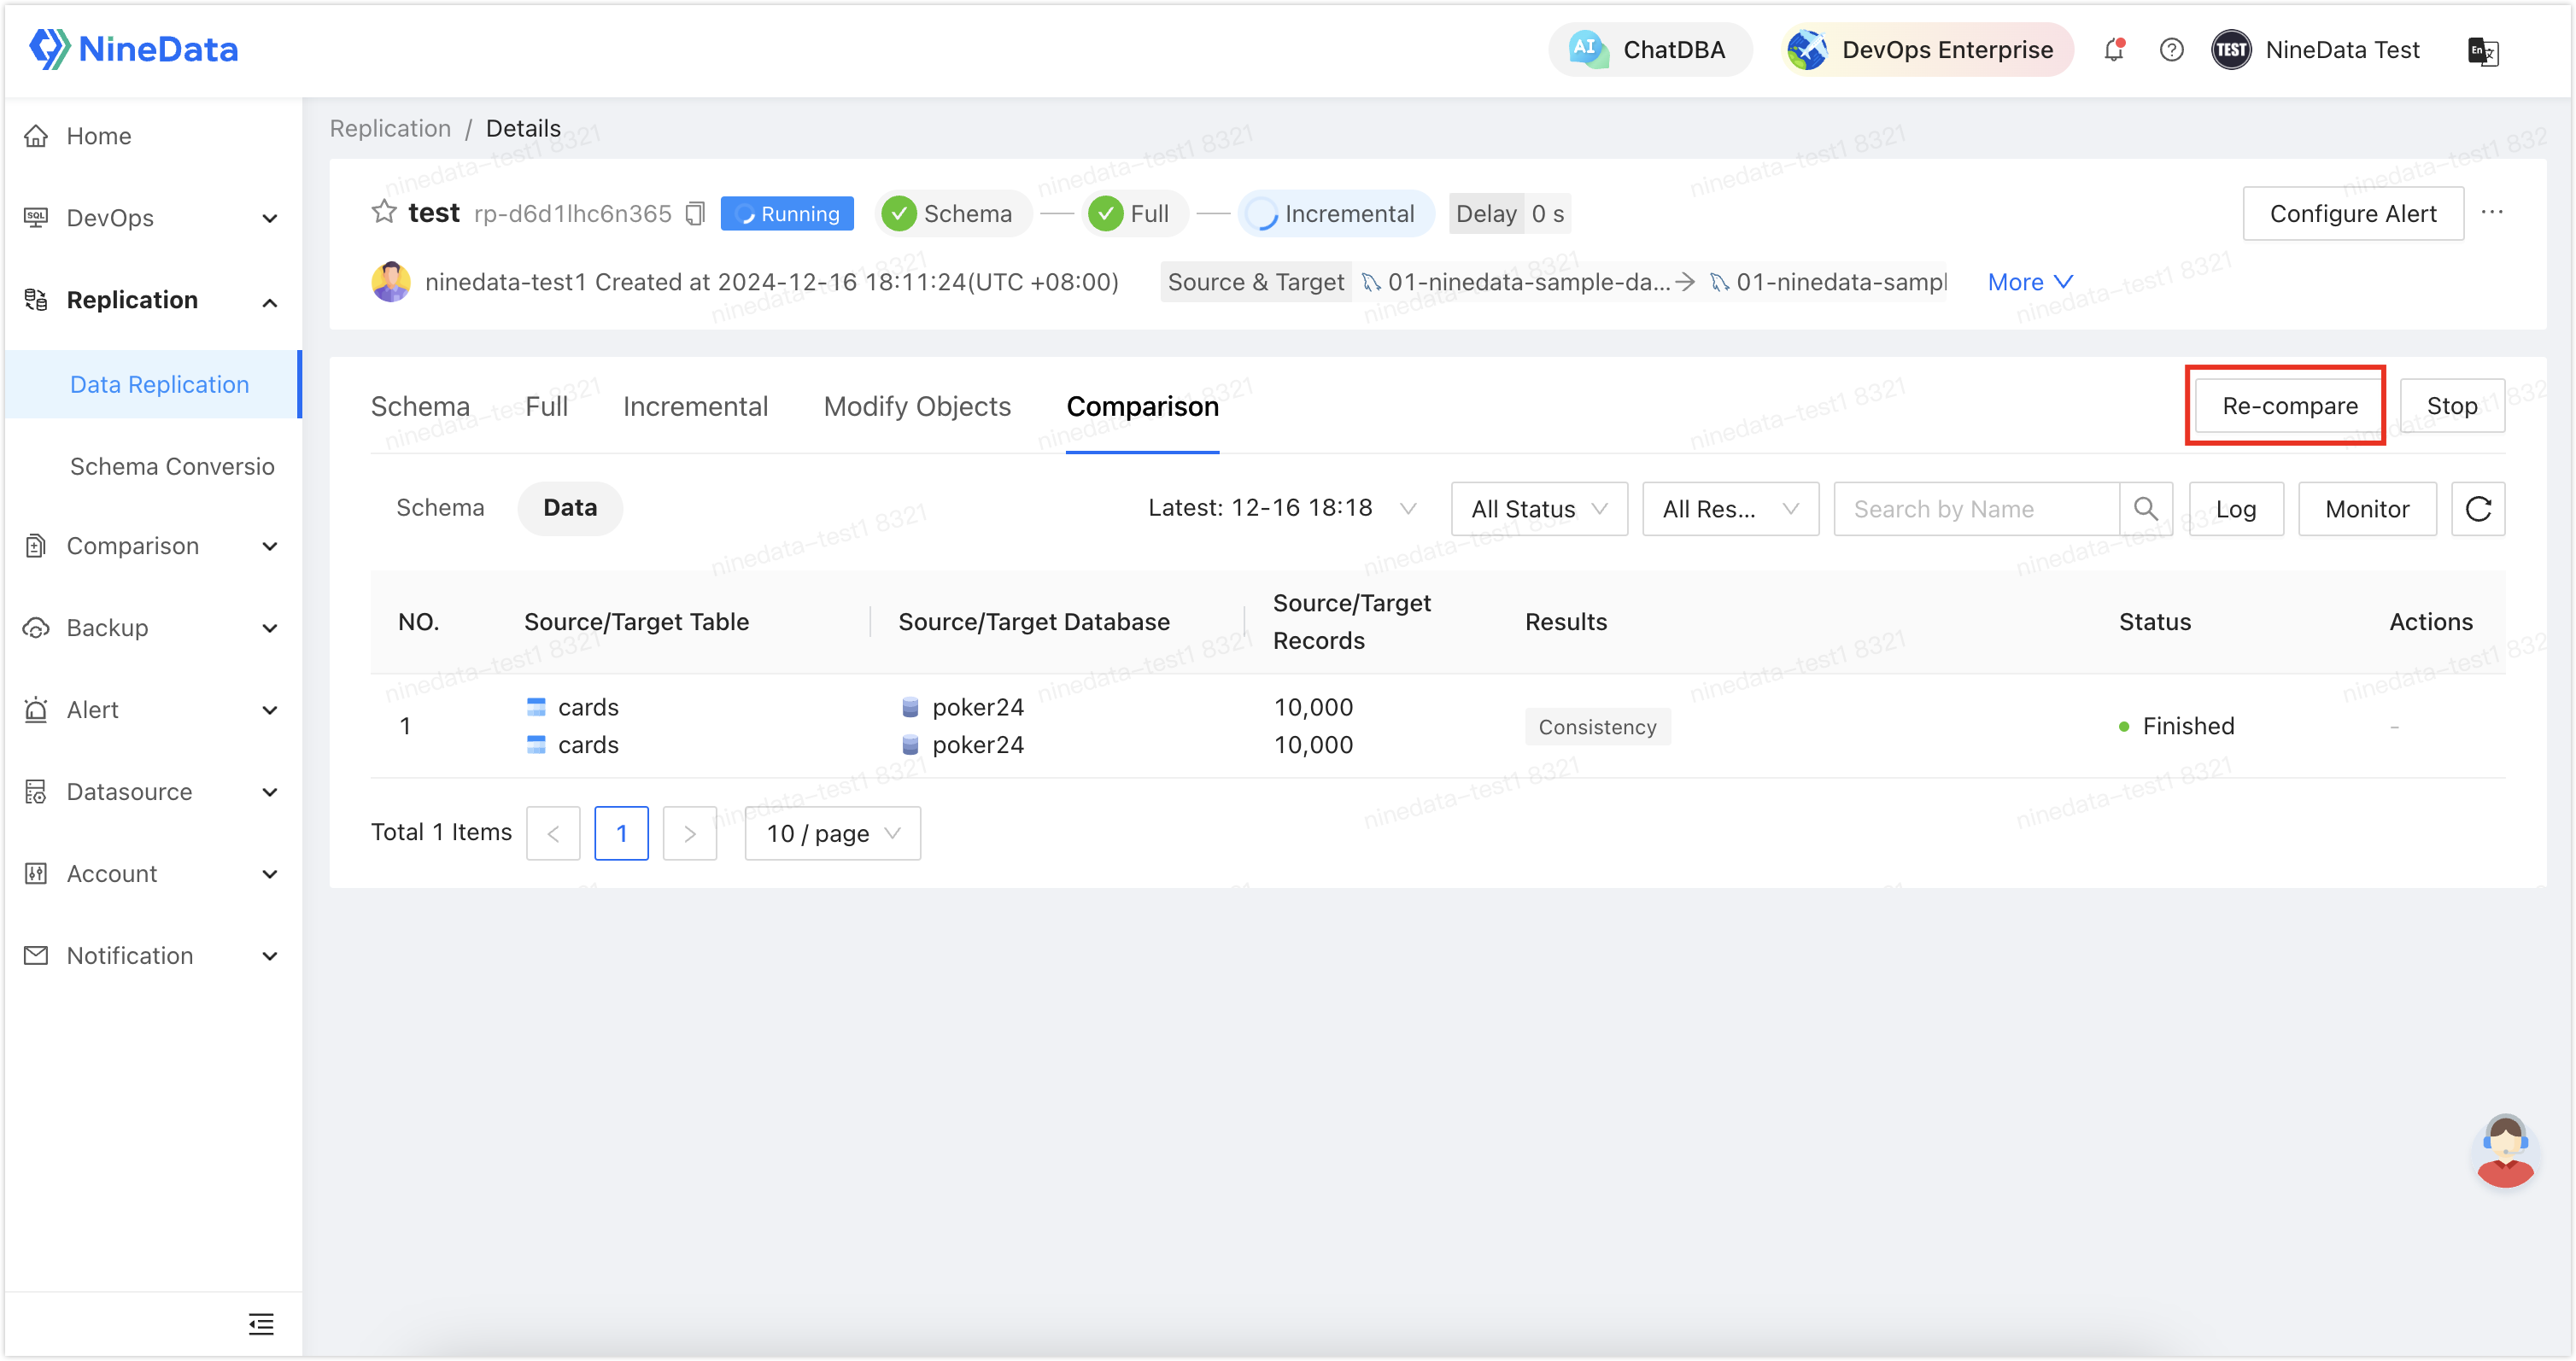
After some time, click Re-compare to verify the latest incremental data.
Step 4: Configure task alerts
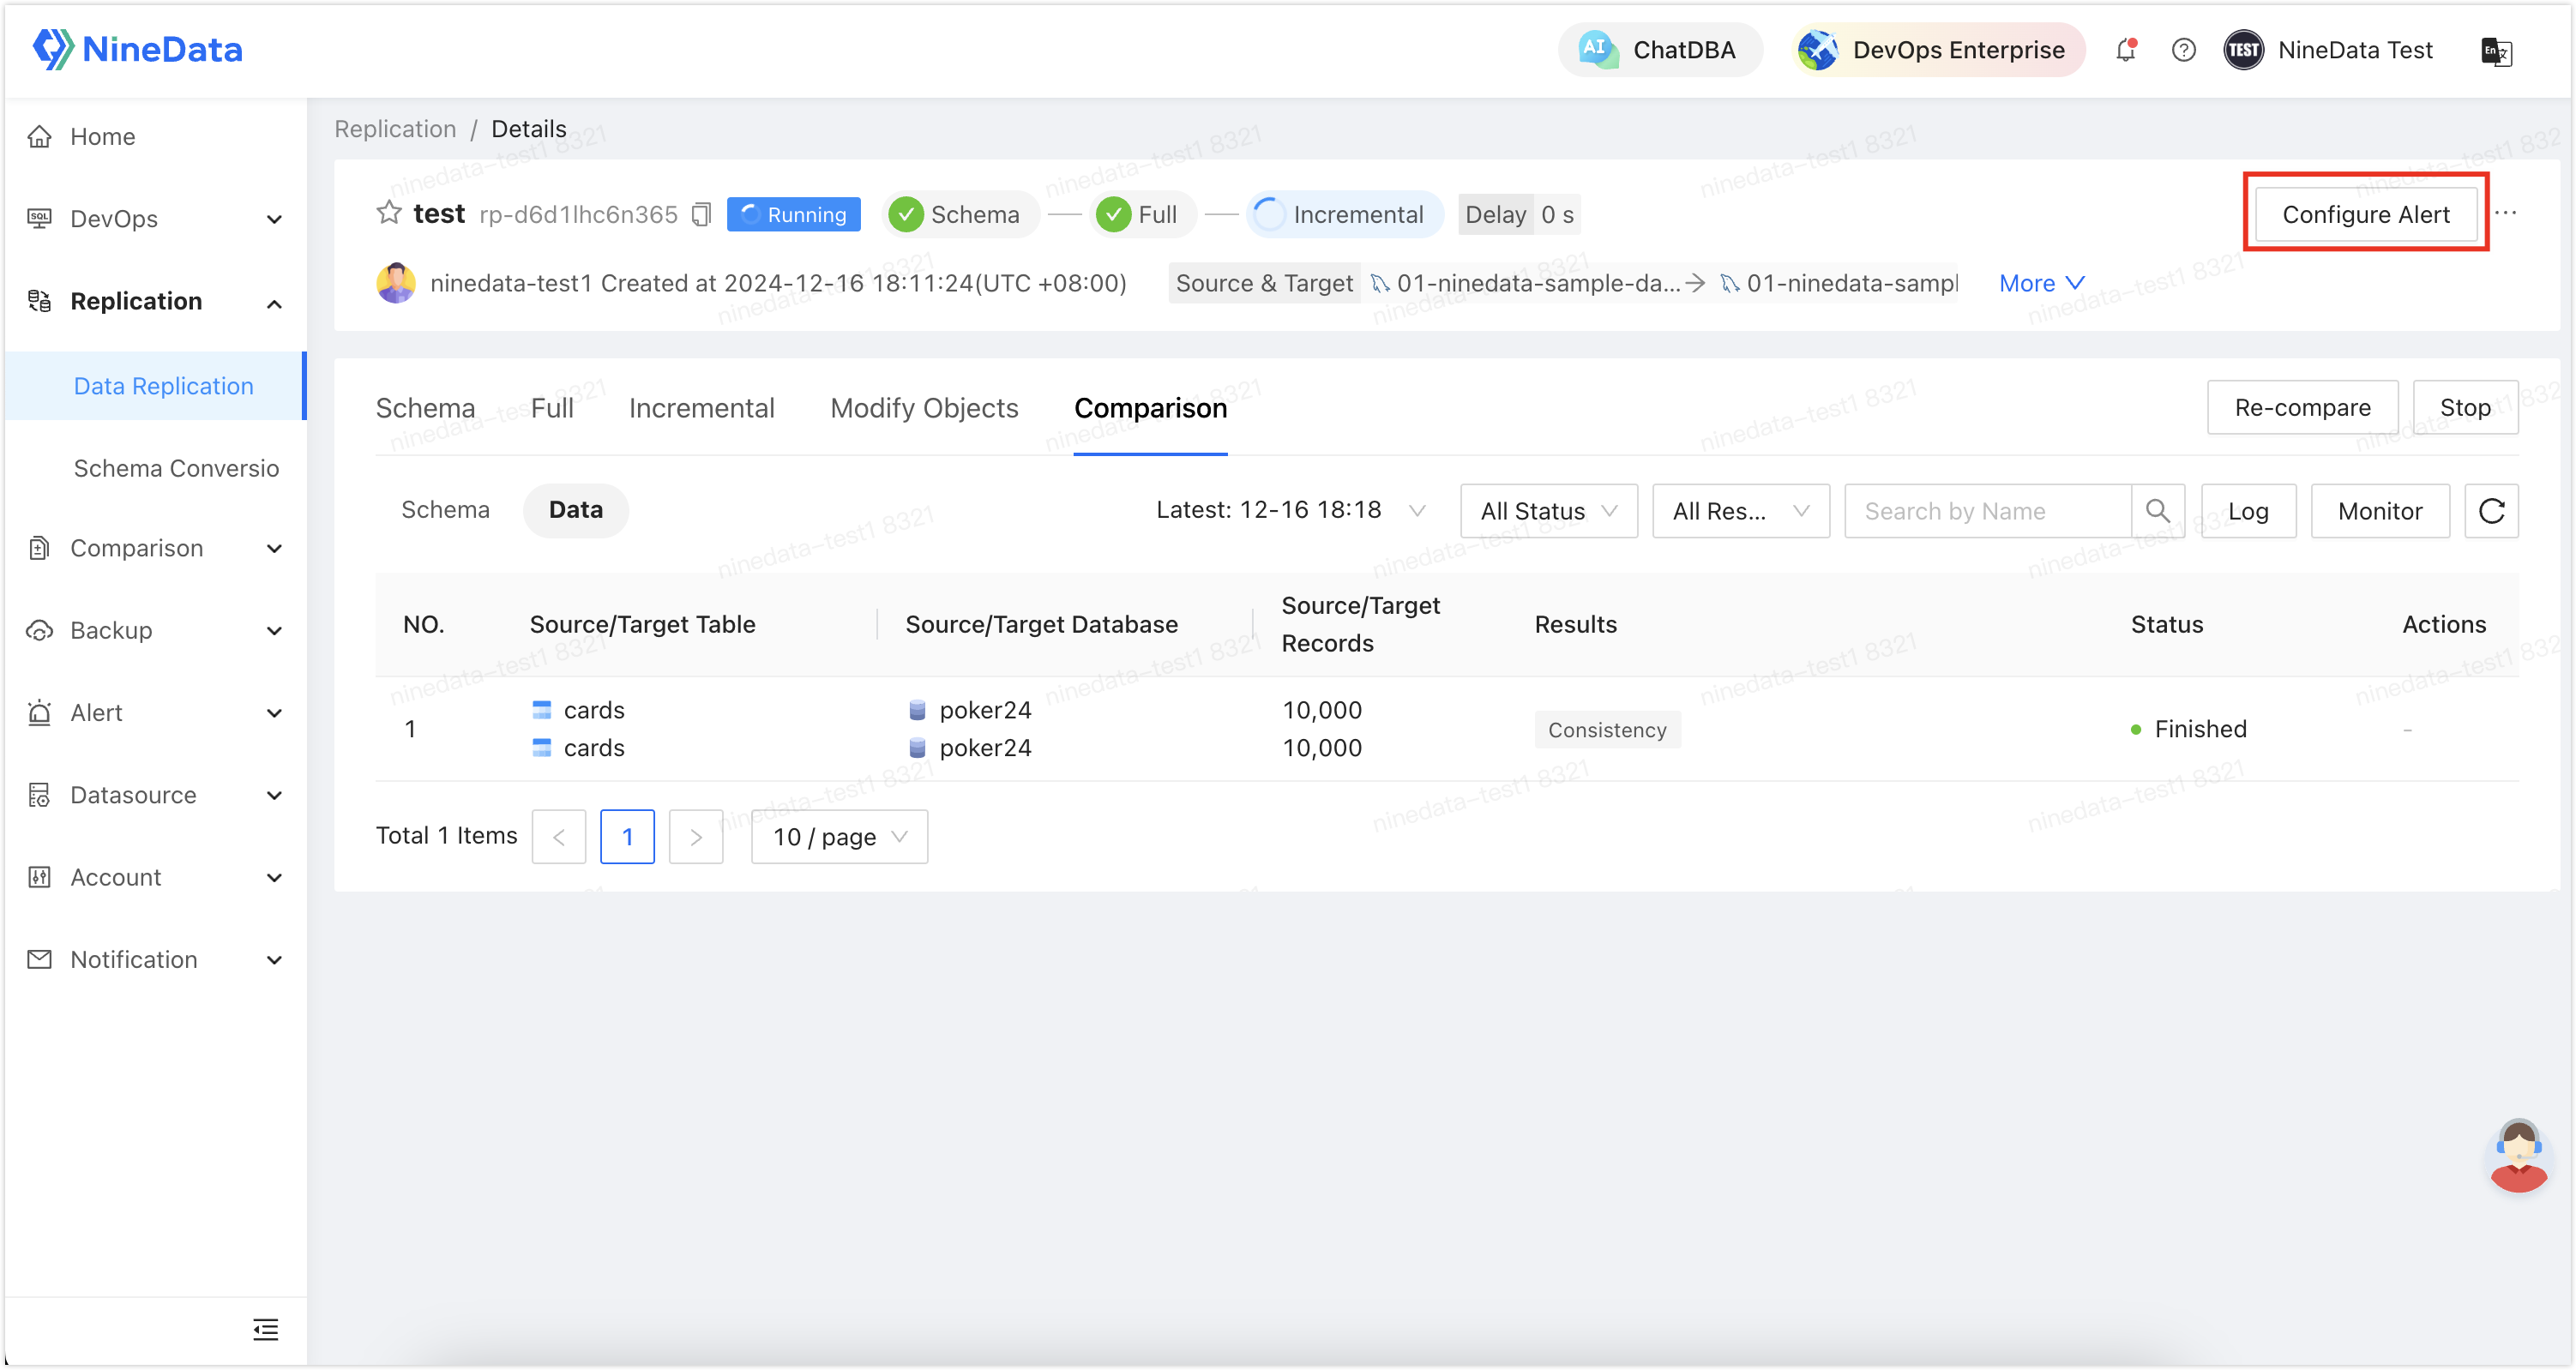
Because this is a long-running migration task, you may want real-time alerts for failures or delays.
Sign in to the NineData console, go to Replication > Data Replication, and then click the replication task ID created in Step 2.
Click Configure Alert in the page header.
Configure the alert policy and click Save. Use the built-in rules to send SMS reminders when the task fails or the replication delay reaches 10 minutes. Create custom rules if required.
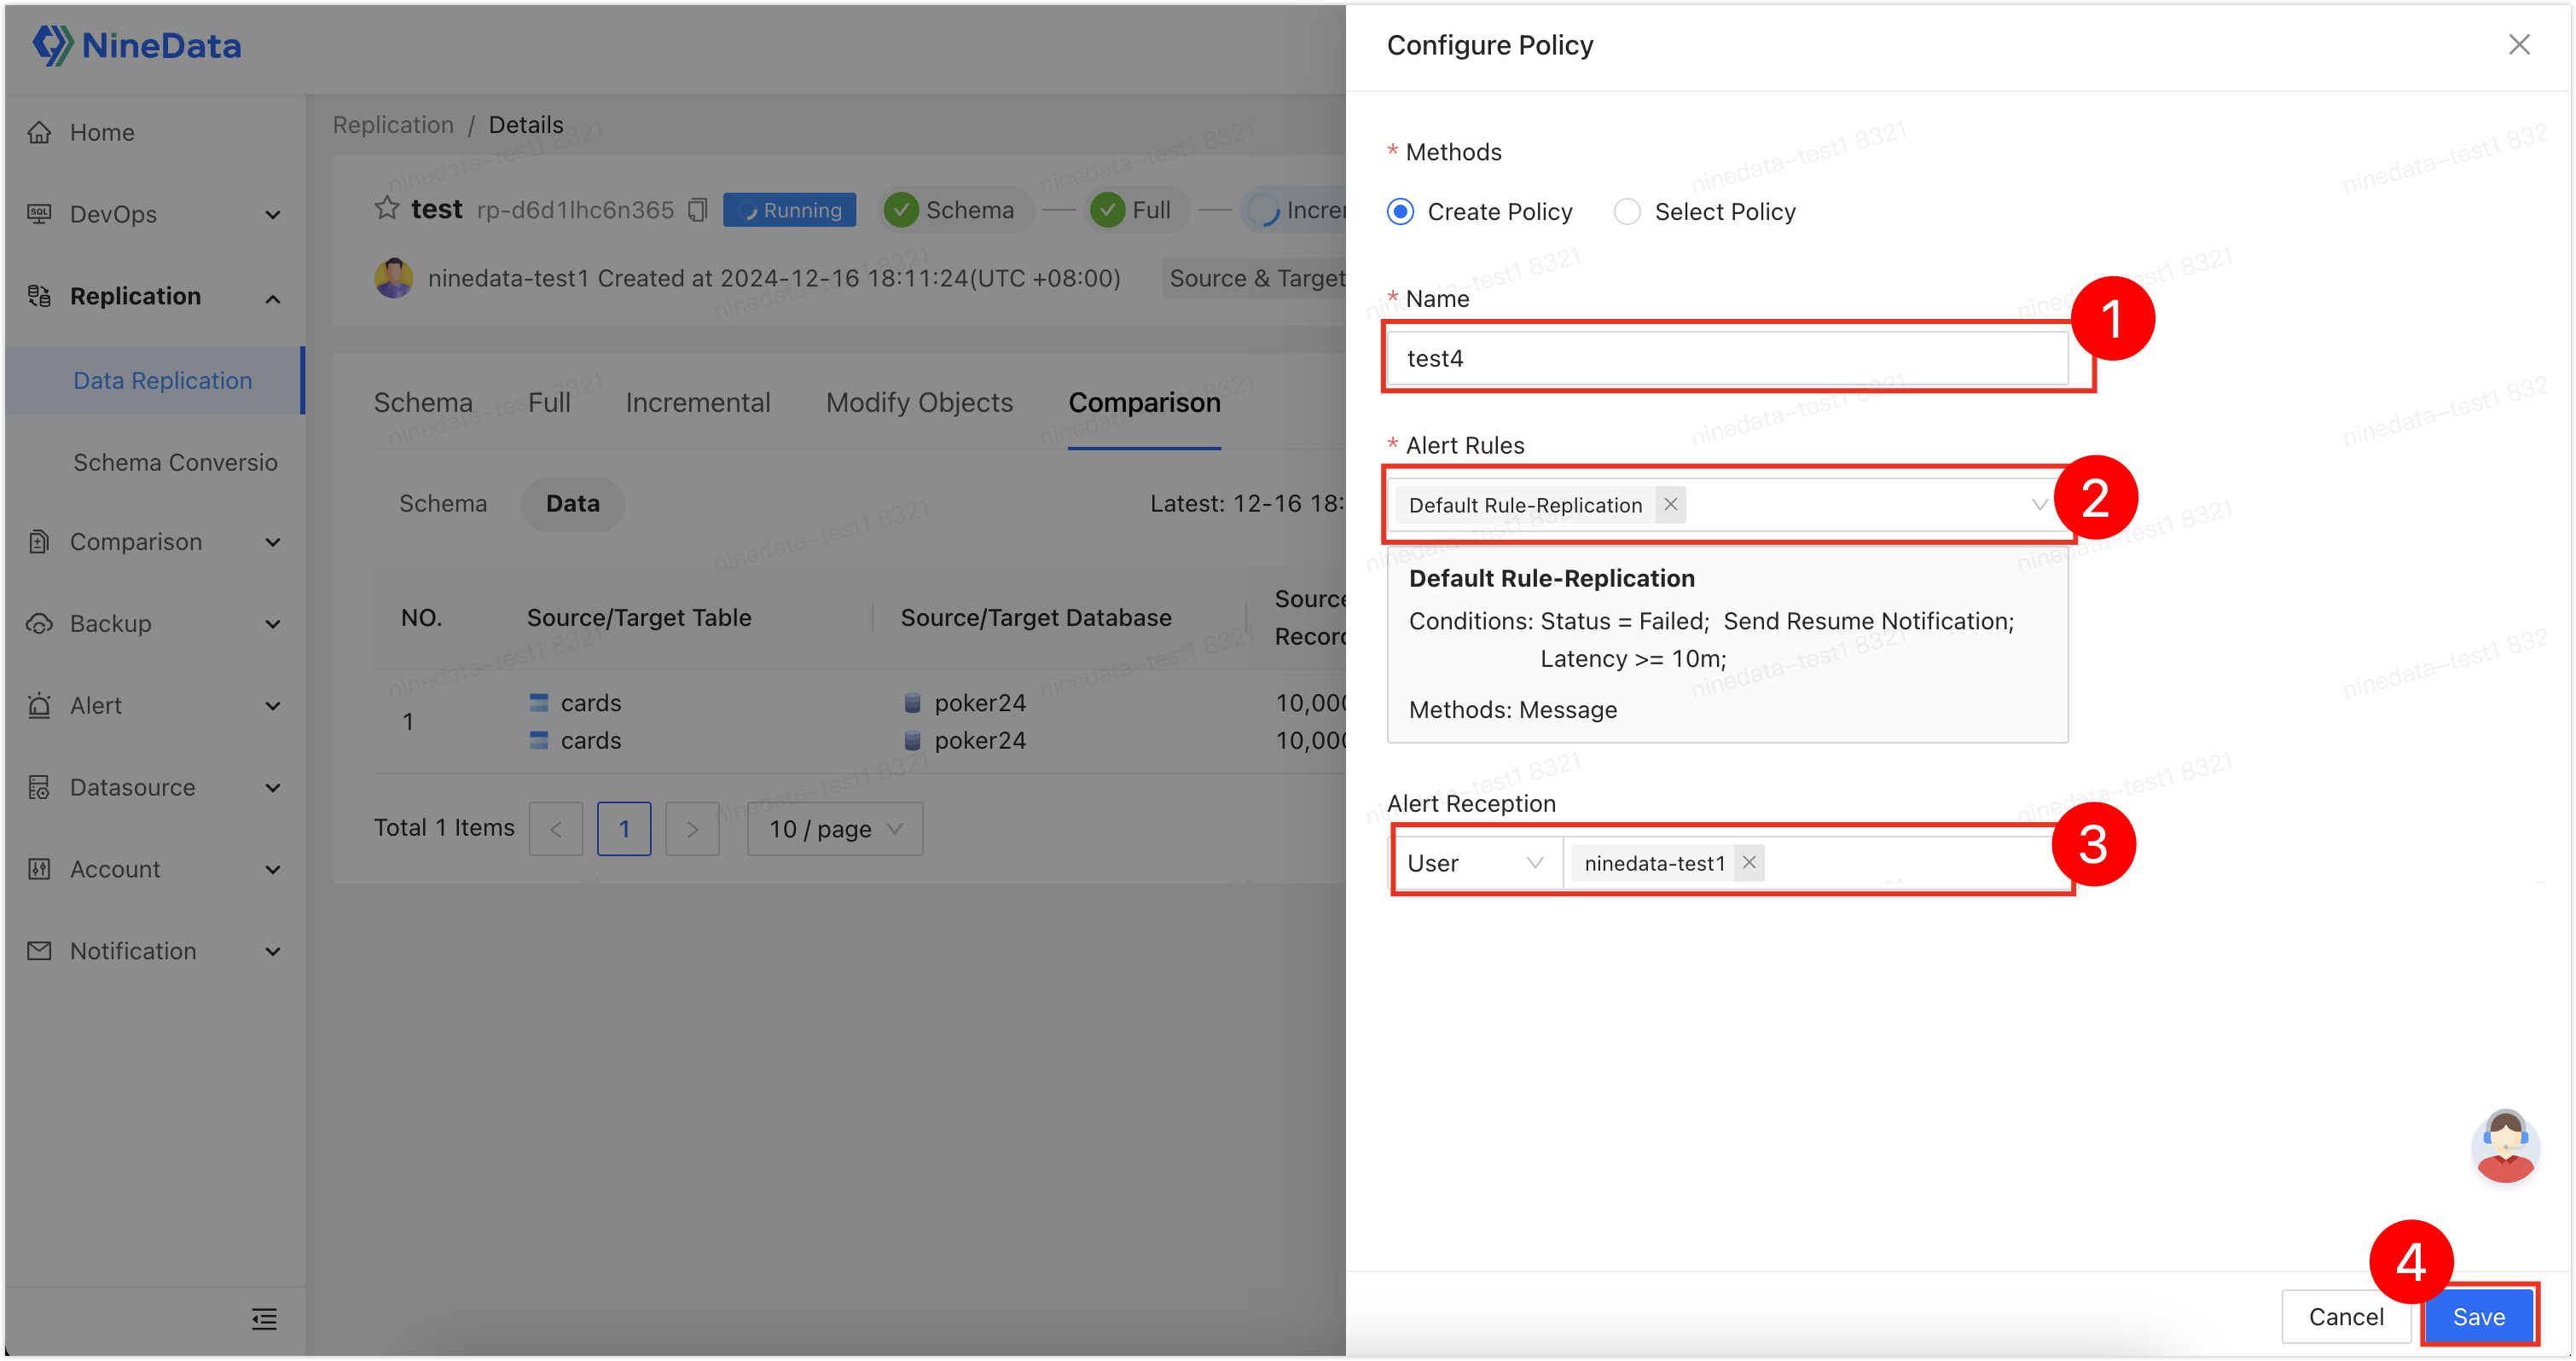
Result
With these steps, migrate MySQL data to AWS RDS MySQL with minimal downtime. When the incremental delay reaches zero, switch business traffic to AWS with confidence.
Next steps
- Keep comparison enabled until cutover finishes.
- Keep alert rules active during validation and the switch window.
- If you need a rollback path, keep the reverse replication plan ready before cutover.